Make sure curl is enbaled , mbstring is enabled, set_time_out is enabled , safe_mode is off, open_base_dir has no value, allow_url_fopen=1 and mysqli support is on.
[Note: If you get "404 page not found" error then make AllowOverride in your virual host and check if .htaccess file is uploaded successfully in root or not]
Installation Manual :
Download .zip package
Upload it to your server
Extract the package
Make sure your folders/files has required premissions
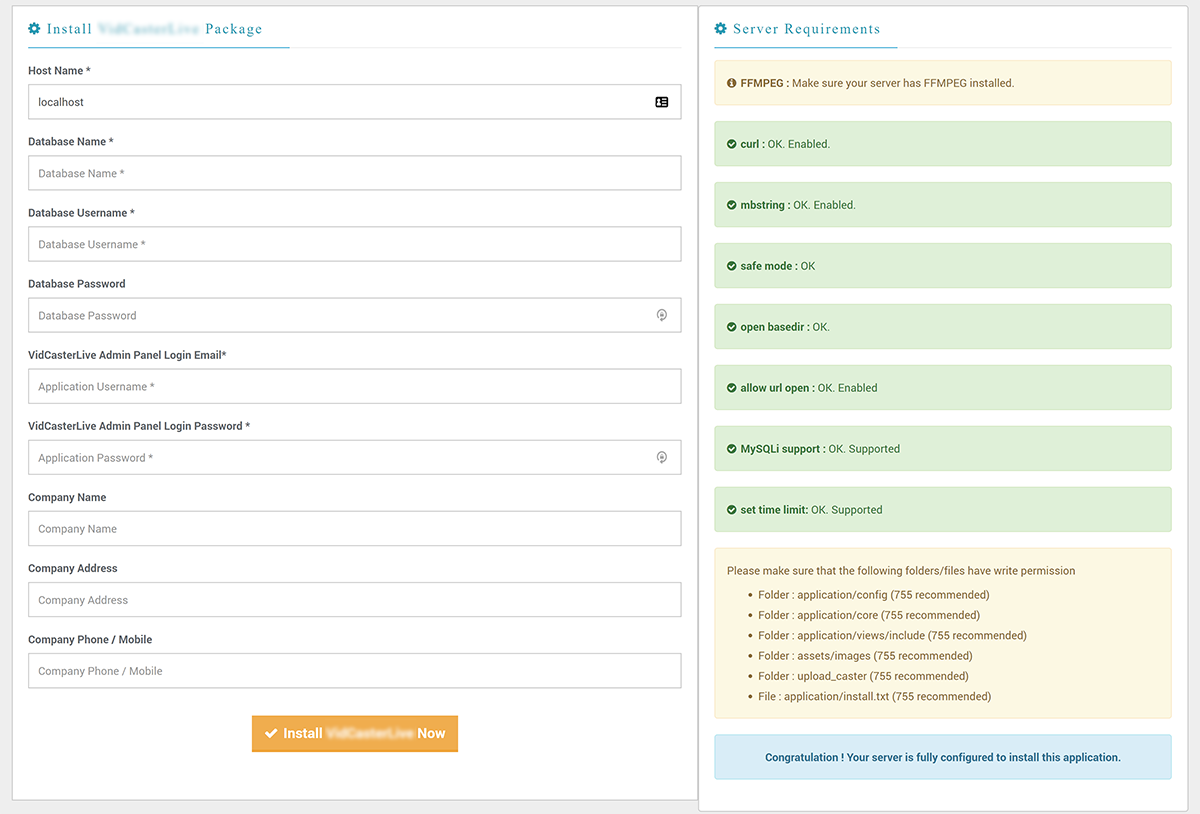
Run the uploaded url via browser (http://yourdomain.com/projectFolder/) and you will find a interface to provide the settings :
Hostname : database host name / IP
Database Name : create a mysql database on your host and write that name here
Database username : username of the created database
Database password : password of the created database
Admin Panel Login Email: this will be used to login as admin
Admin Panel Login Password : password to log in as admin
Company Name and Company Address
Company Phone / Mobile
Click install button
You are done. Log in with your admin username and password and start using.
Administration
This panel is for only admin users. As an admin user, you will find everything to control your application here.
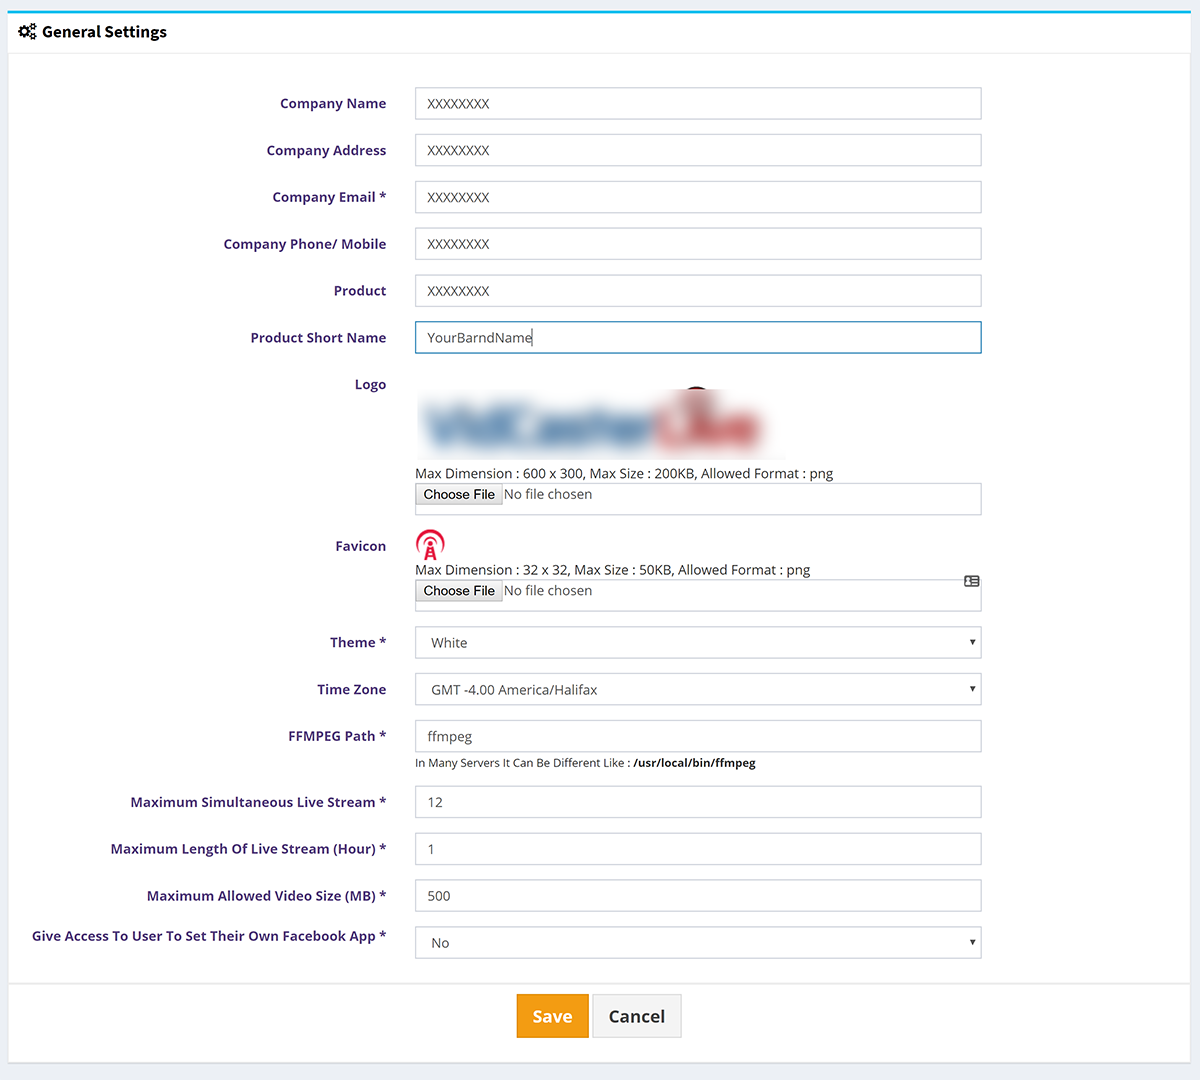
Settings > General Settings [Only Admin]
This is the place where you can change company information, logo,favicon, time zone.
There are 12 color scheme available now, you can choose your theme from here. You can hide/show the landing page from here also.
You can set how much simultaneous live stream you will allow as maximul length of each live stream. Also you can also set the maximum video size allowed.
You can also allow your users to use their own app.
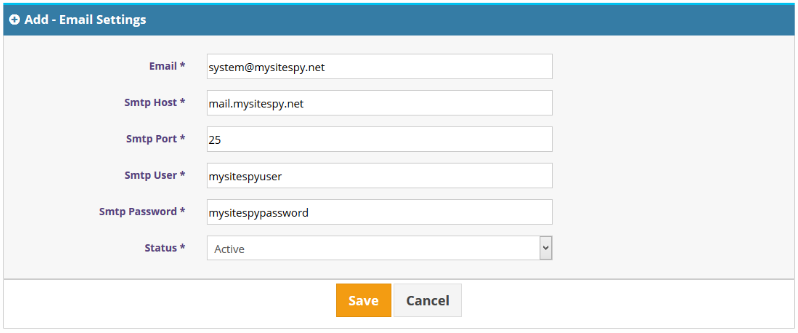
Settings > Email Settings (System SMTP Email: Only Admin)
This is the place to configure system email.
You can add any SMTP email provider here.
These settings will be used to send system emails like forget password, contact, send notification etc.
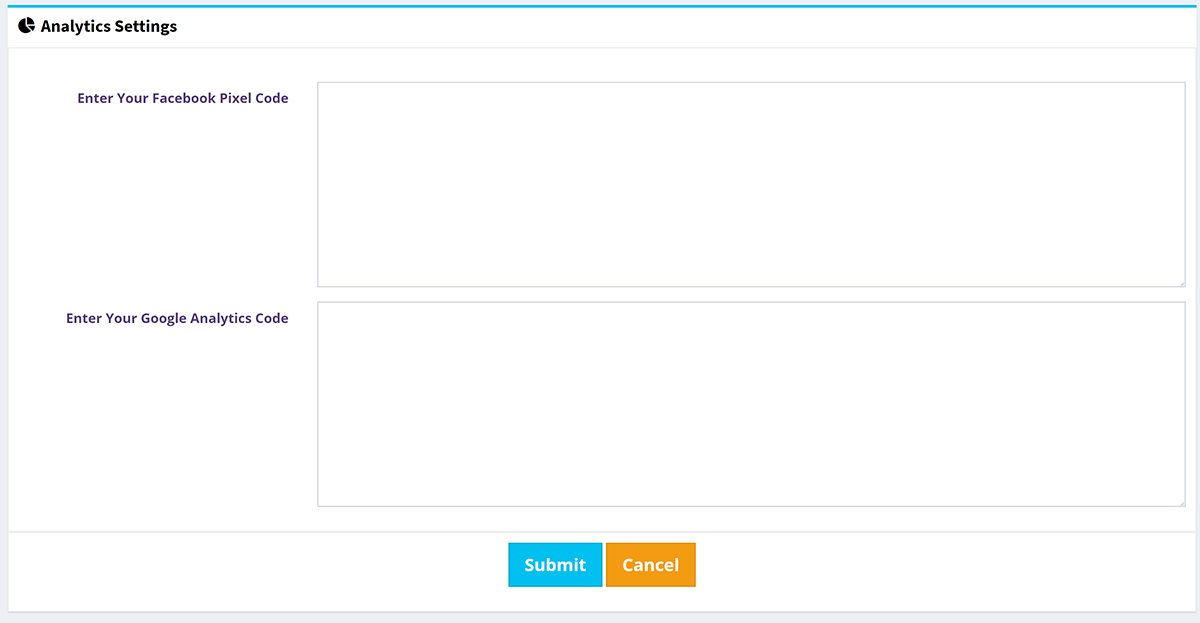
Analytics Settings [Only Admin]
Admin can put google analytics code and facebook pixel code to track down visitors.
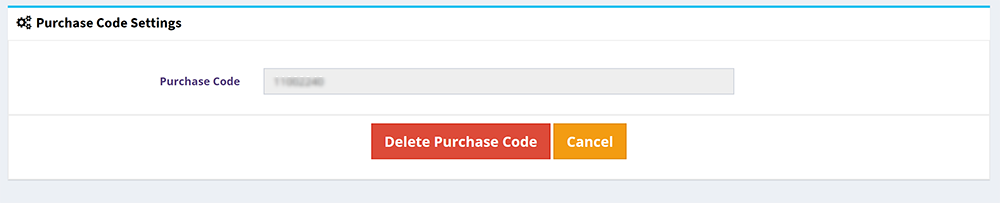
Purchase Code Settings [Only Admin]
Admin can delete the purchase code used to register the application and can use to any new domain.
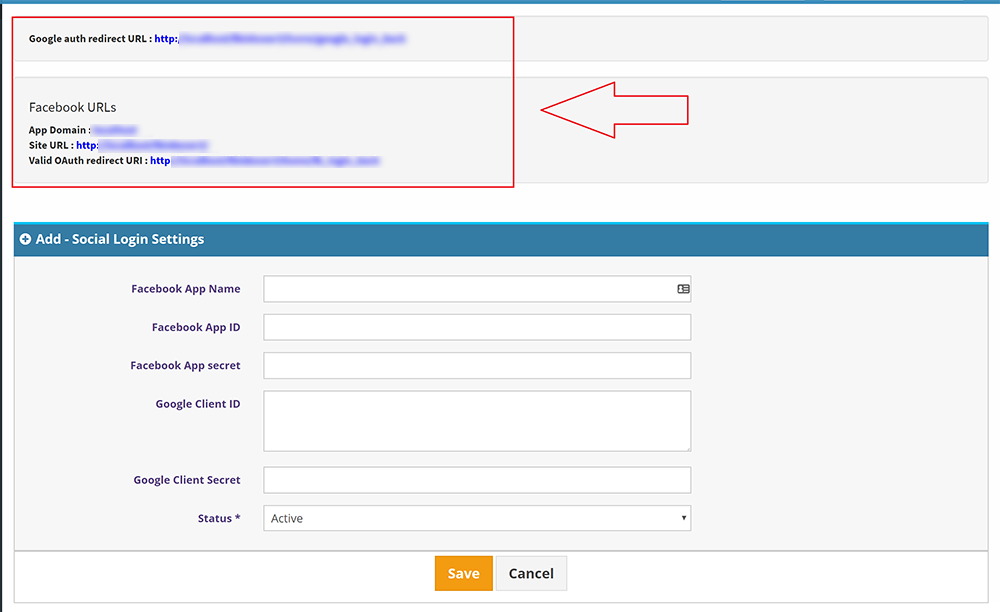
Settings > Social Login Settings [Only Admin]
Admin has to config "Social Login Settings" with Facebook APP ID, Facebook APP Secret, Google Client ID , Google Client Secret to make facebook & google login to work. FOllow the video below to create your APIs.
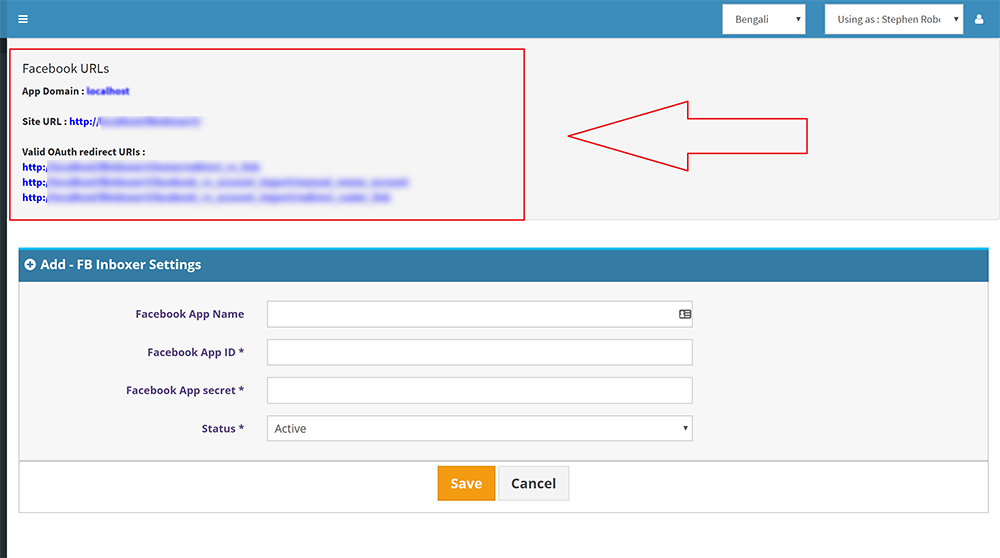
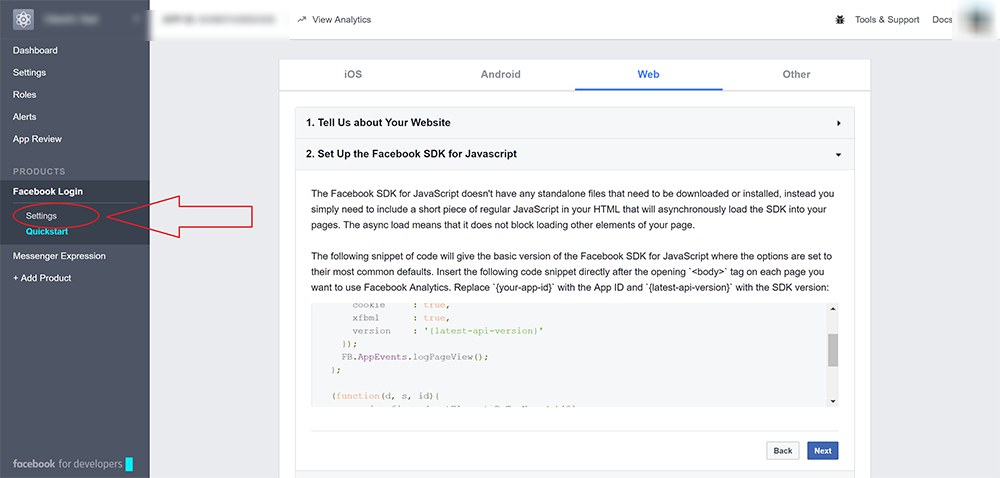
Settings > Facebook Settings
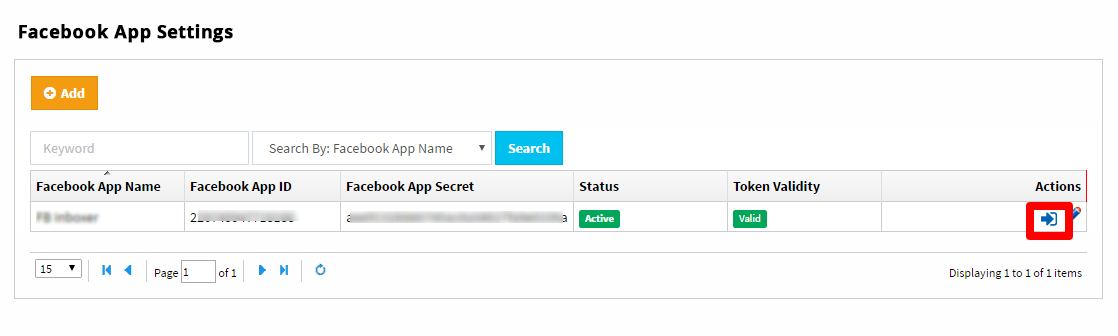
This is the form to add your facebook app information, you will get app domain, site url, valid oauth redirect uris needed to create facebook app here. Copy the urls and create your facebook app following the process below. You can create multiple app and can add but only one can be enabled at a time.
Create your own facebook app and put APP ID and APP Secret here. System will take care of everything else.
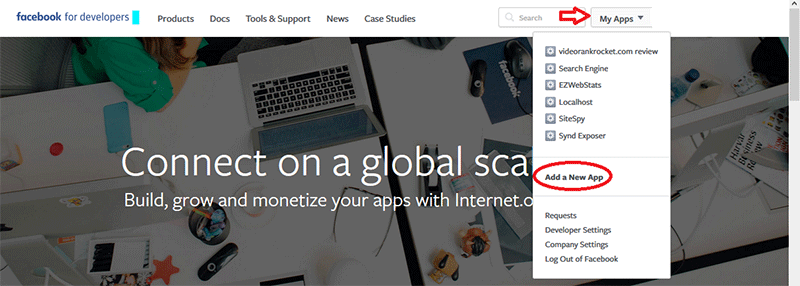
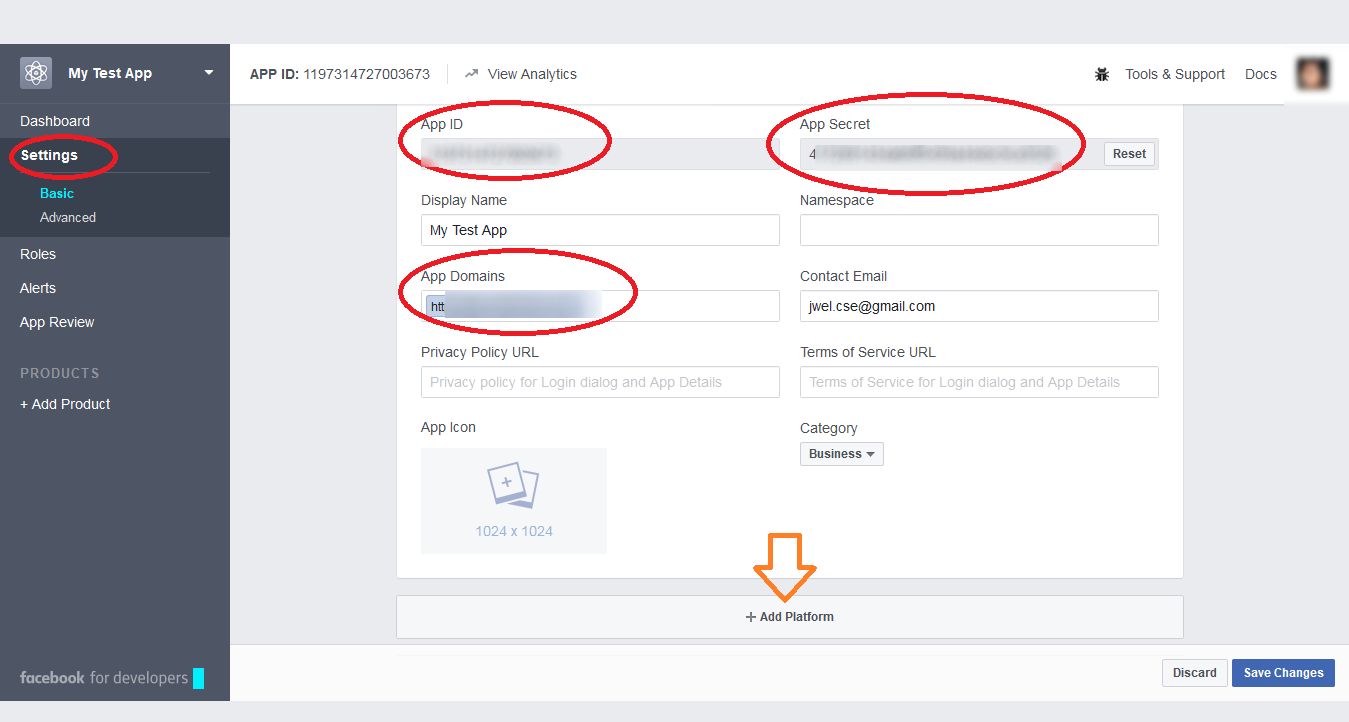
How to create facebook app and get API ID & APP Secret?
Type a "Dispaly Name" , select categoty "Business" and click "Create App ID"
Click "Settings" menu. Here you will see your APP ID and APP Secret. Type YOUR APPLICATION DOMAIN in "App Domains".
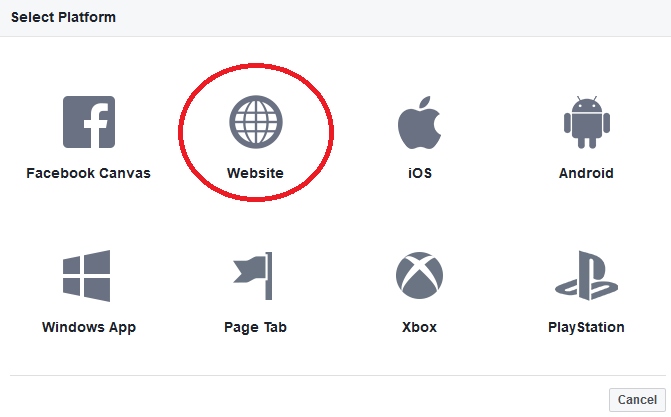
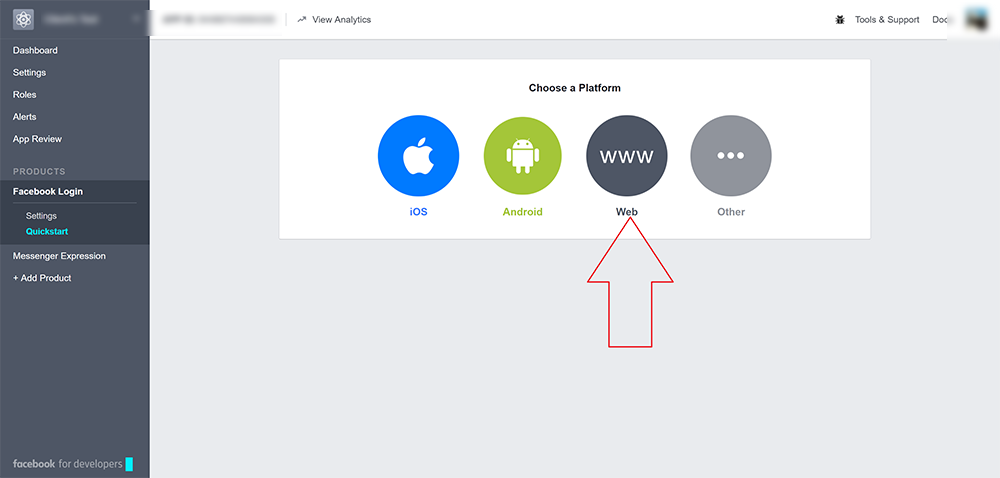
Then click "Add Platform" and it will bring the following popup. Choose "Website" here.
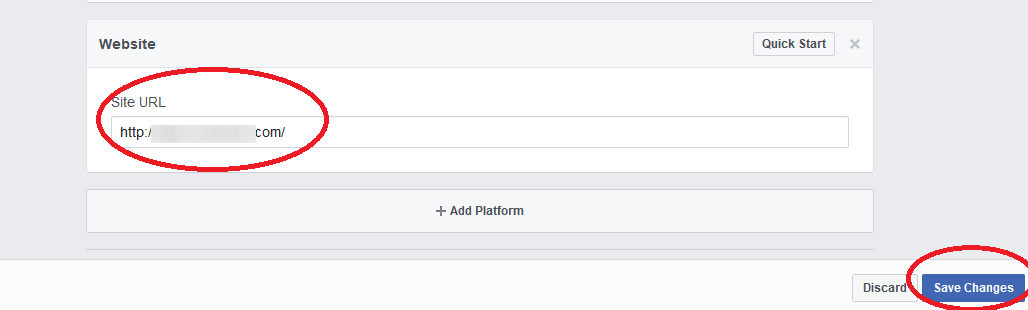
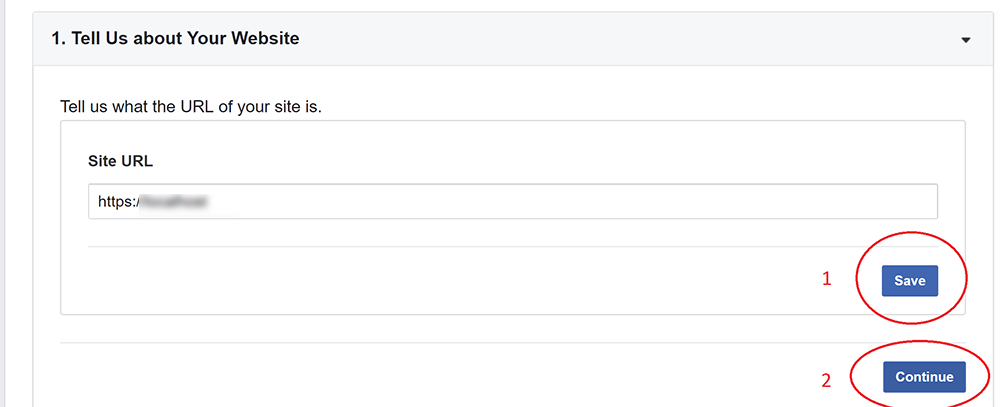
It will bring a input area for "Site URL", put it and click "Save Changes".
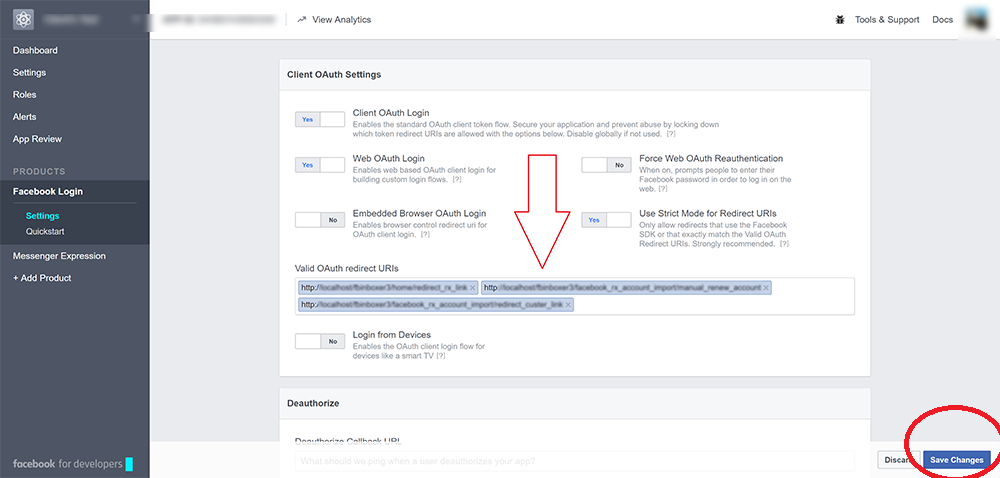
Put valid oauth redirect URIs and click "Save Changes"
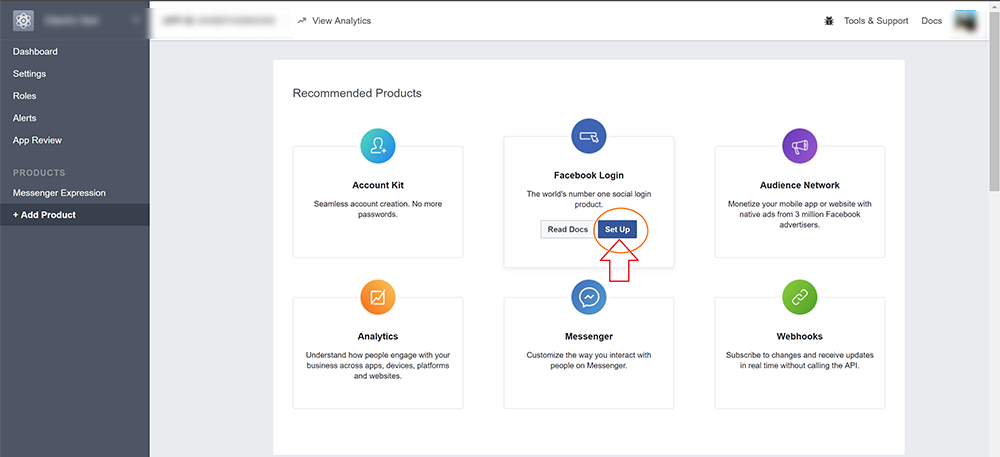
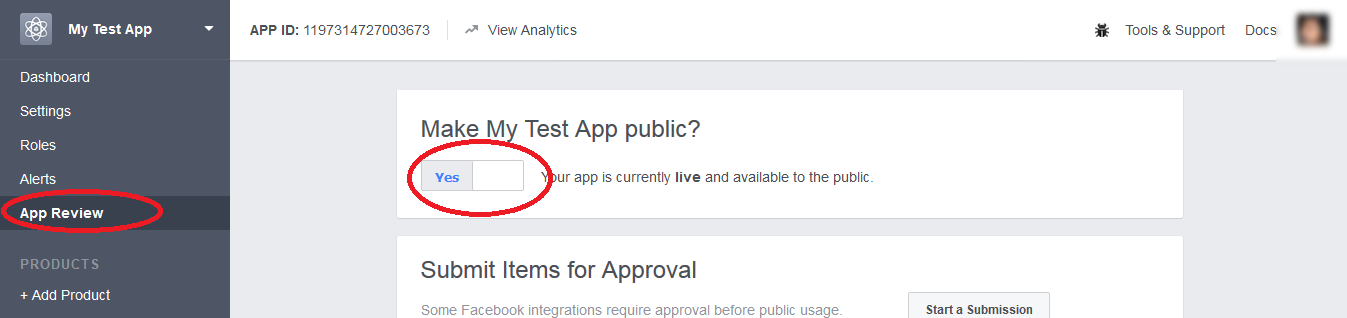
Click "App Review" menu and make your app public.
Then just click the login button shown in below snapshot to activate your APP ID and APP Secret for this application.
User Management [Only Admin]
It is a muti-user application with the SaaS (Software as a Service) functionality.
It consists of two types of user : admin level & user level (end user)
Both will have similar features except only admin users will have access to "Administrative" menu.
Admin will configure the system through general settings, email settings, connectivity settings, proxy settings, payment settings etc while end users will use the system & will pay monthly service charge for using the system. It has feature to recieve payment via PayPal & Stripe will be discussed later in this documentation.
In user management admin users will have access to add, view, disable, enable, edit, reset password, delete users.
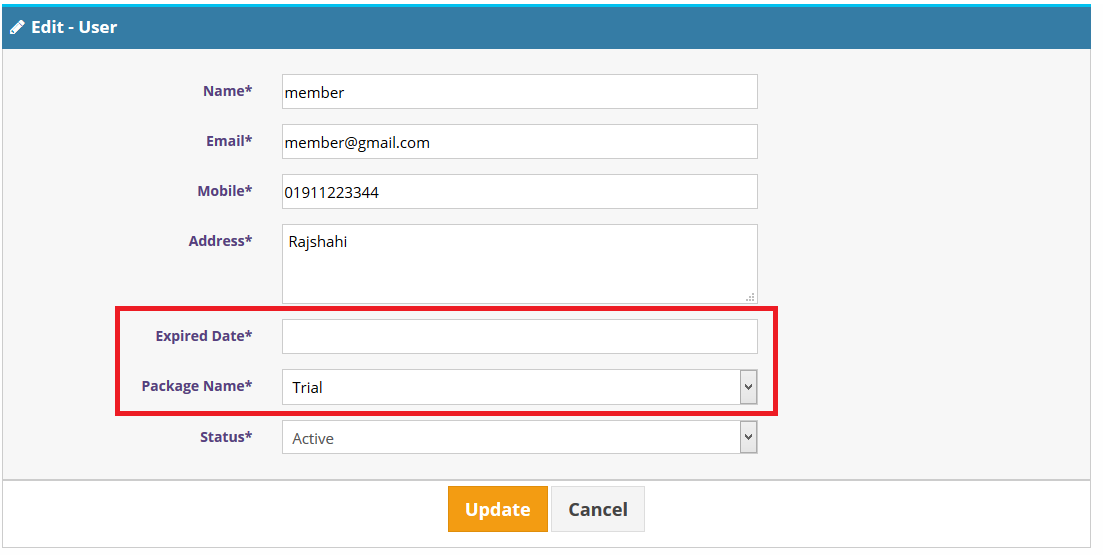
Note: if you add an user manually, then after addition edit the user to assign subscription package and expiry date manually.
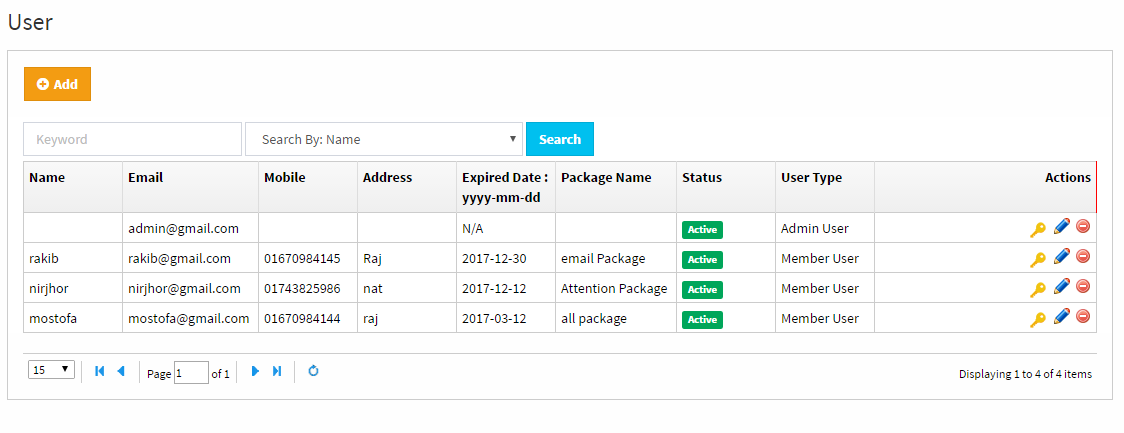
User List
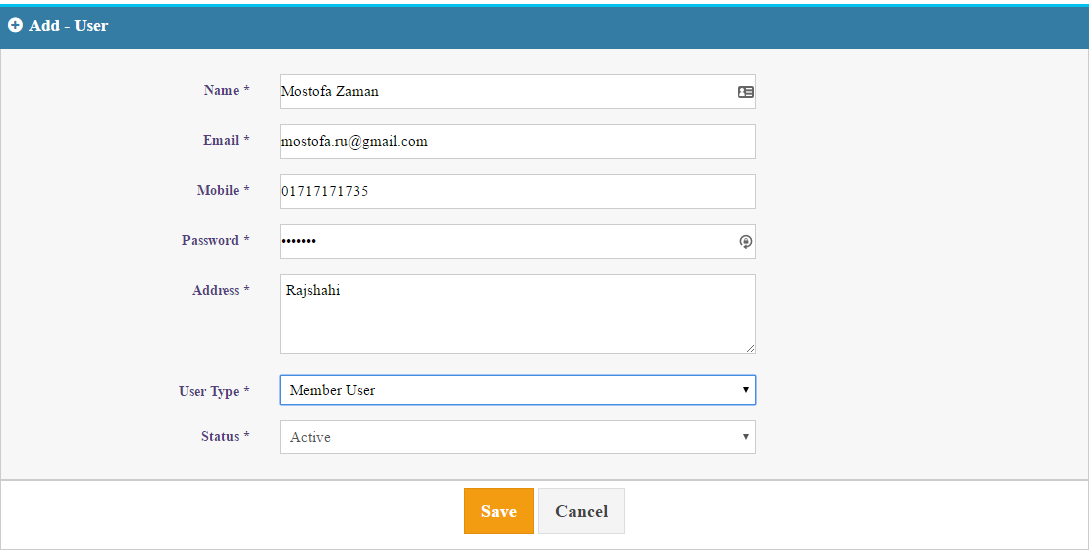
User Add Form
User Edit Form [Package assign]
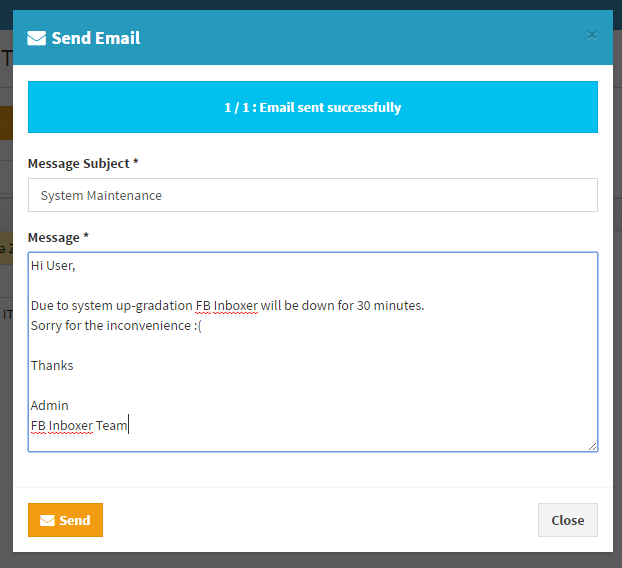
Send Notification (email to users) [Only Admin]
You can send email (festival greetings or maintenance notification) manually to any users.
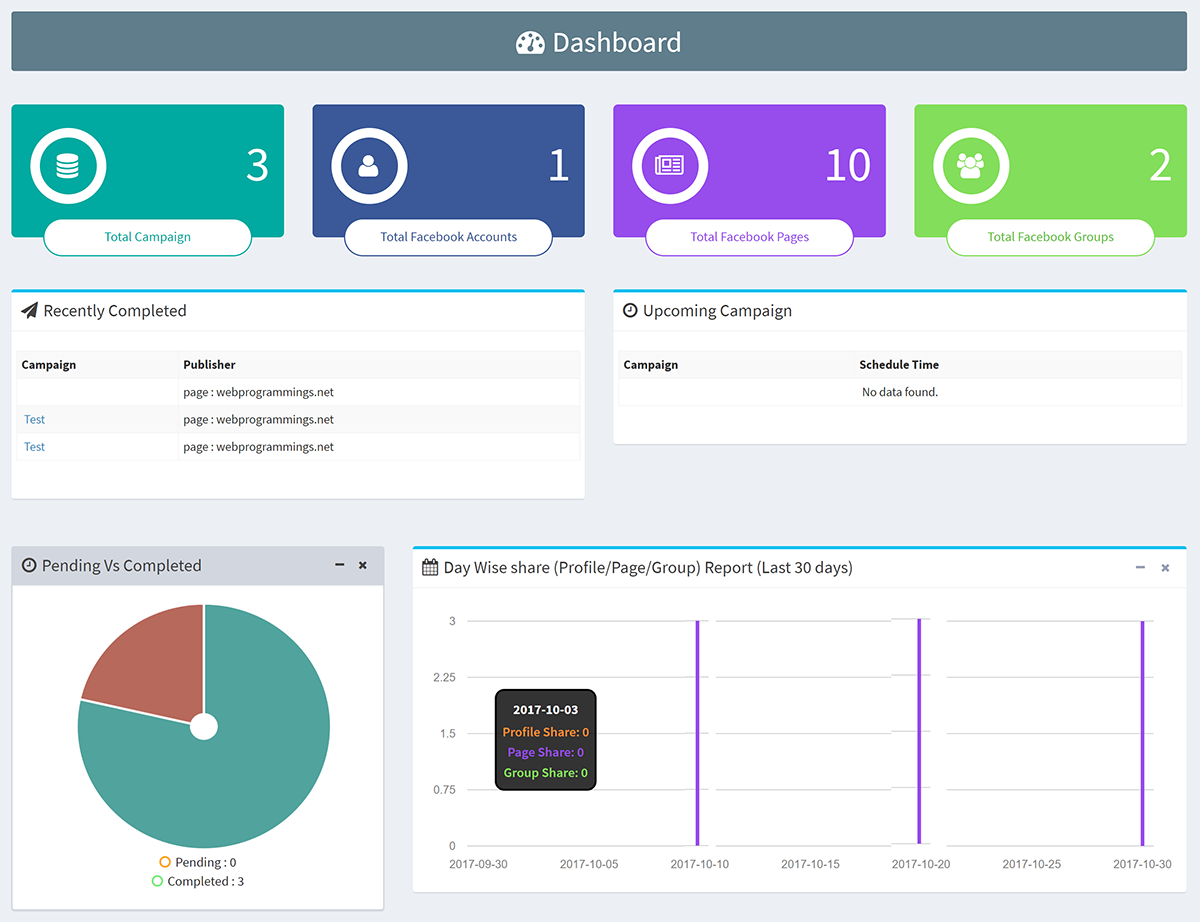
Payment > Dashboard [Only Admin]
This is place where you can see your collection report graphically.
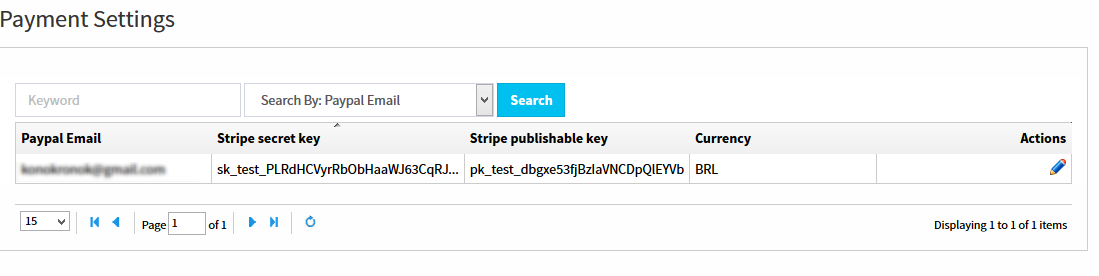
Payment > Payment Settings [Only Admin]
This is the place where you set your PayPal account / Stripe account or both and your currency. Your end users will pay to this PayPal account/ Stripe account.
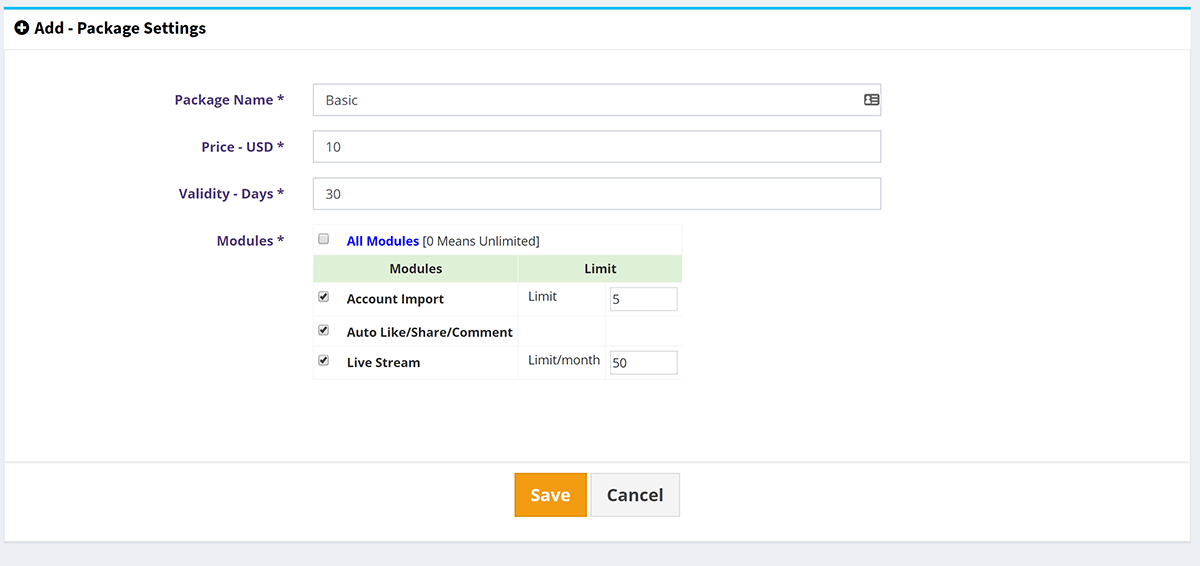
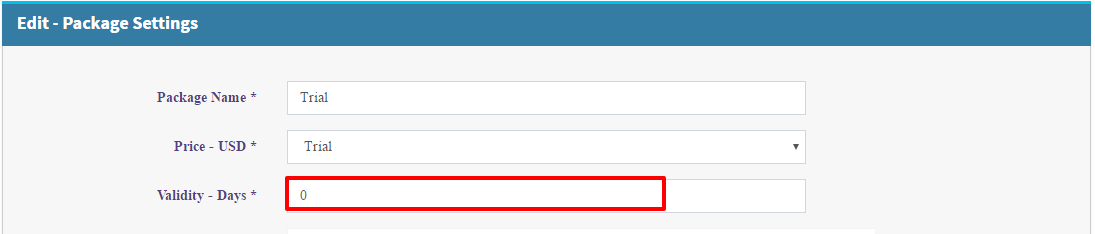
Payment > Package Settings [Only Admin]
You can create subscription plans or packages here. The system will automatically create a package named "Trial" with 7 days validity, so that, your users can try it and remeber that you can not delete this default package.
Suppose you want to create a package named "basic" which validity will be 30days, price will be USD 10 and you want to assign specific modules
(i.e. 5 facebook accouts and 50 live stream camapaign/month) for this package. While you assign limits, 0 (zero) means unlimited.
If you do not want a trial then edit deafult package's validity to 0 (zero).
If you do not want to take money from users then edit the default package's price to "Free".
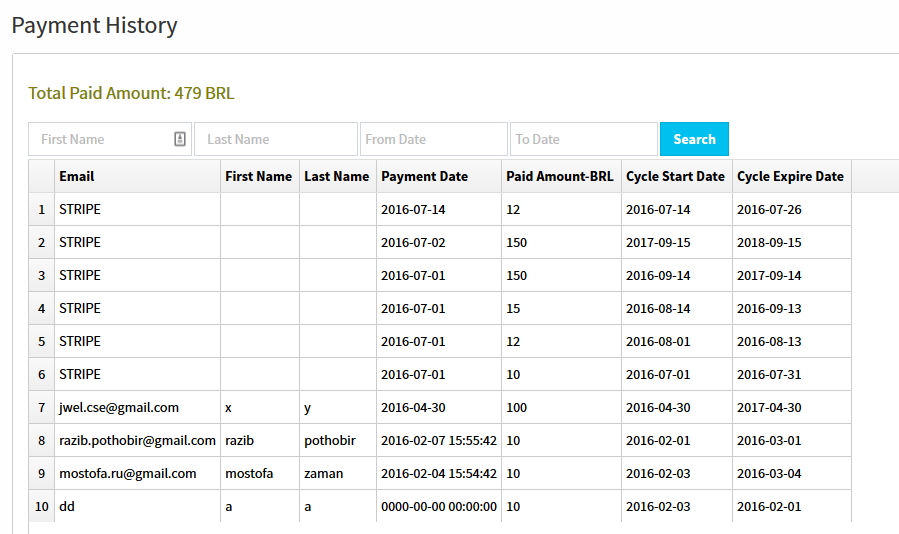
Payment > Payment History [Admin will have all and users will have own report]
History of all payment made by end users. You can search be name or payment date.
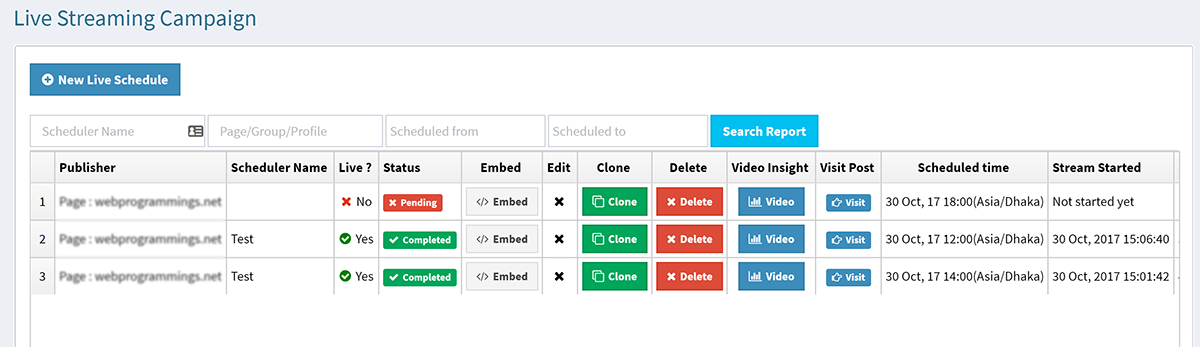
Dashboard
Import Account
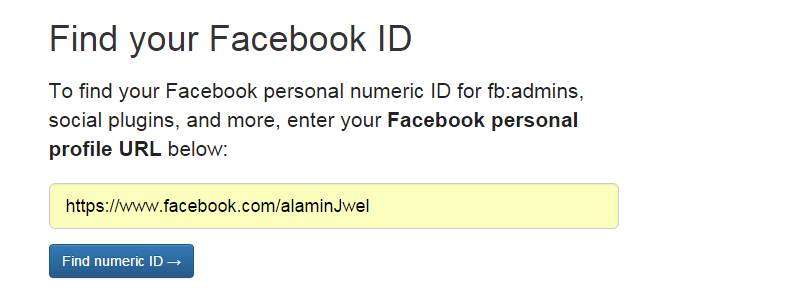
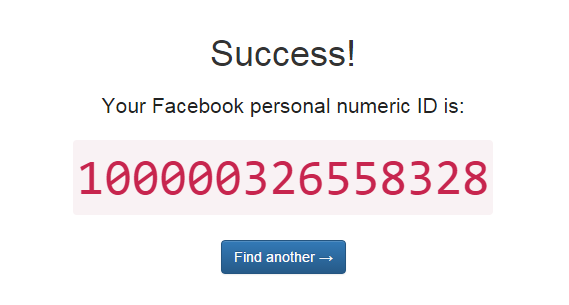
This is the place where you connect your facebook accounts to this app. First you have to find your facebook numeric id. To find your facebook numeric id go to http://findmyfbid.com/
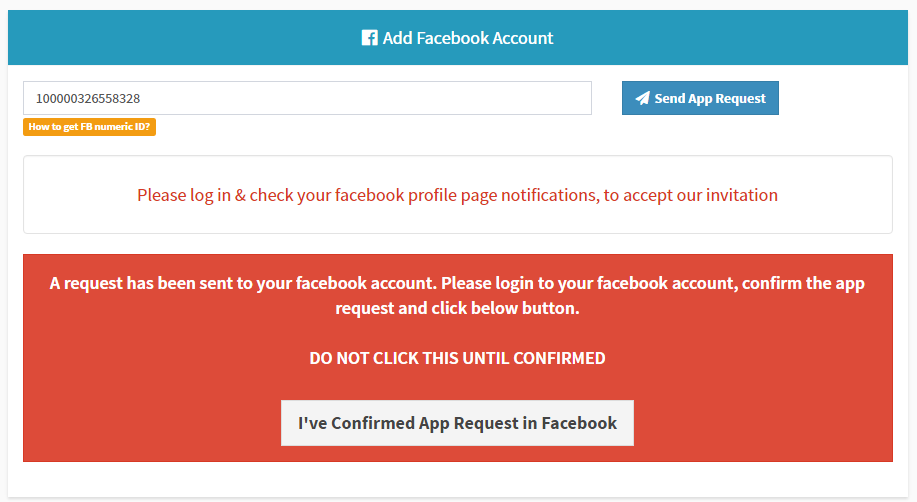
Copy the numeric id and paste here then click "Send App Request" button
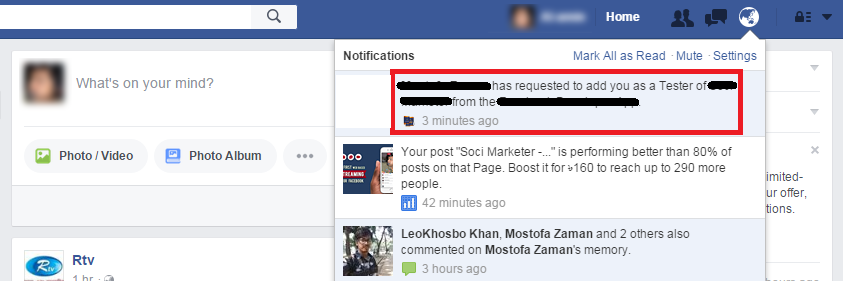
Now go to your facebook account and you will get a app request in your notification bar. Click on the notification.
You will get a page to confirm app request. Click "Confirm" button.
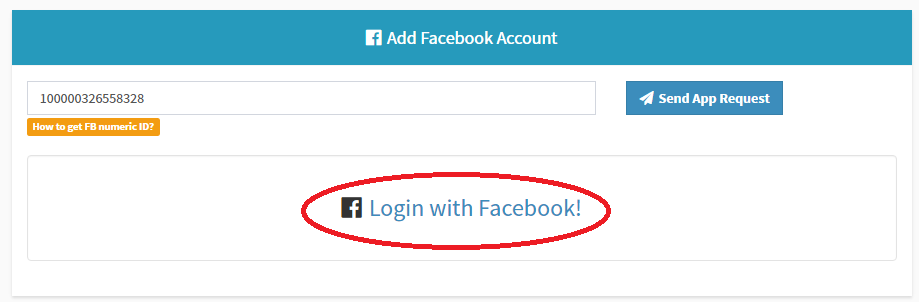
Go back to the application and click "I've Confirmed App Request in Facebook" and this screen will appear. Now click "Login with Facebook" button and it will take you to facebook and you have to log in as the user account you want to import.
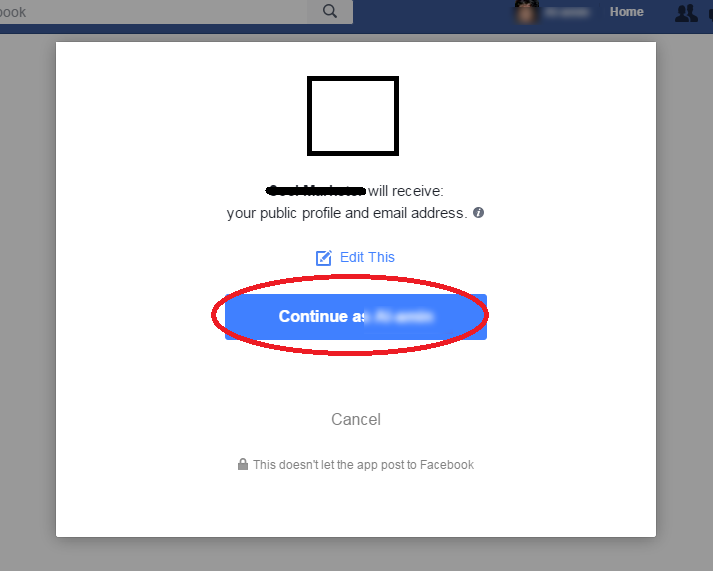
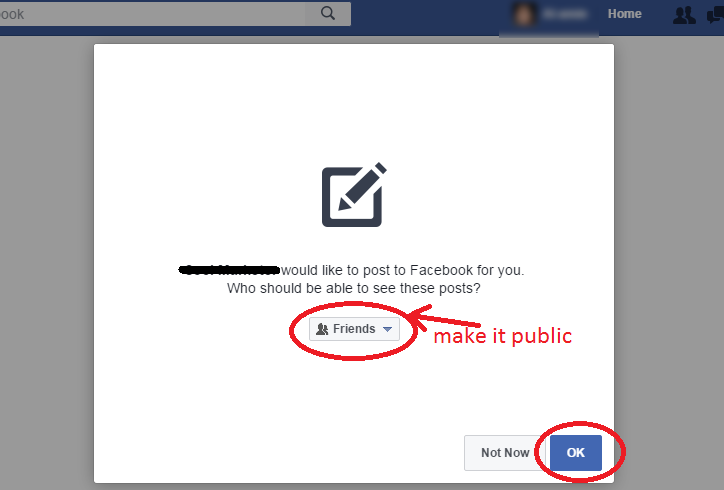
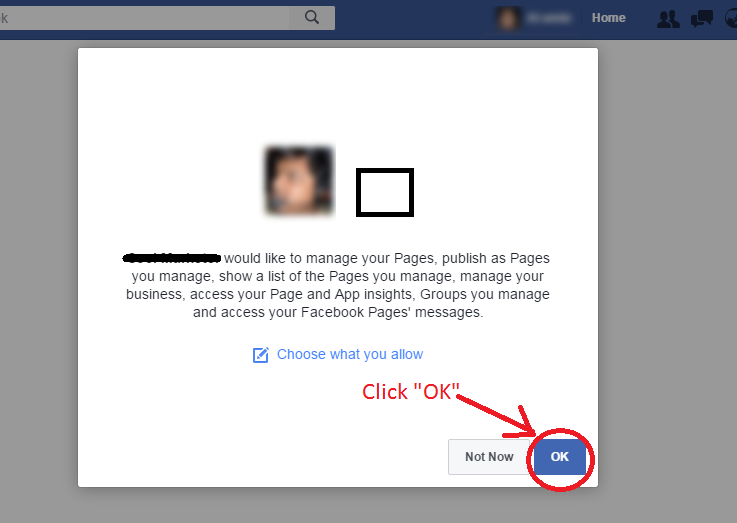
Allow the permission as the snapshots below :
You can choose privary friends or public. It privacy is set to "Friends" the posts will be only visible to your friends. If you set it to "Public" then the posts will be visible to everyone. You should use "Public" for marketing purposes.
You must click "OK", otherwise nothing will work !!!
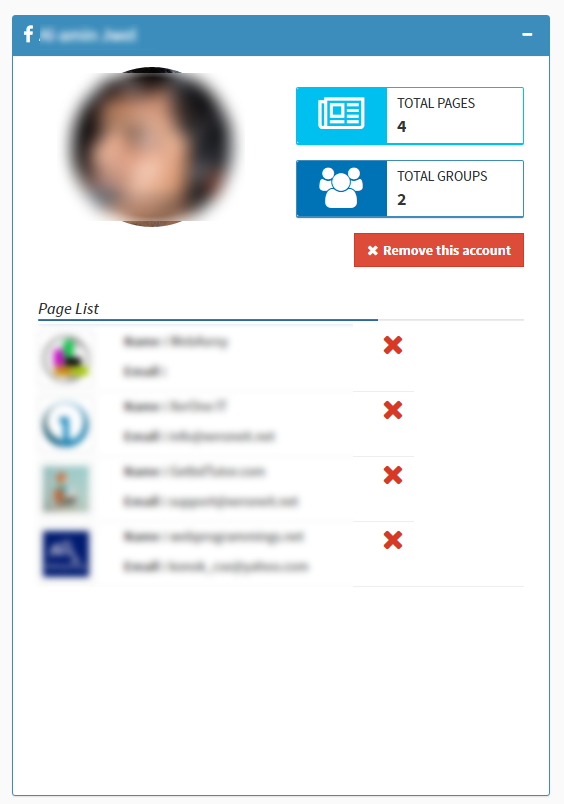
Finally your account is imported now !!! You will see your pages, groups. You can add another account (if your package is multi-account) same way.
If you import multiple facebook accounts, you can switch among them from the top-right of the page.
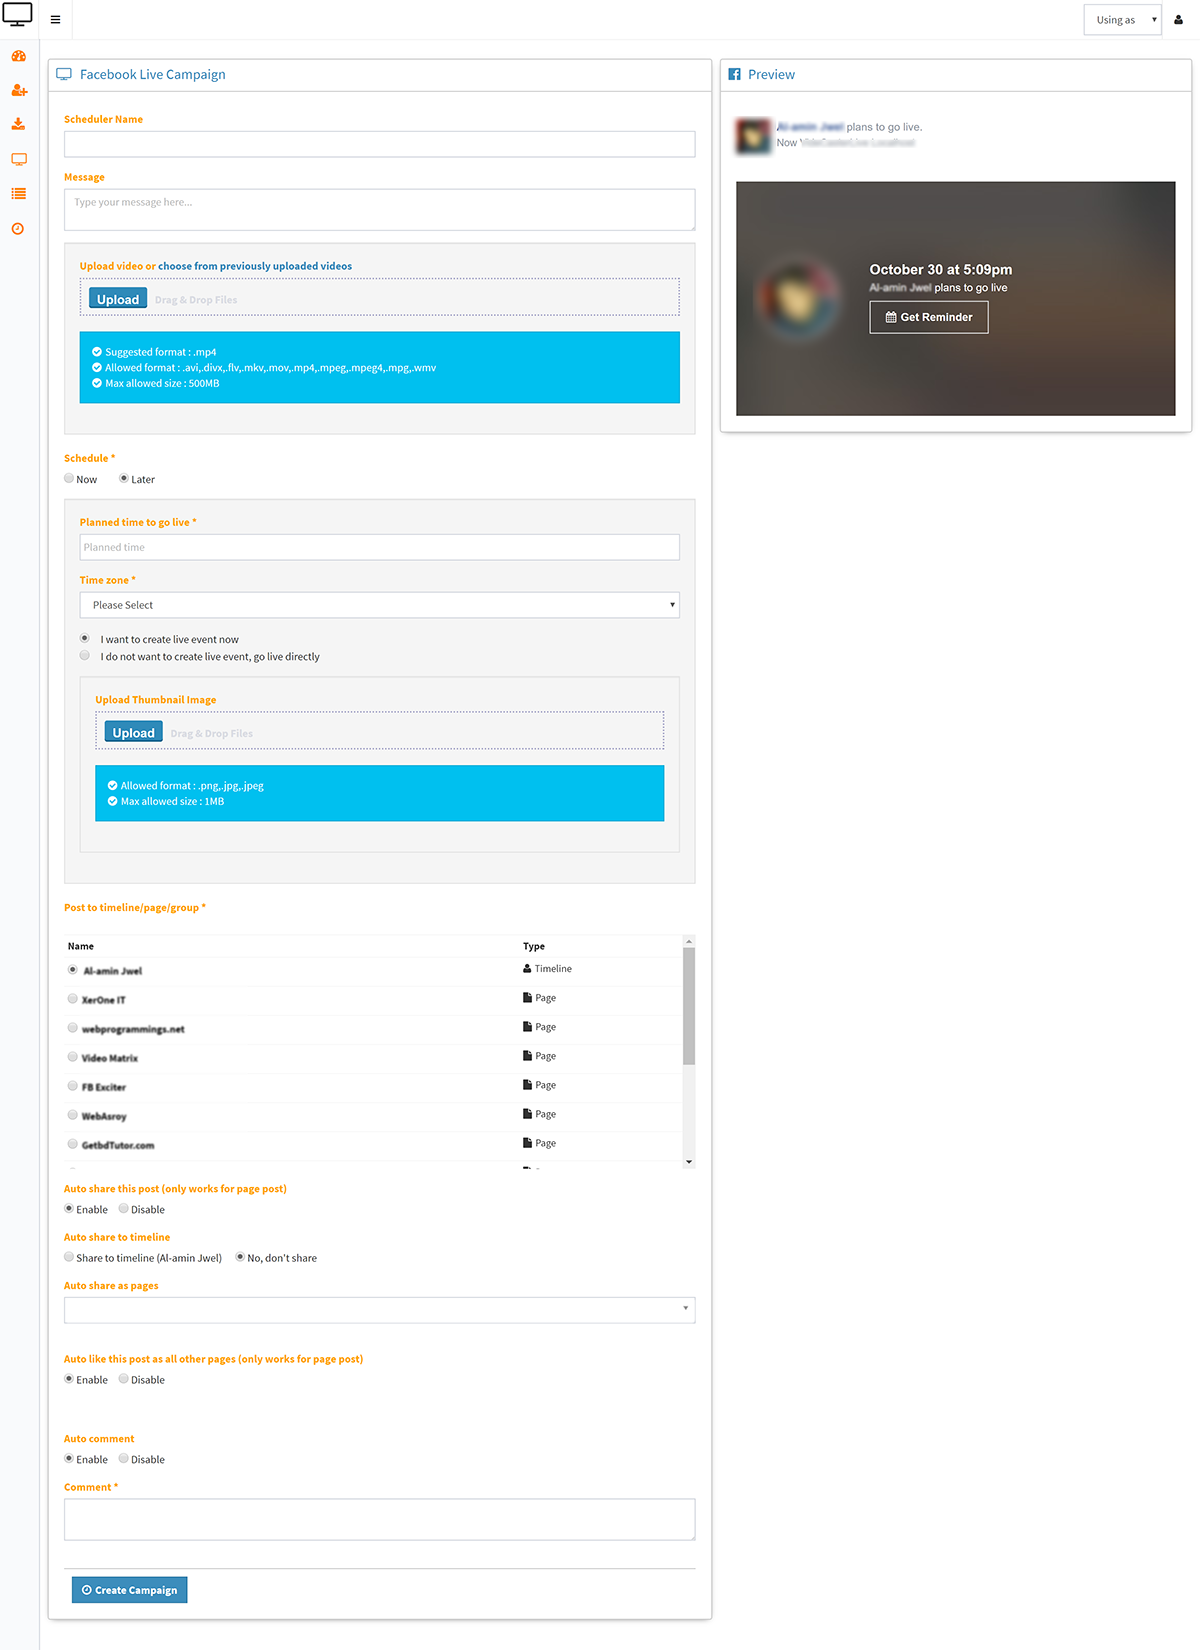
Create Camapgin
Upload your video.
You can choose when to stream, now or later
You can choose where to post among your timeline,pages annd groups.
You can enable auto share and choose among your timeline or pages to share the post . It will be automatically shared (only works for page post).
You can enable auto like. It will be automatically liked by all your pages. (only works for page posts)
You can enable auto private reply, means after this post publish, when anyone put comment on this post, he/she will get a private inbox.
You can enable auto comment , means after this post publish, there will be a comment there already on behalf of you.
Cron Job/Scheduler [Only Admin]
To get your API KEY and Cron Job command go to Cron Job menu. Copy the command and configure it into your server.
How to Update
Update - 2.3.1 to 2.4
1. Download v2.4
2. Copy/Replace your following files and folders taking from v2.4