Email Phone Opt-in Form Builder
Getting Subscribers through opt-in form from external site is very common. But most exciting part of this add-on is beside collecting subscribers through opt-in form, it's providing the freedom of making opt-in form by drag & drop the fields. Form will generate an embeded url which you can use your own site or any site from where you want collect email/phone subscribers into your xerochat application.
Manage Opt-in Form
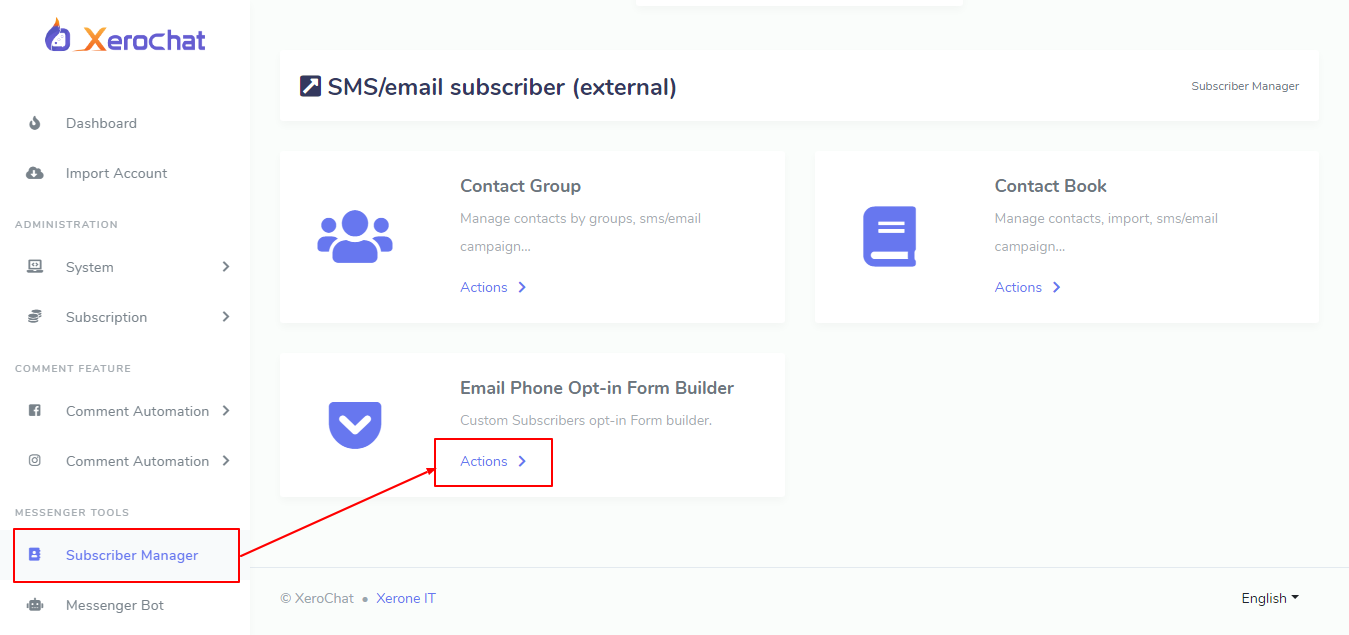
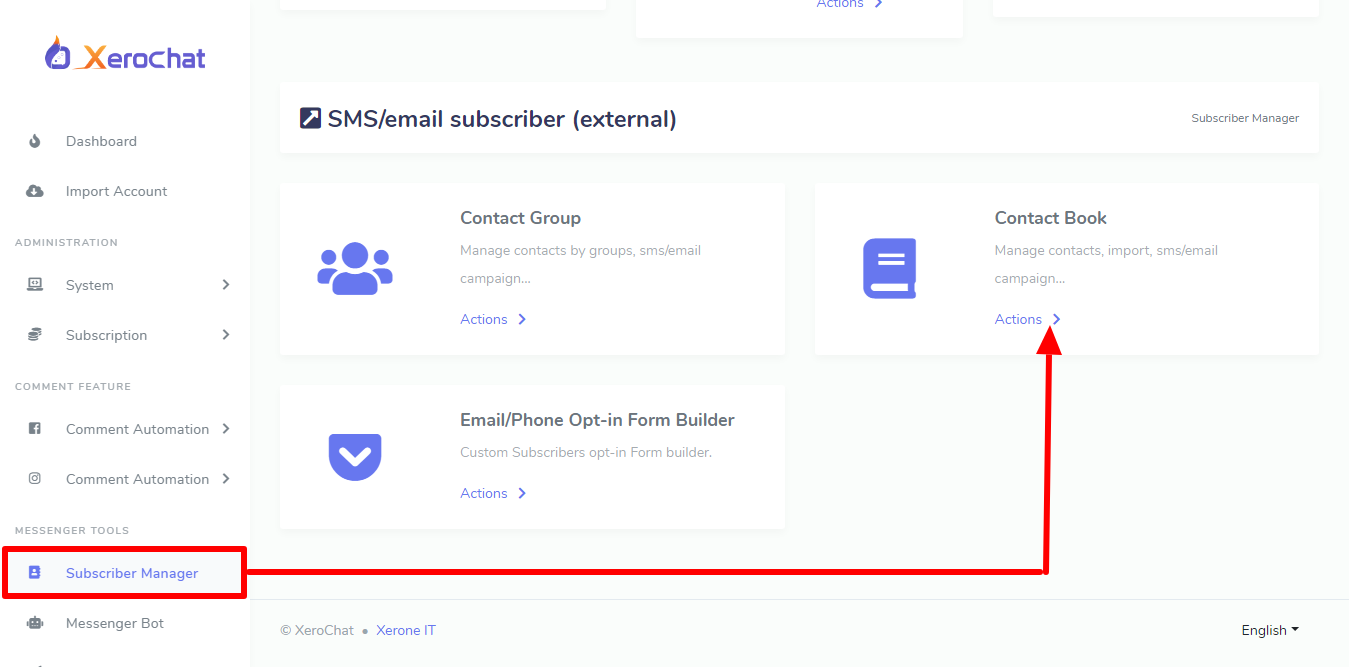
To use a opt-in form, first of all you've to create the form first. So to get the opt-in form section, please go to Subscriber Manager -> Email/Phone Opt-in Form section.
Build Opt-in Form
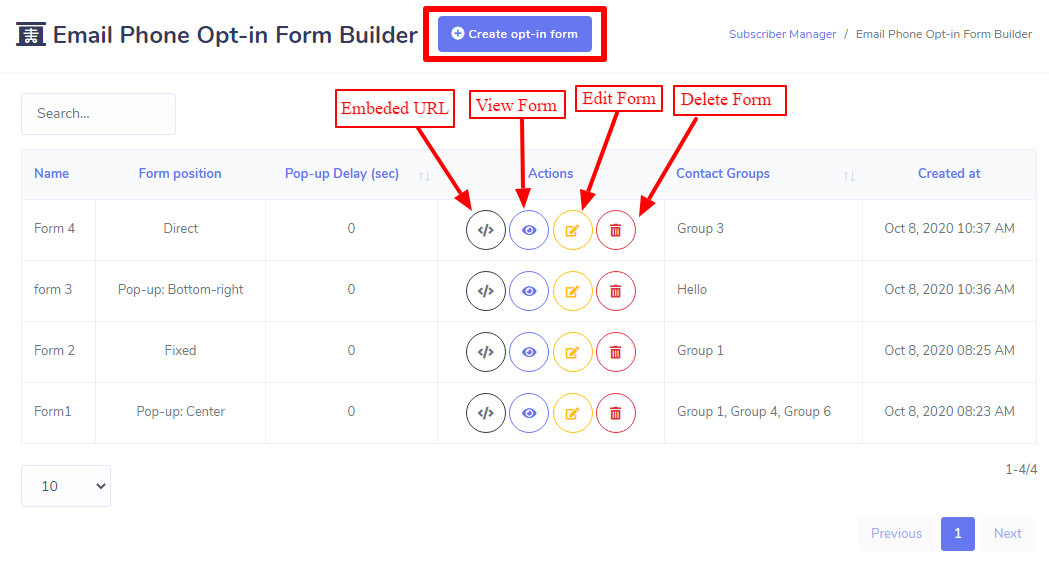
Email/Phone Opt-in section will allow you build, view, update and also will be able to delete the form in very easiest way from actions section of Form Lists table. press on Create Opt-in Form button and an form will appear with some required information fields and drag & drop form builder.
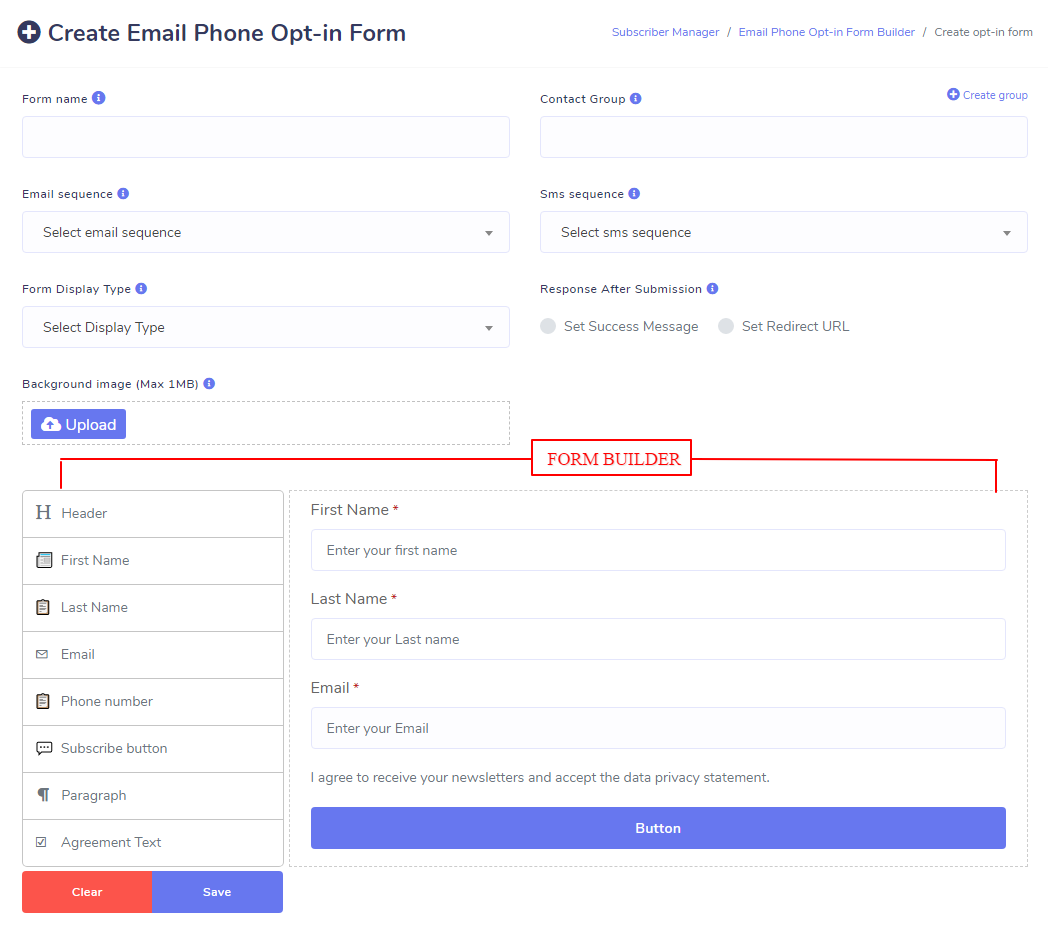
In the form you'll have to fill up some required information with form builer options. A short description on form's field are given below.
Form Name:
This is the form name which will only for displaying in the application's form table.
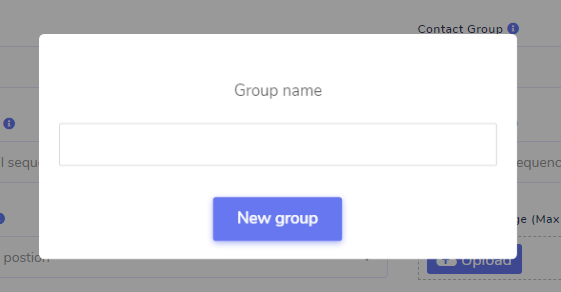
Contact Group:
In this field contact groups that had been created at Subscriber Manager > Contact Groups section will be shown here. This field is a required field because subscribers who will come through opt-in form will be added as external subscribers lists. So when a new subscriber comes by Opt-in form, he/she will be assigned to those contact groups which has been selected during form creation. You can select multiple groups, subscribers will also assigned to multiple groups.
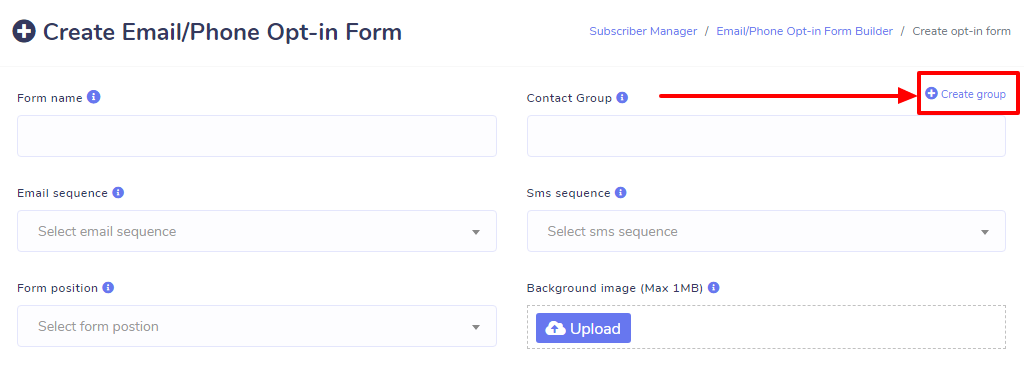
Anyway, you can also create group from here too by click on Create Group at the right side of this field.
Email Sequence:
This field will show the email sequence campaign lists that had been created at Broadcasting > Sequence Campaign (External Contacts). This section will only be available if you've Email & SMS Sequence Campaigner : A XeroChat Add-On.
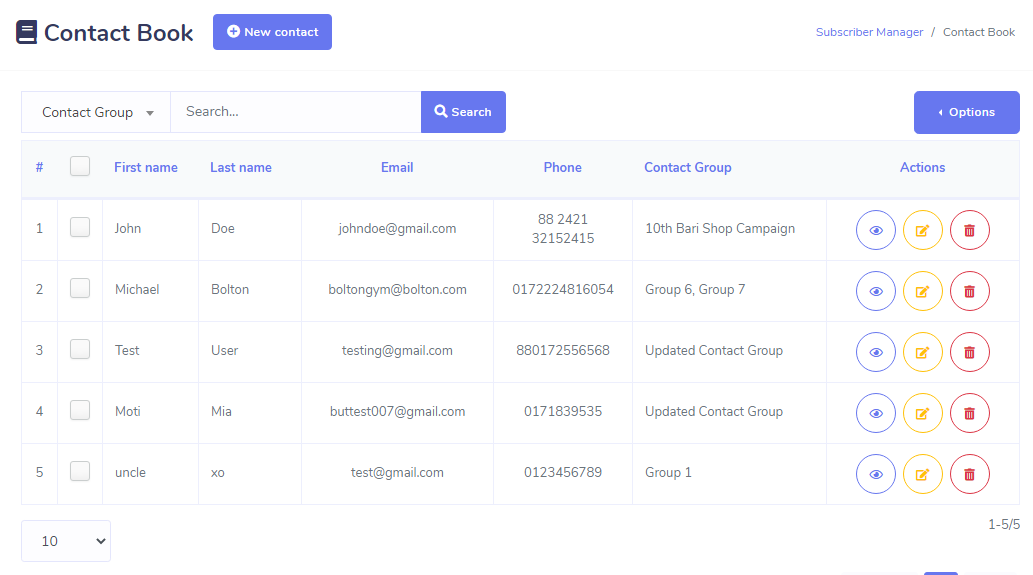
However this field is not required, you may select or not. If you select any email sequence campaign, then subscribers comes through that form will be assigned to these sequence campaign automatically. You can see the output what's said from Subscriber Manager -> Contact Book section and click on view icon, you'll see the assigned sequences in modal.
SMS Sequence:
As Email Sequence field this field will show the SMS sequence campaign lists that had been created at Broadcasting > Sequence Campaign (External Contacts). This section will only be available if you've Email & SMS Sequence Campaigner : A XeroChat Add-On.
However this field is not required, you may select or not. If you select any SMS sequence campaign, then subscribers comes through that form will be assigned to these sequence campaign automatically. You can see the output what's said from Subscriber Manager > Contact Book section and click on view icon, you'll see the assigned sequences in modal.
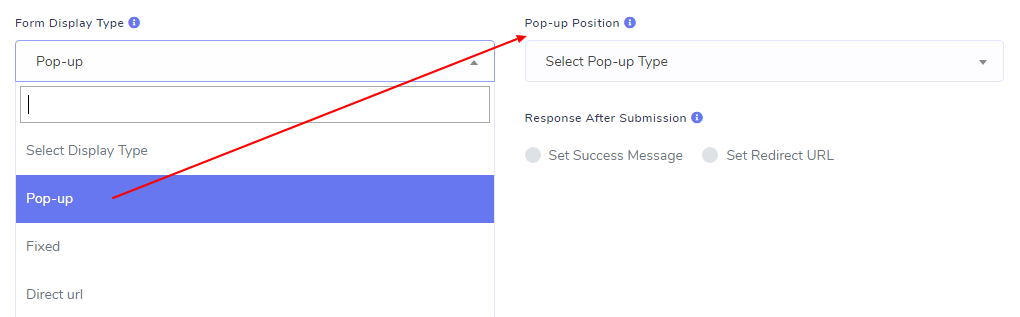
Form Display Type:
This field is a required field. Beside building a form, you will also have the facilities of selecting at which position you want to make visible your form.
Anyway, there are four types of positions which are :
-
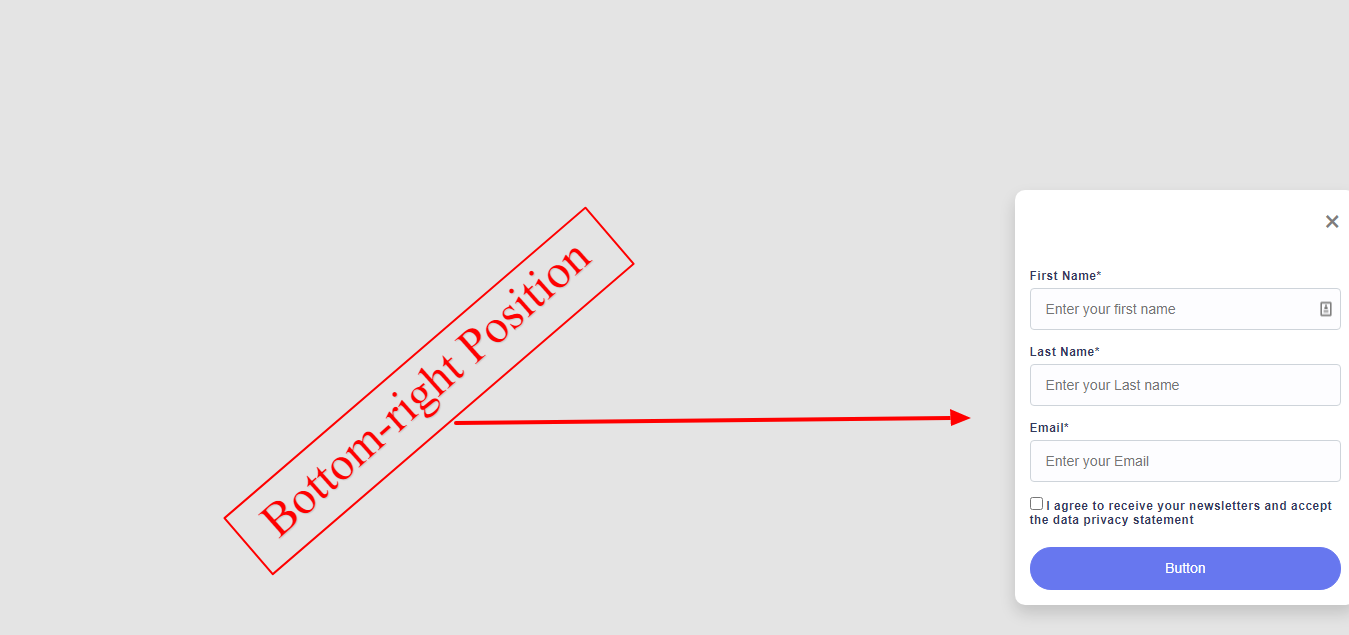
Pop-up: If you select Pop-up as display type, a filed called Pop-up position will appear. There will be two pop-up options Bottom-right & Center.
Pop-up Position: There will be two options which are described below:
- Bottom-right: If you select Bottom-right position, then your form will be visible at the bottom-right position of the site where you put this embeded form.
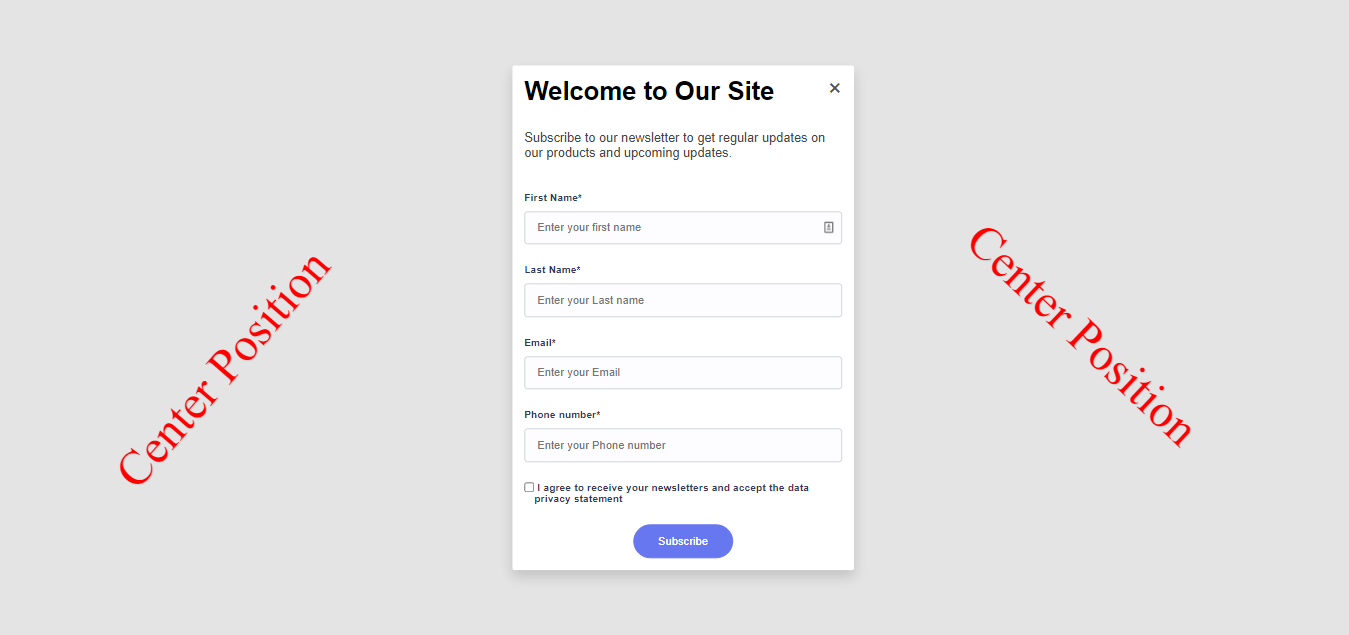
- Center Position: If you select Center position, then your form will be visible at the Center position of the site where you put this embeded form.
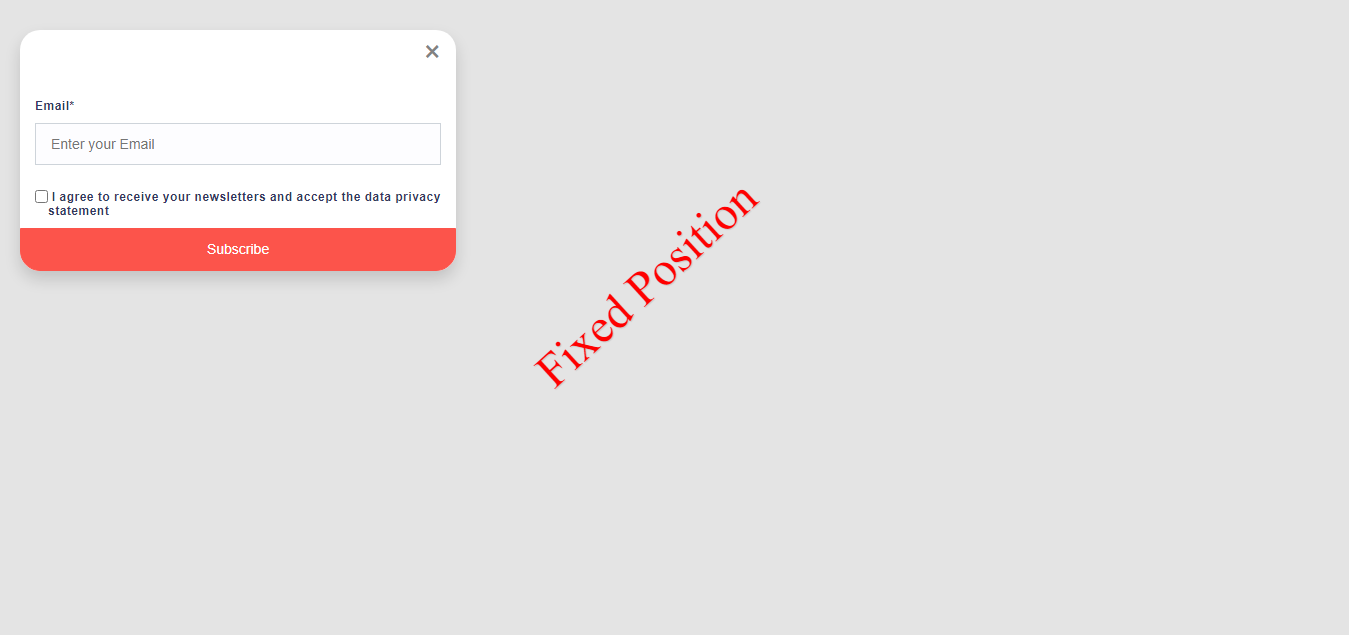
- Fixed Position: If you select Fixed position, then your form will be visible at the fixed position of the site where you put this embeded form.
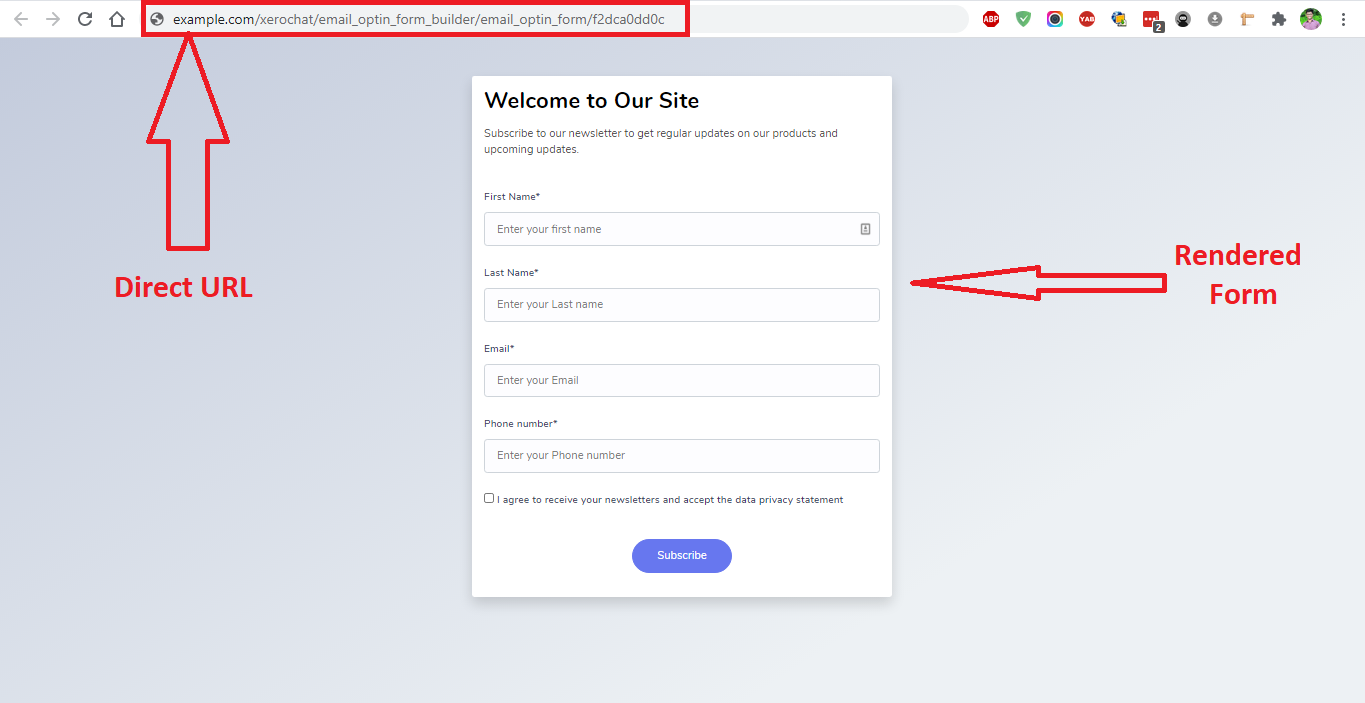
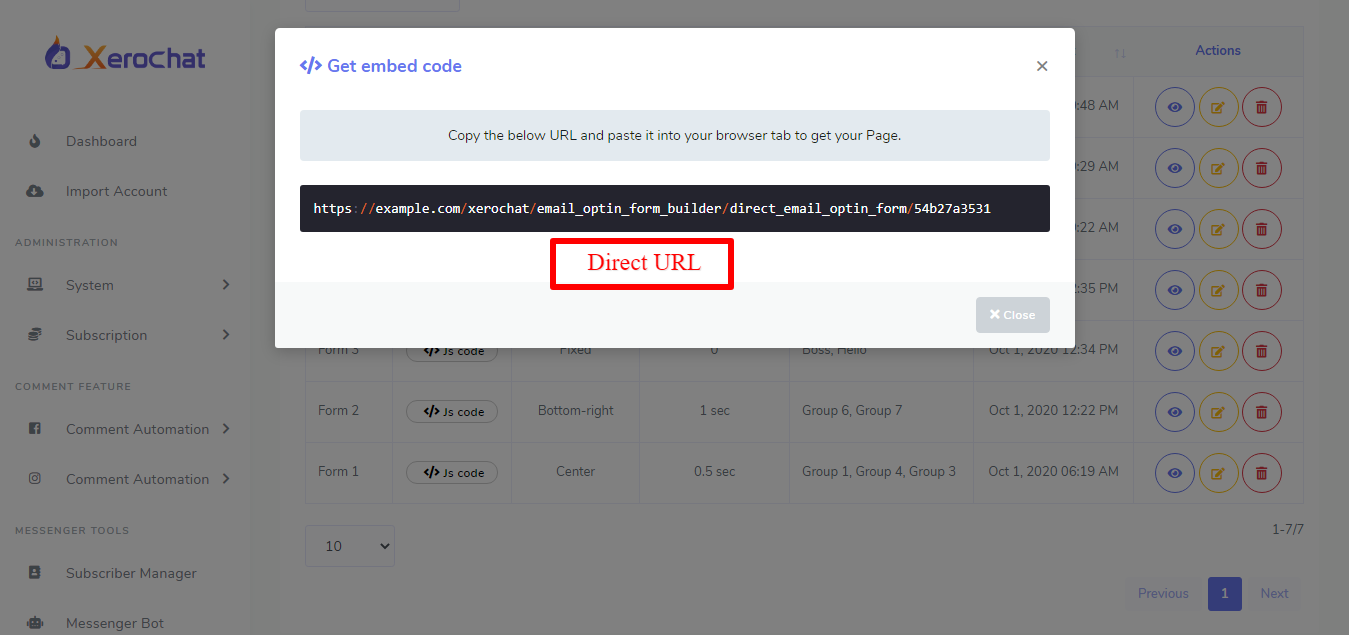
- Direct URL: This is not actually a position type. It's different from the above three positions. If you select this position, then you'll get a URL, thorugh this URL you or your user can directly access the created form. Copy the URL and paste it into your browser and you'll see your created form.
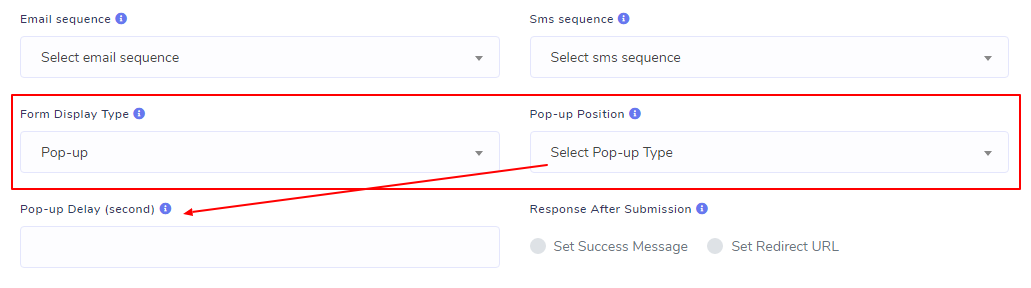
Pop-up delay:
Pop-up delay refers to after how much time your form will be visible and it will work as second, for example, if you put 1 in the field then the form will be visible after 1 second. At initial stage of the form, this field won't be shown. Pop-up delay is required for Pop-up Position(Bottom-right and Center)
Background Image: This field is optional. If you upload a image, then this image will be used as background image of the form body.
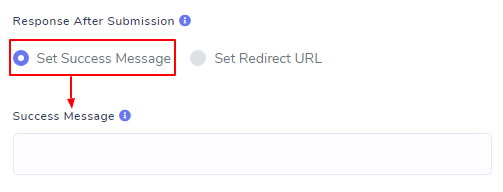
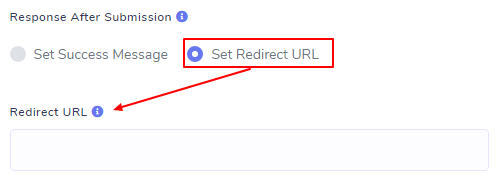
Response After Submission:
This field is required. You've to select a response type and fill the corresponding form for the successfull form submission's after event. There are two options you can set, successfull message and redirect url.
- Set Success Message: If you choose Set Success message, then a field will be appear for success message text. So, When anyone submit the form successfully, this success message will be shown.
- Set Redirect URL: If you select Set Redirect URL, then a field will be appear for redirect url. So, when anyone submit the form successfully, system will redirect that user to this URL automatically.
Form Builder
Build your Opt-in Form with the beautiful drag & drop form builder. There are two sections in the builder body, one is sidebar with draggable & droppable options at left and another is for options field at right.
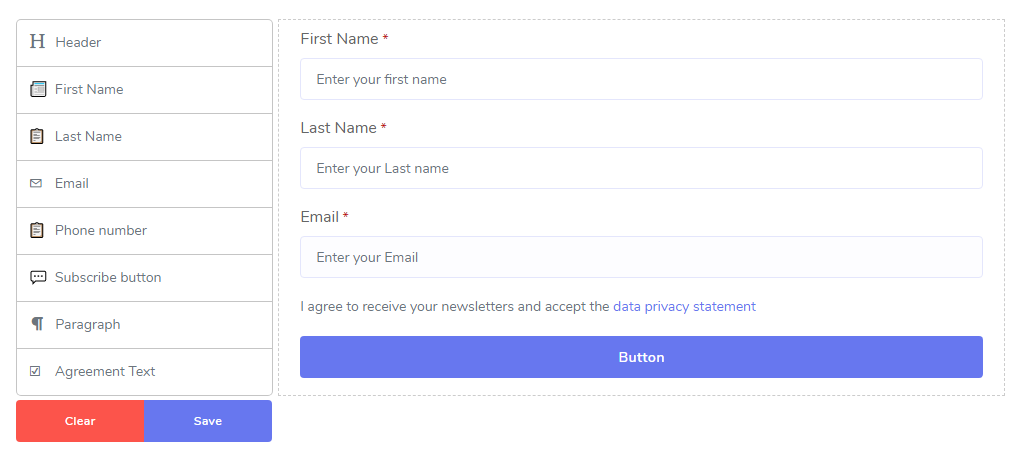
Drag & Drop Options:
As it's called Email Phone Opt-in form builder, so there are several options are available to build a standard form for subscribers email or phone collection.
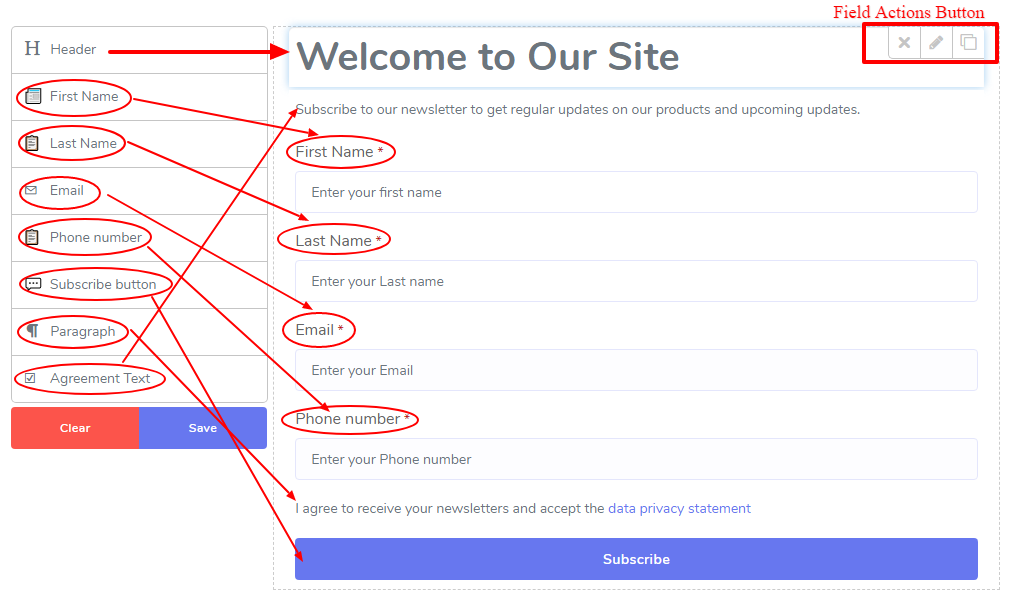
- Header: Drag & drop header option for Form header. You can choose different header types.
- Paragraph: Drag & Drop paragrap as a text field to set a short information for the form.
- First Name: Drag & Drop First Name option to set and get first name of the Subscriber. You can make it required or not by editing the field.
- Last Name: Drag & Drop last Name option to set and get last name of the Subscriber. You can make it required or not by editing the field.
- Email: Drag & Drop email option to set and get email address of the Subscriber. You can make it required or not by editing the field.
- Phone Number: Drag & Drop Phone Number option to set and get phone number of the Subscriber. You can make it required or not by editing the field.
- Agreement Text: Drag & Drop this field for make the subscribers agreed with your terms & conditions or any other agreement, so before check they can't submit the form.
- Subscriber Button: After all now the form need a submit button, so drag & drop the Subscribe Button and update the button name by editing the button option. You can choose different types of button color.
Form Examples
- Pop-up: Bottom-right Position
- Pop-up: Center Position
- Fixed Position
- Direct URL
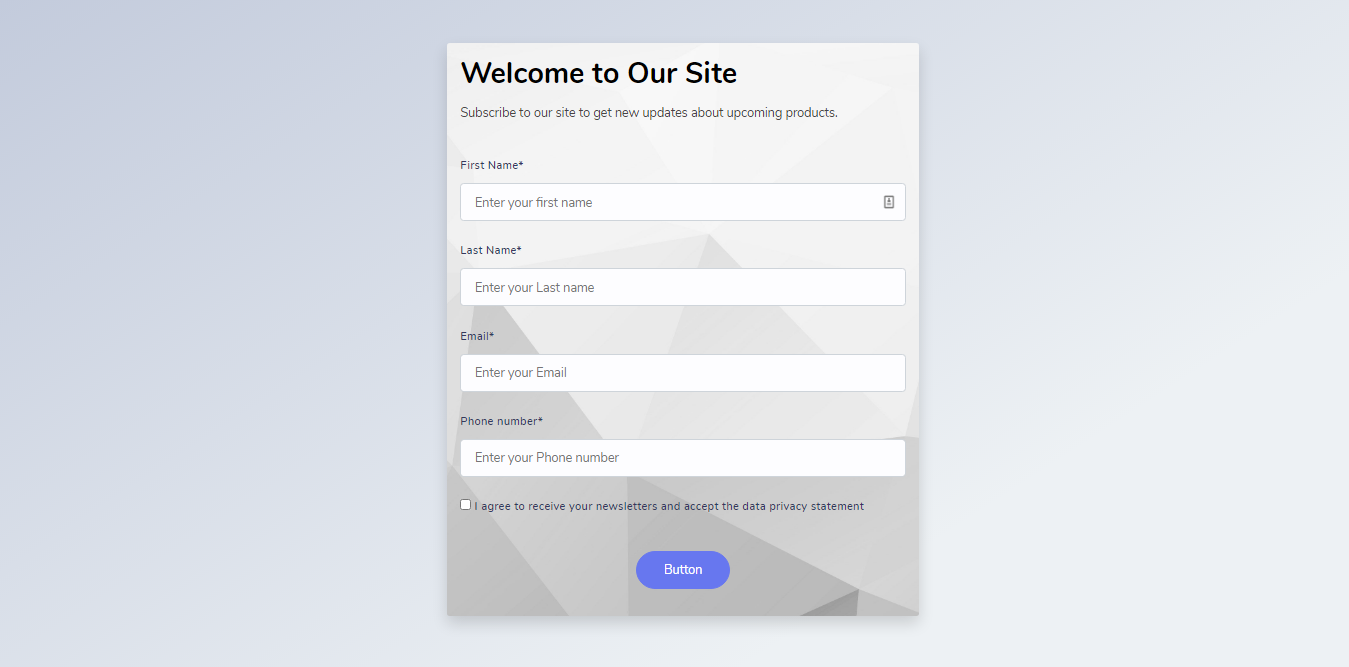
- Form With Background Image
How to Use Embeded URL & Direct URL
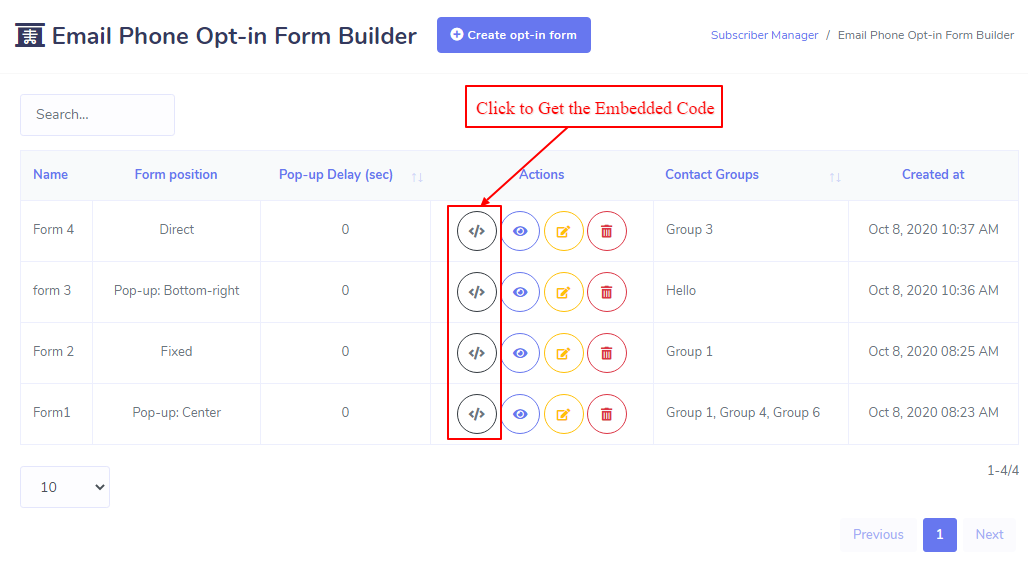
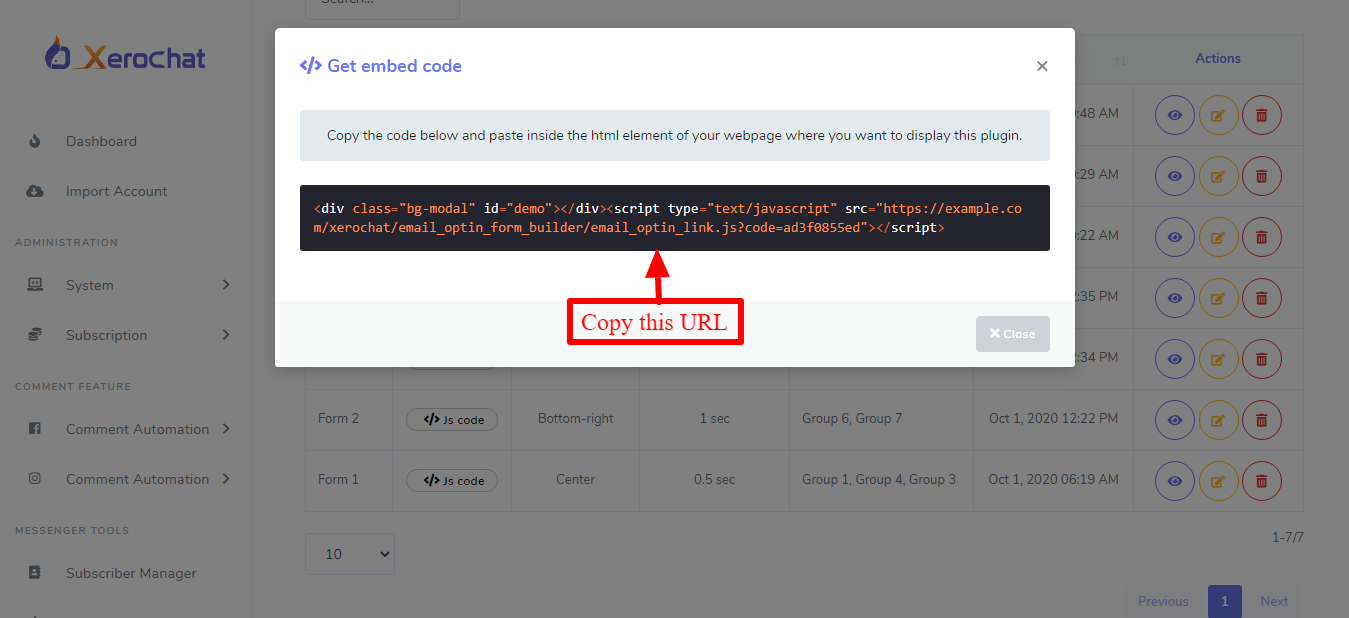
After Build a form, click on the  from the Actions Column, a modal will appear with the embeded URL. Now copy the embeded ulr and then paste it into your website where you want to show this form.
If you copy the direct positioned URL, then you've to copy it and then paste it into your browser to get the form.
Opt-in Form Subscribers
As they are subscribed from external source, so they will be stored as external subcribers insided the application. You can see your opt-in form subscribers lists at Subscriber Manager > Contact Book Section.
Now you can use these subscribers for sending Bulk Email/SMS or you can assign them manually to Email/SMS sequence campaign.