Subscriber Manager
Subscriber manager is also attached with the Instagram chatbot add-on.
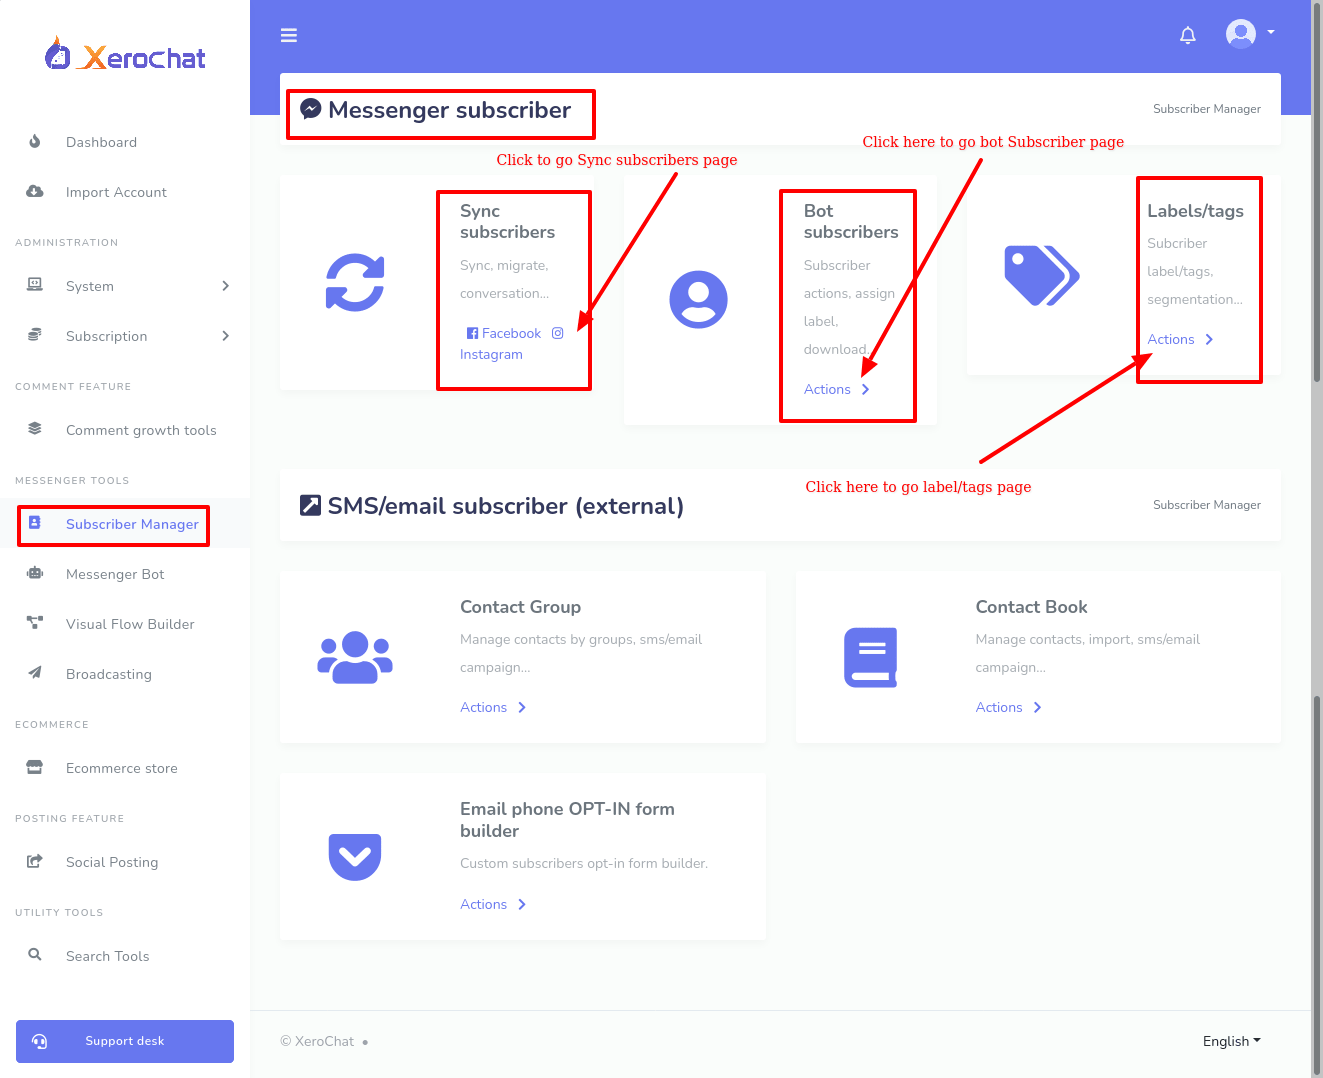
Click on the Subscriber manager at the left sidebar of Dashboard. Instantly, will appear a page divided into two sections-- Messenger subscriber and SMS/Email subscriber(External). In the Messenger subscriber option, you will see three options-- sync subscriber, bot subscribers, and label/tags.
Sync Subscribers
First, click on the sync subscribers’ Instagram button, and instantly, the sync subscriber page of Instagram profile will appear. In the pages section, you have to select an Instagram profile first. Here, you will see the statistics and other things on the Facebook page you selected. But if you want to see these things of your Instagram profile, select the radio button with the same name as your Instagram profile.
In the conversation subscriber box, you can see how many users have conversations with your Instagram profile.
In the bot subscriber box, you can see how many people have conversations with the bot you set with the Instagram profile.
In the unsubscribed box, you can see how many users have unsubscribed your bot.
In the 24h interaction box, you can see how man users have interacted with your Instagram profile in the last 24 hours.
In the migrated bot subscriber, you can see the subscribers has been migrated.
Then you will see a row of four options-- subscriber list, scan page inbox, background scanning, latest conversation.
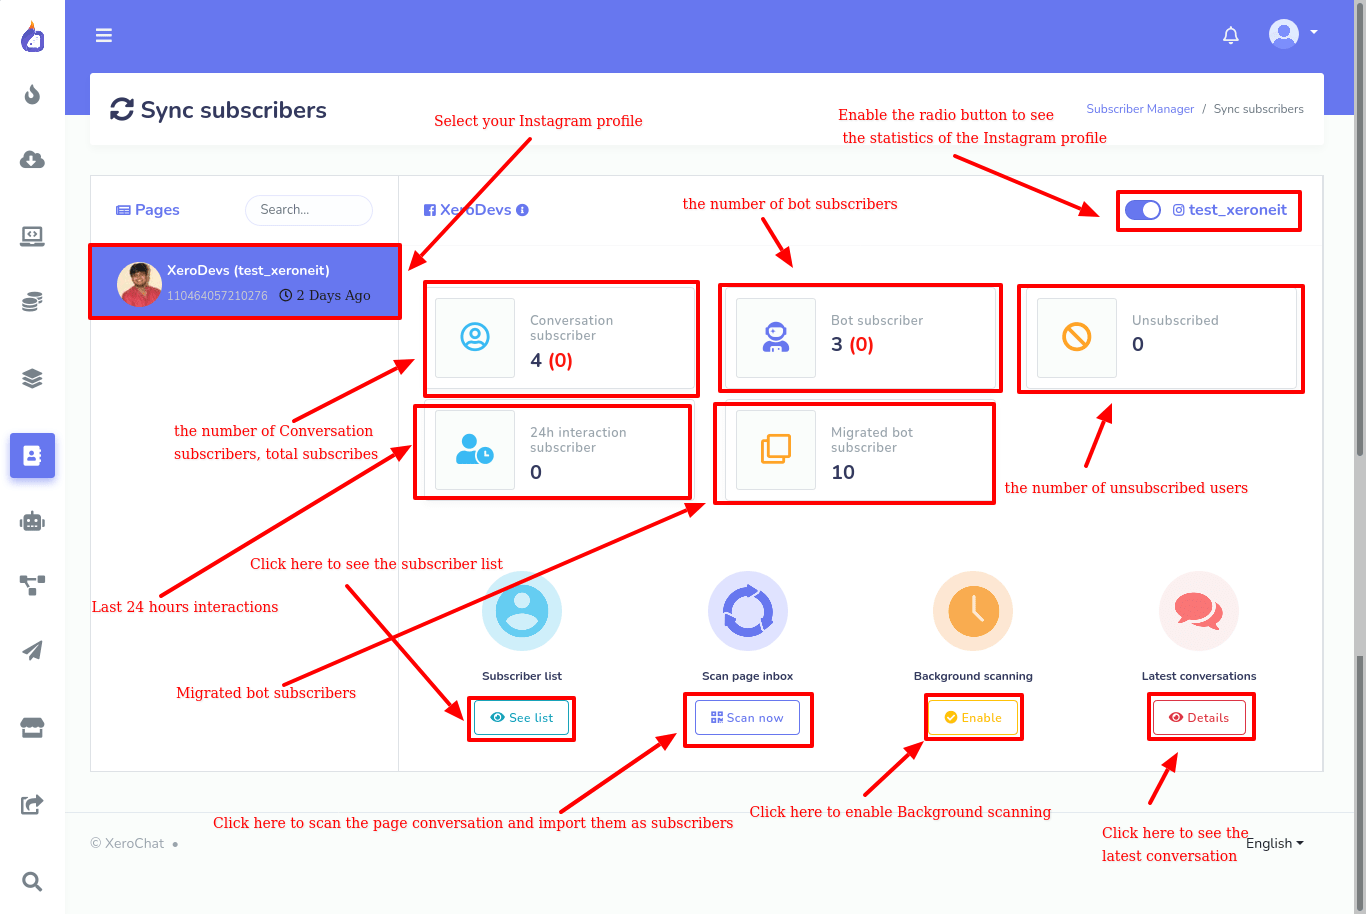
In the subscriber list option, you can see the list of the subscribers of your Instagram profile. Click on the see list button of the subscriber list option and instantly, subscribers list will appear in a modal box.
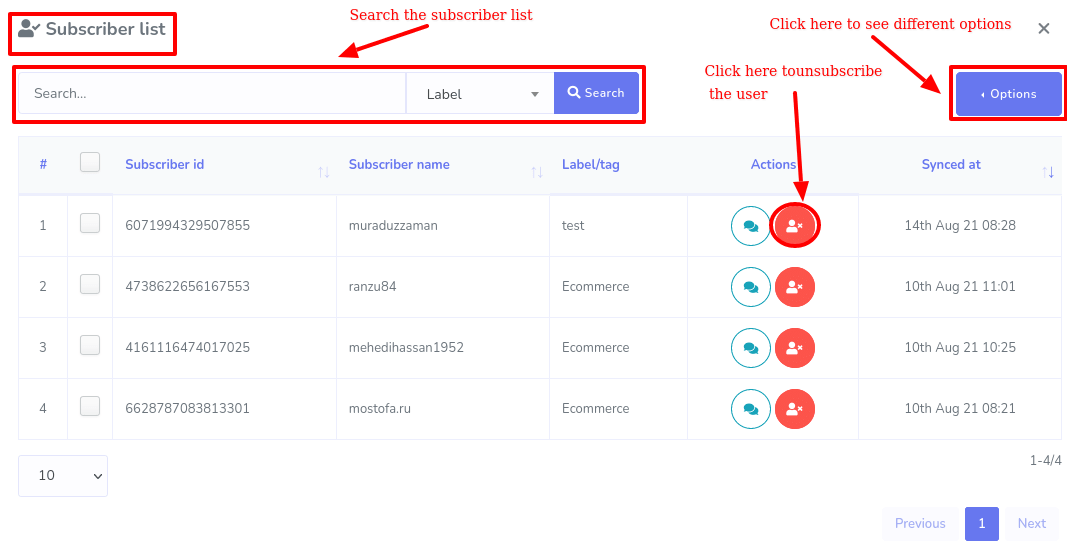
By clicking on the unsubscribe button next to a user’s name, you can easily unsubscribe the user.
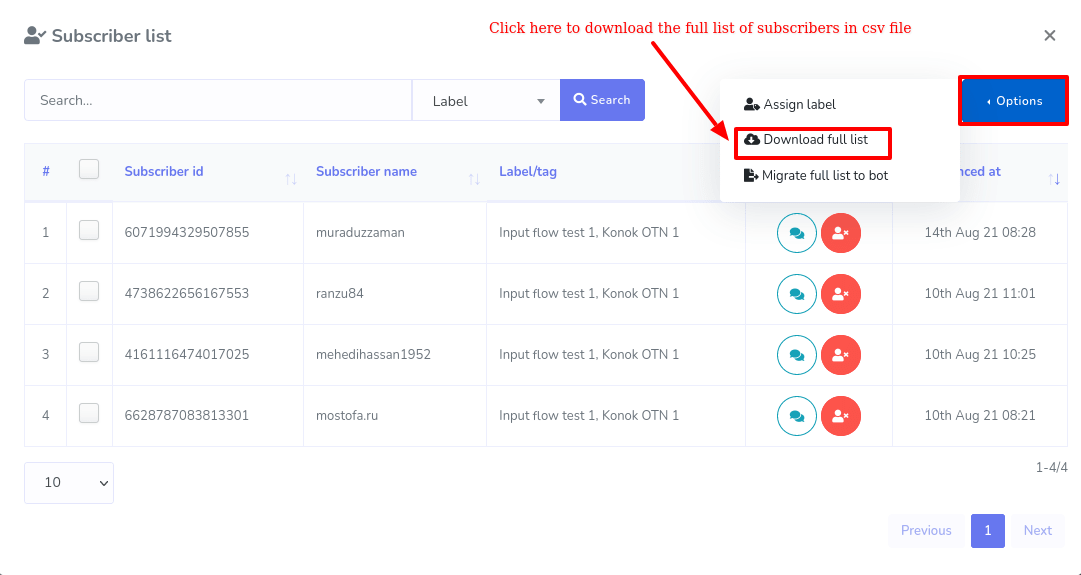
At the right top corner of the modal box, you will see a button called option. Click on the options button, and will appear a menu of three options-- assign a label, download the full list, migrate full list to the bot.
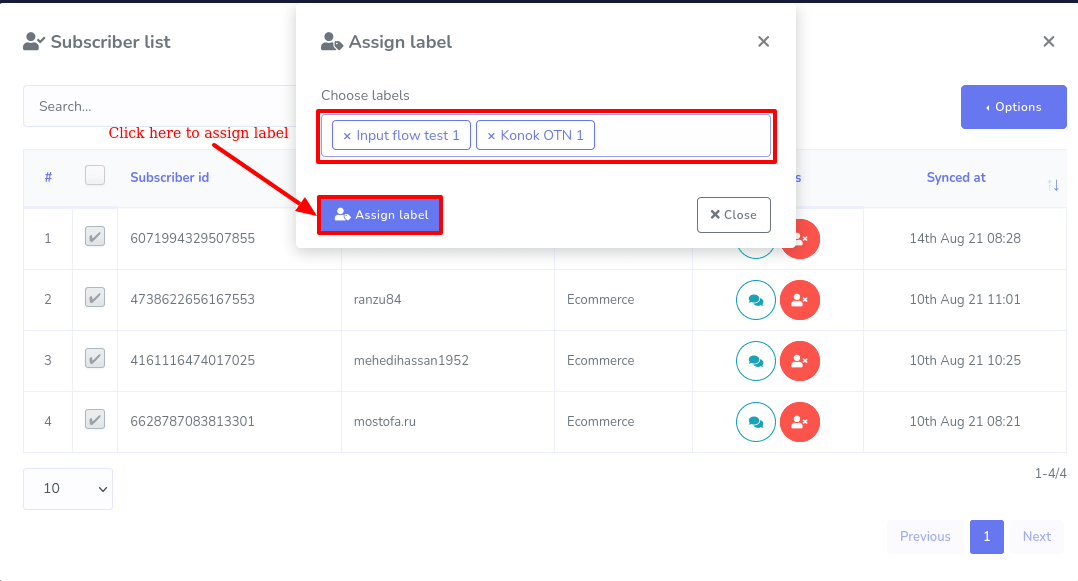
With the assign label, you can assign subscribers into a label. First, select the name of the subscribers you want to assign to the label.
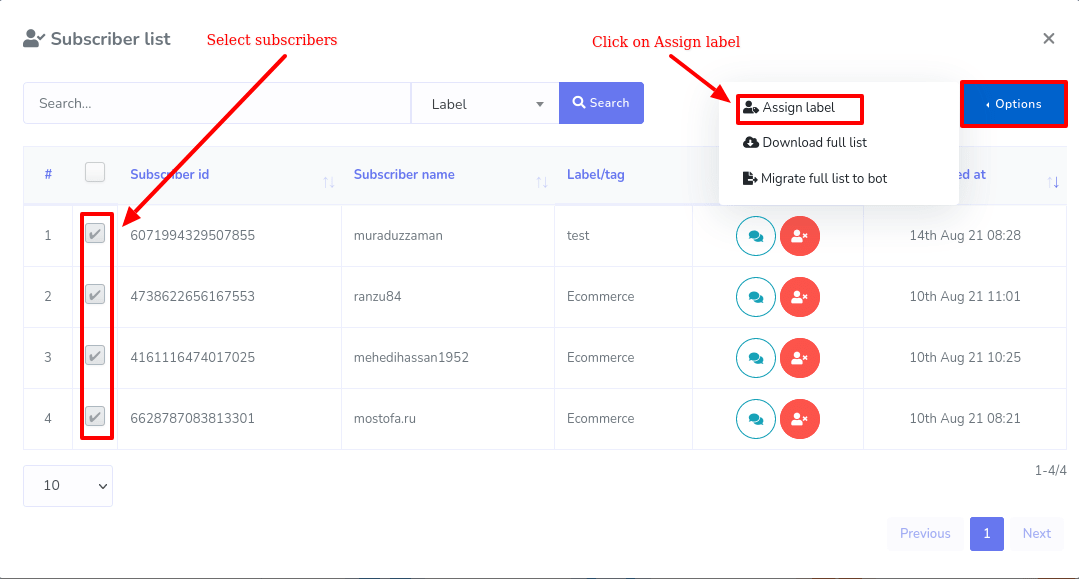
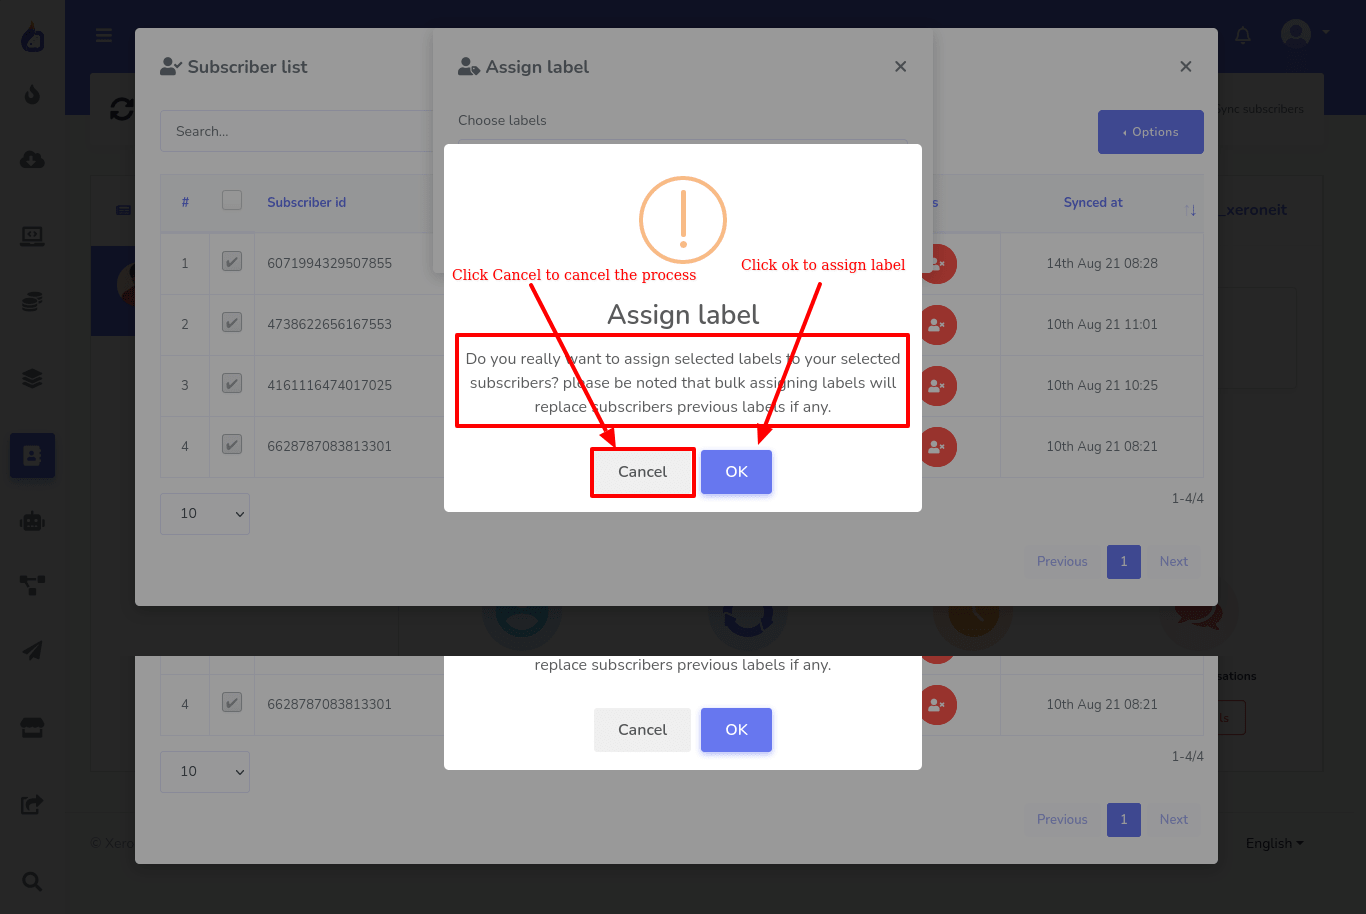
And then click on the assign label option and a modal form called assign label will appear. Now click on the choose label fields and instantly a drop-down menu of different labels will appear. Now select your desired label and click on the assign label button. Instantly, a warning message will appear. It will warn you what really will happen in the background. Still, if you want to assign a label, click on the ok button.
If you want to download the full list of the subscribers, click on the download full list button. Instantly, the full list will be downloaded as the CSV file.
You can also migrate the full list as a bot subscriber. Now click on the Migrate full list to bot option and a warning box will appear to check if you click on the option accidentally. Now click on the ok button of the warning box and a migration successful message will appear.
If you want to scan your Instagram profile conversation and import them as subscribers, click on the scan now button of the Scan page inbox. Instantly, a modal form will appear. To know more about the scan page inbox, click on the tooltip button of the scan the latest fields. Now click on the field and a drop-down list of different numbers of subscribers will appear. Now select your desired option and click on the start scanning button. And after the conversations are imported as the bot subscribers, you will see a successful message. That is, the conversations have been imported as the bot subscribers.
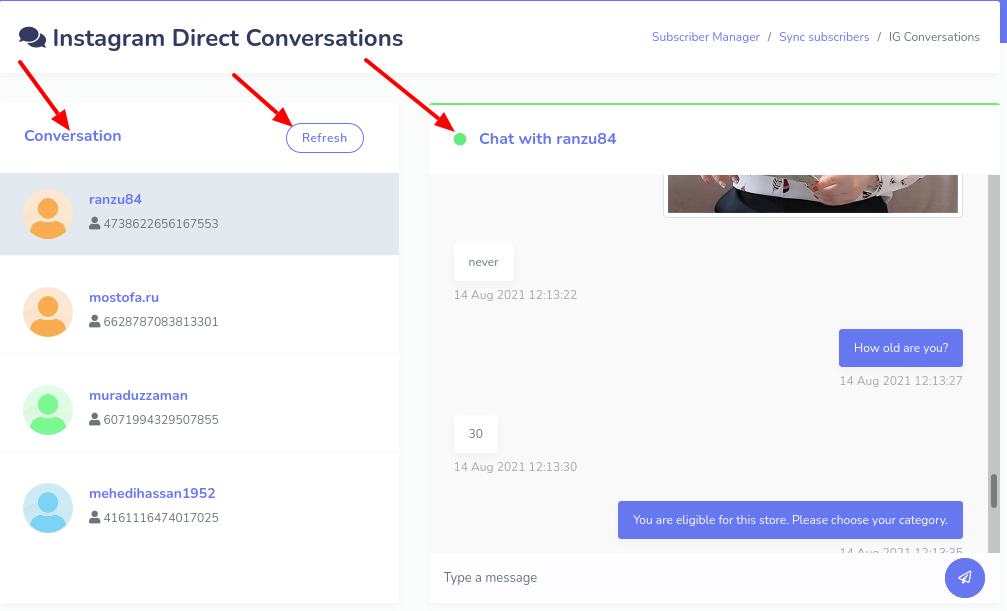
If you want to enable background scanning, click on the enable button. To know more about background scanning, click on the tooltip button. Also, you can see the latest conversations of your page. Now click on the details button, a new page will appear on another tab of your browser. Here you can see the latest conversation. Besides, you can converse with the users from here. That is, the page works as the Instagram messenger. This feature is useful because if a user wants to chat with a human instead of a bot, you can talk with the user here without going to the Instagram messenger.
Bot subscribers
Now come to the bot subscriber option. Now click on the actions button of the bot subscriber and instantly, the bot subscriber page will appear. Here you have to select the Instagram profile to see the subscribers of the bot set with the profile. Under Facebook, you will see the Facebook pages and under Instagram, you will see the Instagram profile. From here, select the Instagram profile you want to see the subscribers of the bot set with the Instagram Profile. You can see the subscriber list Gender wise and label-wise. If you select a label, you will see the subscribers of the bot stored in the label.
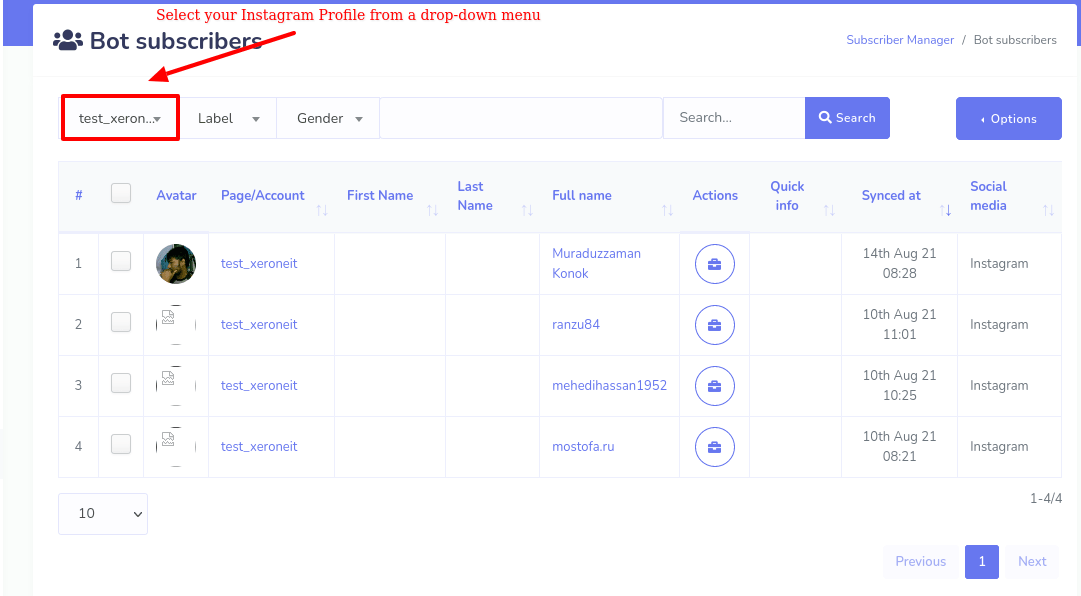
Also, you can search a subscribers in the search box.
Now click on the options button at the right up corner of the modal box. And instantly will appear a list of three options-- Download result, assign label and delete a subscriber. Click on the download result option to download the list of the bot subscribers in a CSV file.
You can also assign subscribers to label. To do this, first select the subscriber or subscribers you want to assign to a specific label, and click on the assign label option of the drop-down menu. Instantly, a modal form will appear. Now click on the choose label field of the modal box and a drop-down menu of different predefined labels will appear. That is, you have to create a label first. Well, now select the label where you want to assign the subscribers you already selected. Now click on the assign label button and a warning message about what will happen in the background. Still, if you want to assign subscribers to the label, click on the ok button. Now you will see a successful message. That is, the selected subscribers have been assigned to the label.
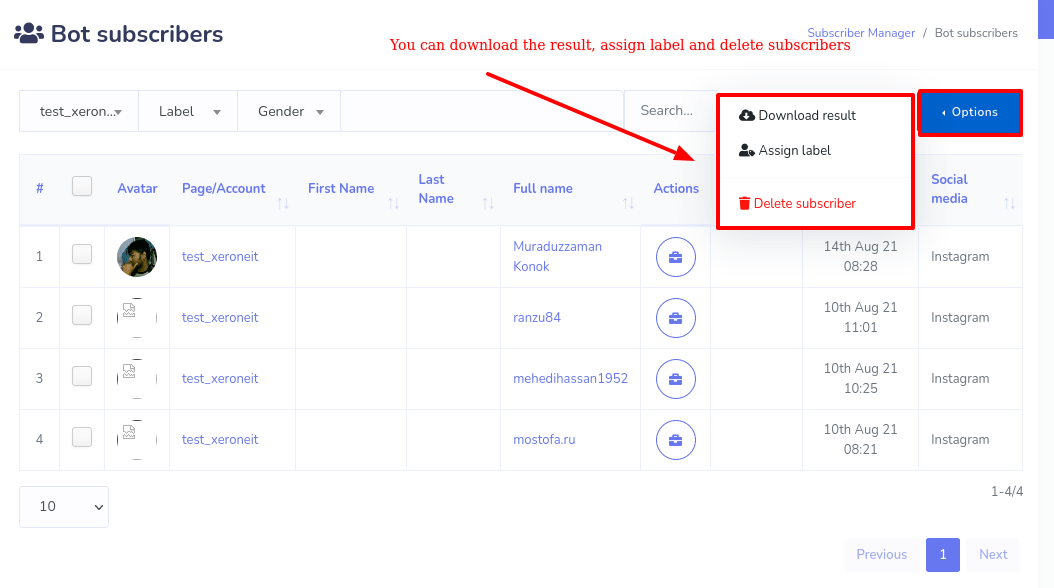
Also, you can delete subscribers. To delete subscribers, first select the subscribers you want to delete and click on the delete subscribers option.
Label/Tags
Now come to the label/tag option. Now click on the actions button of the label/tag option and instantly, the label/tags page will appear. Now just click on the new label button and instantly will appear a modal form with two fields-- label name and page name. In the label name field, provide a name for the label and in the page name field, you have to select your Instagram Profile
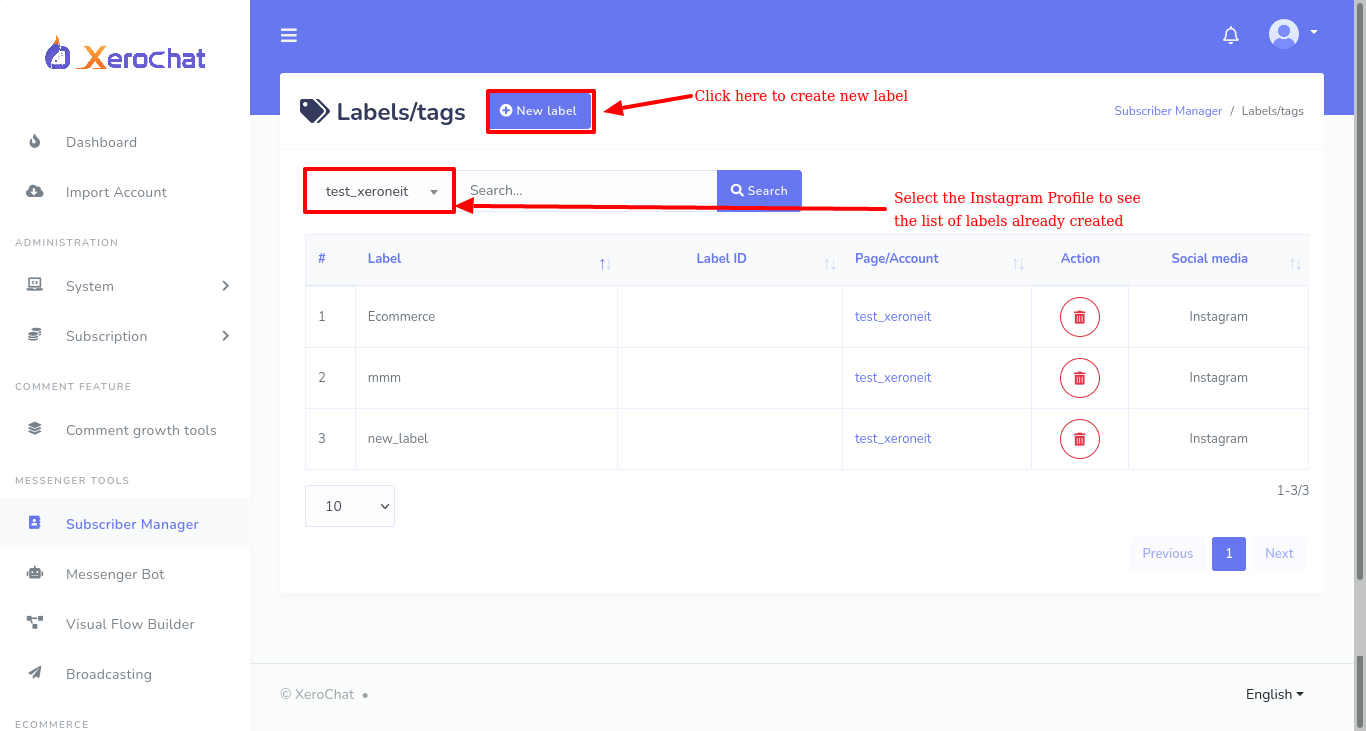

Well, now click on the label name field and write a name for the label. Then click on the page name field, instantly will appear a drop-down menu of Facebook pages and Instagram Profile. Select an Instagram profile for which you want to make the label. Now click on the save button and a successful message will appear at the bottom of the page.

The label will only work for the Instagram profile you selected.