JSON API Connector
JSON API connector sends JSON data to any of your provided external URL. Once any specific event mentioned below is triggered, system will send json data to your provided webhook URL & it will wait for 10 second to get response. If system does not get response in 10 seconds, it will send another post request to your webhook. You can then process your data as you want. This feature can be used to connect our system with any third party app like Zapier or your own custom app. You will find JSON API connector features inside Messenger Bot menu.
CONNECTION LIST : ACTIVITY, EDIT, DELETE
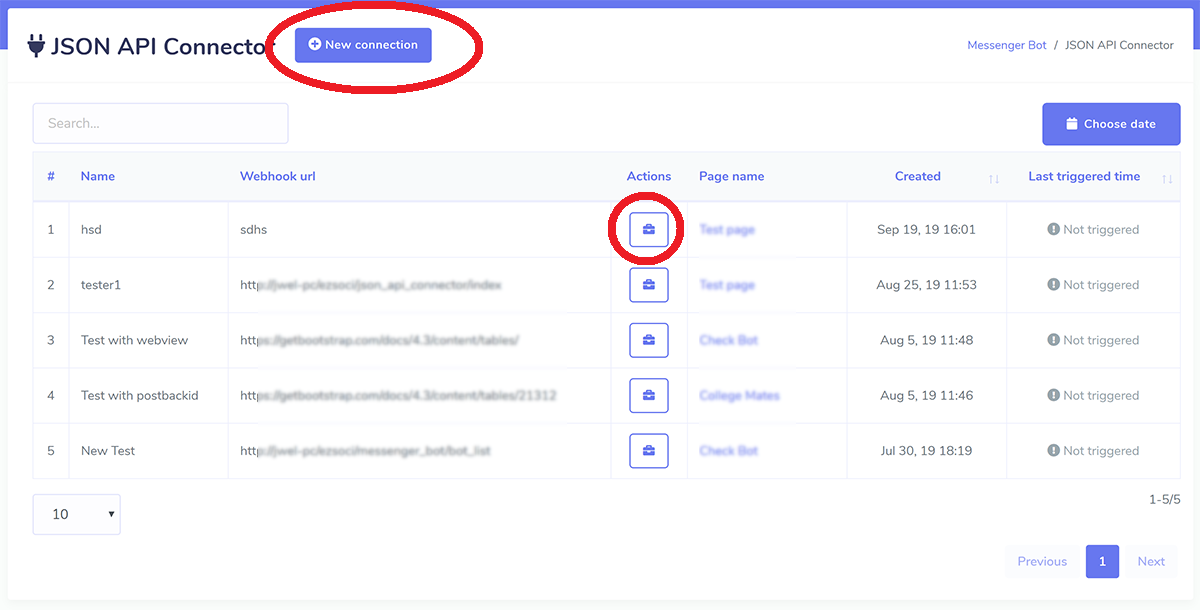
In the JSON API Connector dashboard, you will see all of your created connections. You can also view the activity report, update and delete your connections from Connector dashboard.
CREATE NEW CONNECTION
To create a new connection click New Connection button.

Connection Name: This is the field of what will be your connection name.
Webhook URL: This is the field of webhook URL to receive data. You can put any webhook URL in this field to receive data which you can get from any third party apps like Zapier or your own custom app. System will send data to your provided Webhook URL as JSON like below and it will wait for 10 seconds to get response.
Select a page: In this section you will see the page lists of your bot enabled pages of messenger bot. So you've to select page from which you want collect triggered data.
What field change trigger webhook: There are six triggering options in this section : email, phone number, location , postback , birthdate and webview form. As for example : if you select email, so when any new email is collected through quick reply of messenger bot, then webhook will be triggered. You can select all options togather and then the webhook will be triggered for all the events. Postback event will require to choose the postback ids and webview event will require to choose webview form ids.
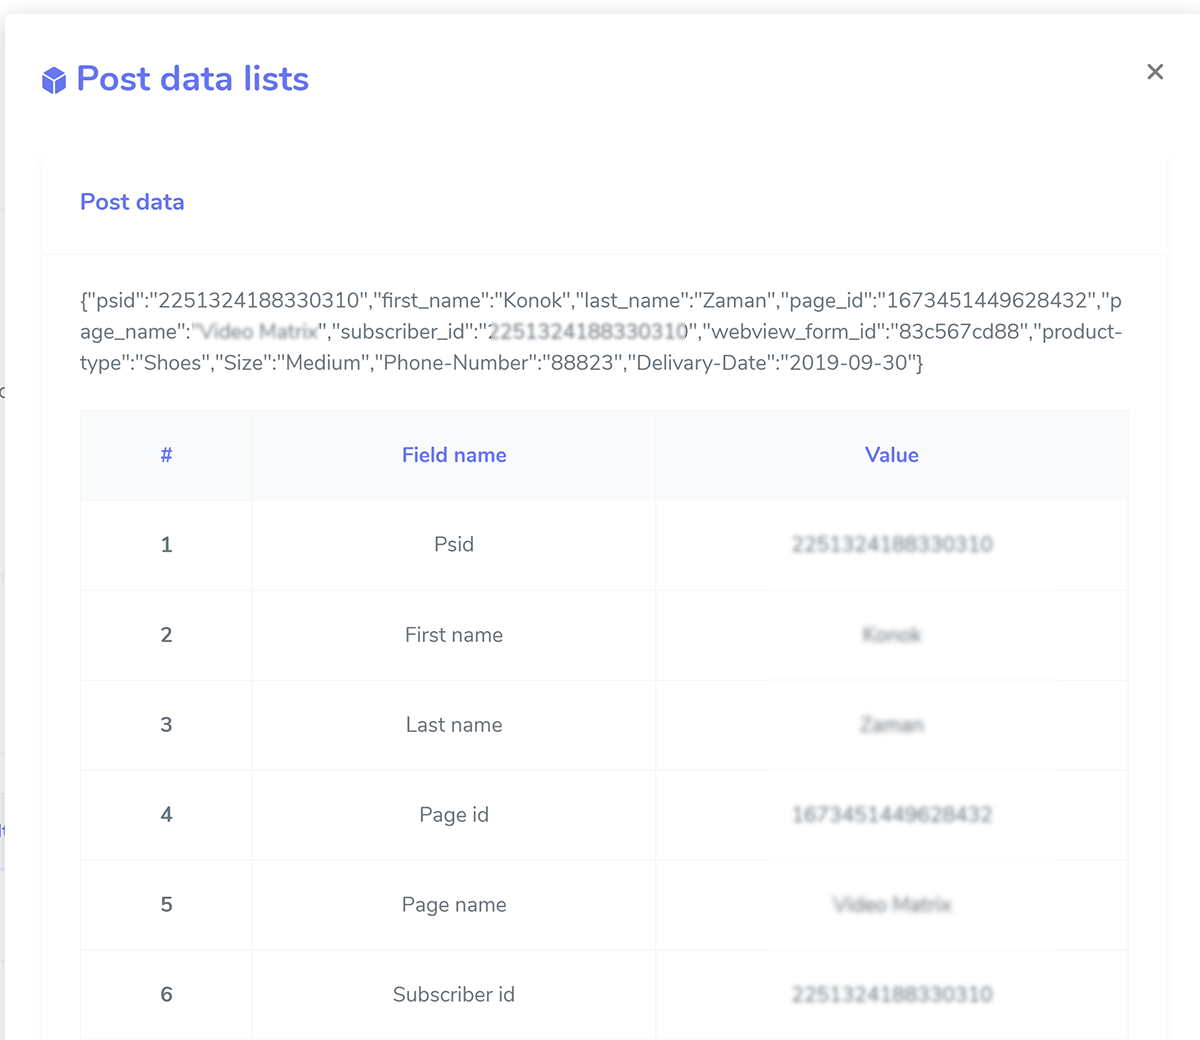
Which data you want to send: There are different options of data of the user which are collected through quick reply and system will send selected data during triggering. A sample data will look like below:
{
"psid":"12765756",
"first_name":"Test",
"last_name":"User",
"subscribed_at":"2019-01-15 12:19:04",
"email":"testuser@gmail.com",
"labels":"Demo,Demo Label 1,new-label-test",
"page_id":"37674343246",
"page_name":"Test Page",
"phone_number":"+88025192523",
"user_location":"",
"postbackid":"",
"subscriber_id":"2251324188330310",
"webview_form_id":"83c567cd88",
"product-type":"Shoes",
"Size":"Medium",
"Phone-Number":"88823",
"Delivary-Date":"2019-09-30"
}
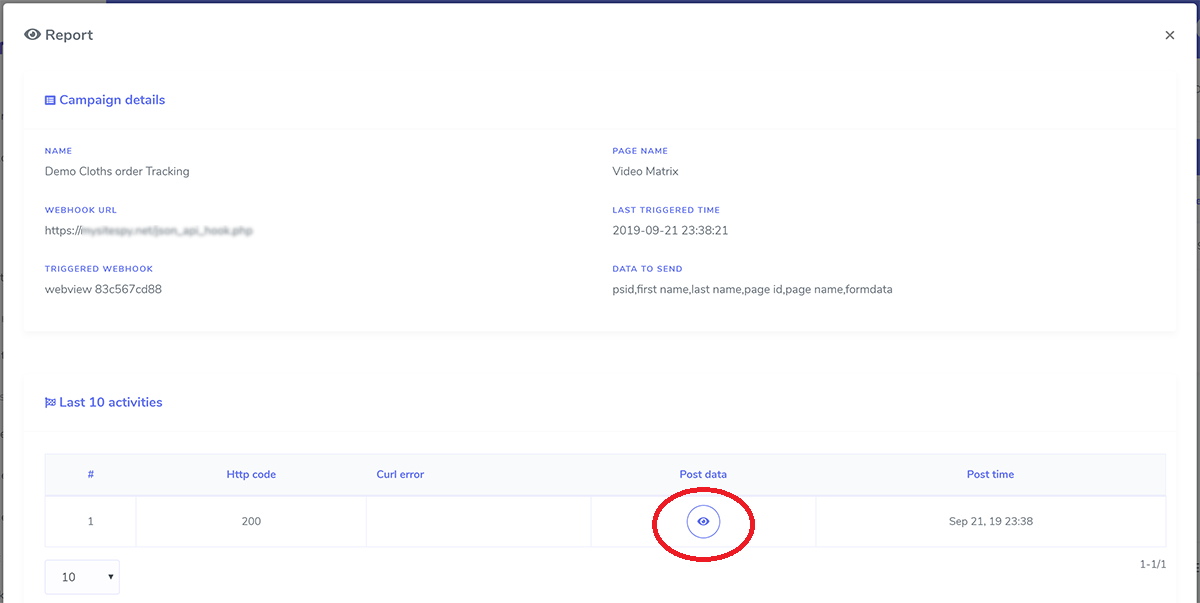
CONNECTION REPORT
Just click on the view button and see last 10 activities of you connection as well as connection setup information. HTTP Code: 200 means connection triggered successfully. You can see the data list in Post Data section which was send when the connection is triggered.
ADD OWN CUSTOM SCRIPTS URL AS WEBHOOK URL USING PHP
Suppose your domain is https://example.com and your script name is test.php, so your webhook URL will be https://example.com/test.php. When any selected event is triggered, it will send data to this URL. To receive the data sent by our system write the following code in test.php
$webhook_data= file_get_contents("php://input");
$webhook_data_array=json_decode($webhook_data,true);