ChatPion's HTTP API Integration empowers you to connect external APIs and seamlessly integrate them into the Flow Builder. This powerful feature enhances your chatbot automation by enabling smooth interactions with external platforms for tasks like retrieving data, submitting forms, updating user information, and much more.
Follow this step-by-step guide to learn how to configure and integrate an HTTP API into ChatPion:
Step 1: Access the HTTP API Section
- Go to the ChatPion dashboard and navigate to the "HTTP API Integration" > "Facebook/Instagram HTTP API" section under the API Channels menu. Here, you can manage existing API connections or create new ones.
- Click the "Create" button to begin configuring a new API connection.
Step 2: Add API Connection Details
In this section, you will configure the API settings to connect with external services:
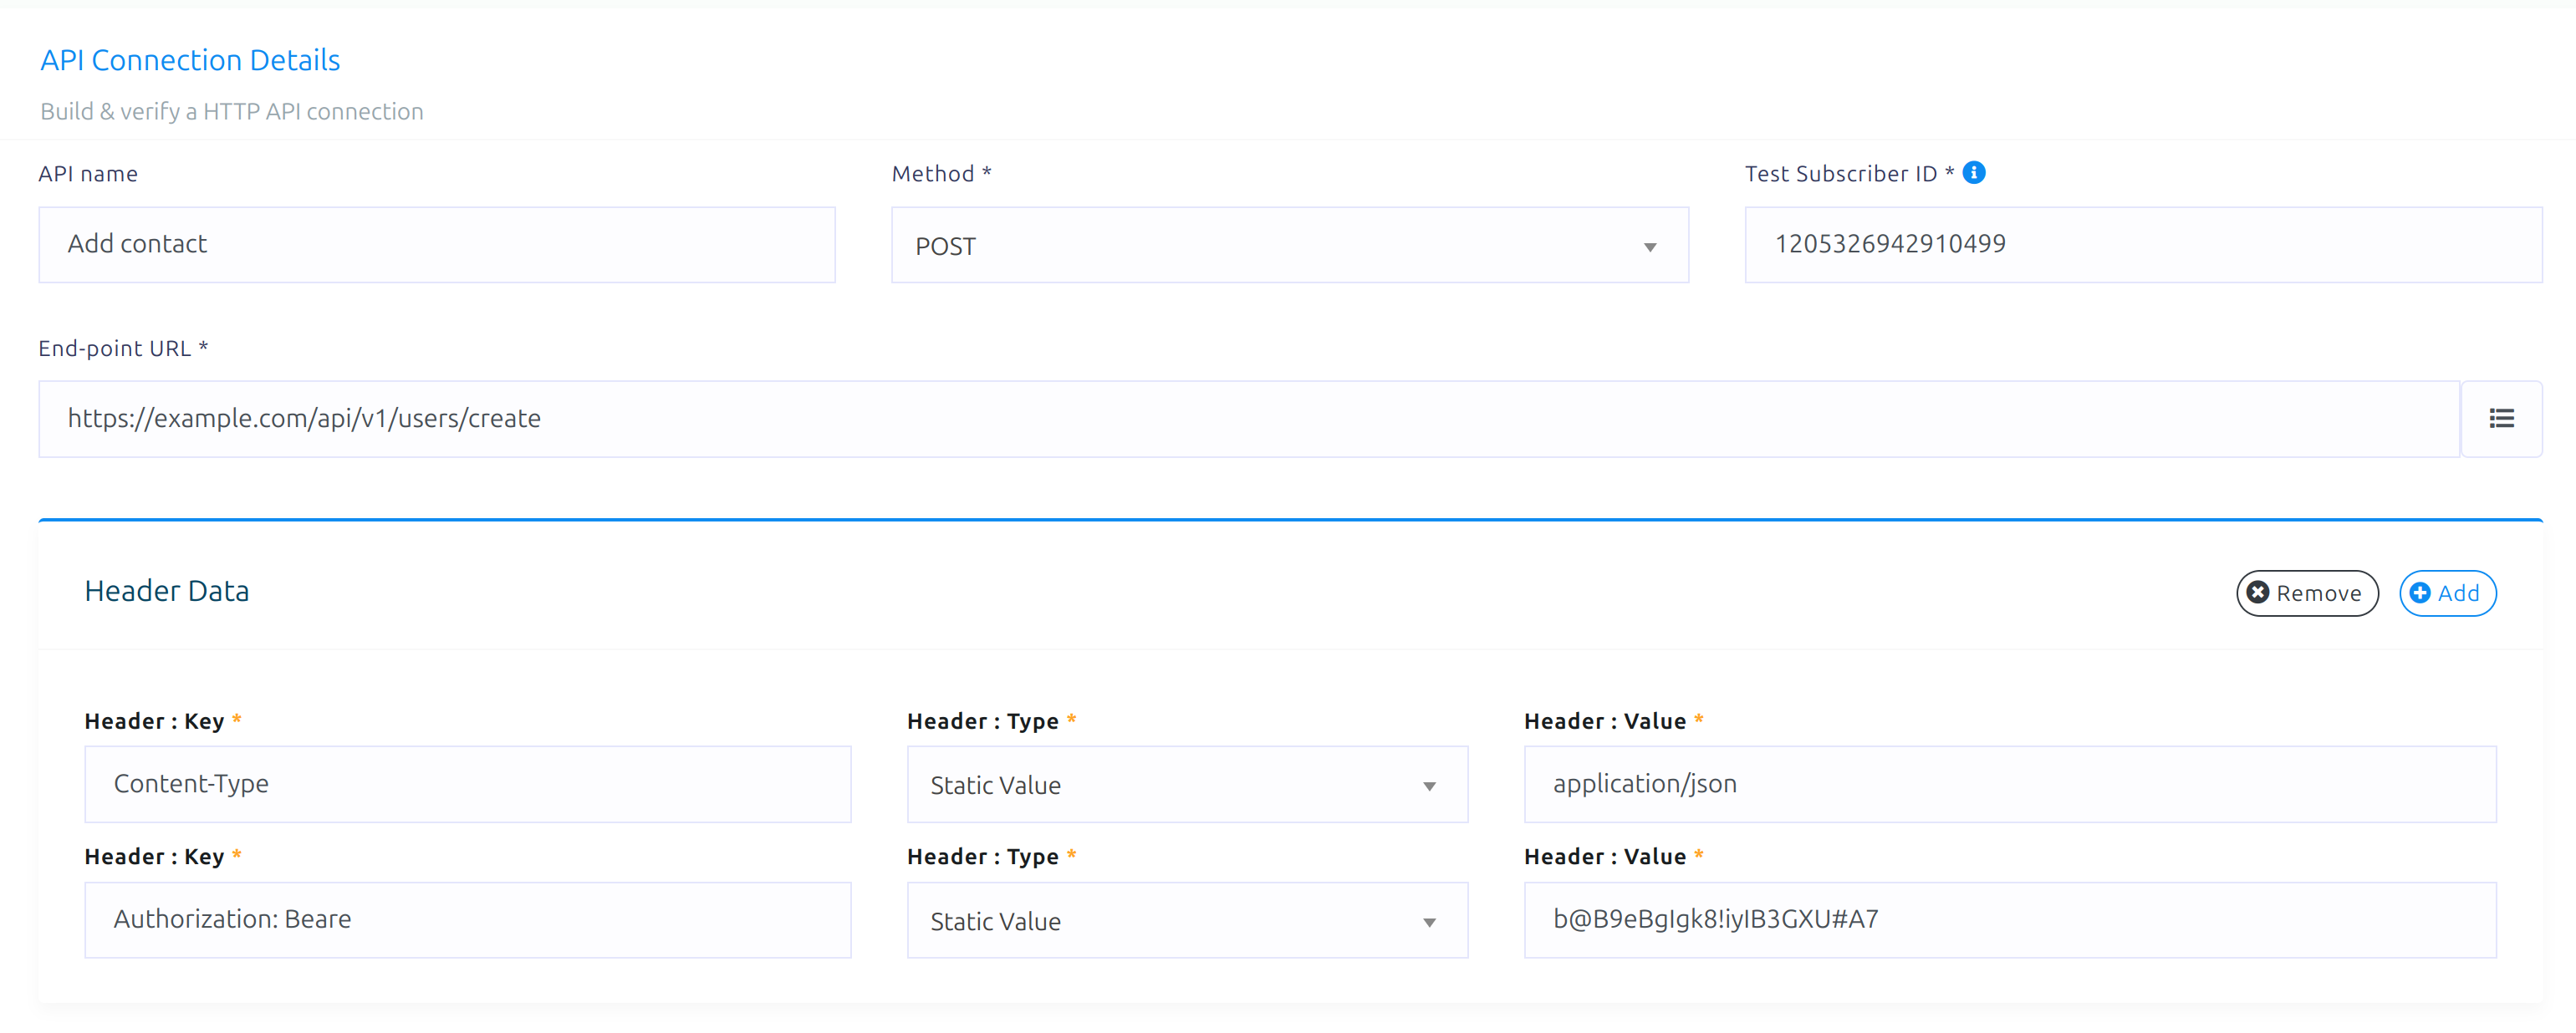
- API Name: Enter a clear and descriptive name for your API connection (e.g., "WordPress User Creation").
- Method: Choose the correct HTTP method (e.g., POST, GET) based on the external API’s specifications.
- Endpoint URL: Input the full URL of the external API you wish to connect to (e.g.,
https://example.com/api/v1/users/create). - Test Subscriber ID: Copy and paste a subscriber ID from the subscriber manager. Use your own subscriber ID for this. This ID is needed to test the API during verification, especially when dynamic data or custom fields are involved. For the initial setup, use a test subscriber ID.
Step 3: Configure Request Headers
In this section, you need to define any required HTTP headers needed to make the API request:
- Content-Type: Configure this to
application/jsonor any other content type required by the API. - Authorization: Bearer: If the API needs authorization (e.g., Bearer Token or Basic Authentication), include the appropriate header with the required token or credentials.

Step 4: Configure Request Body (Optional)
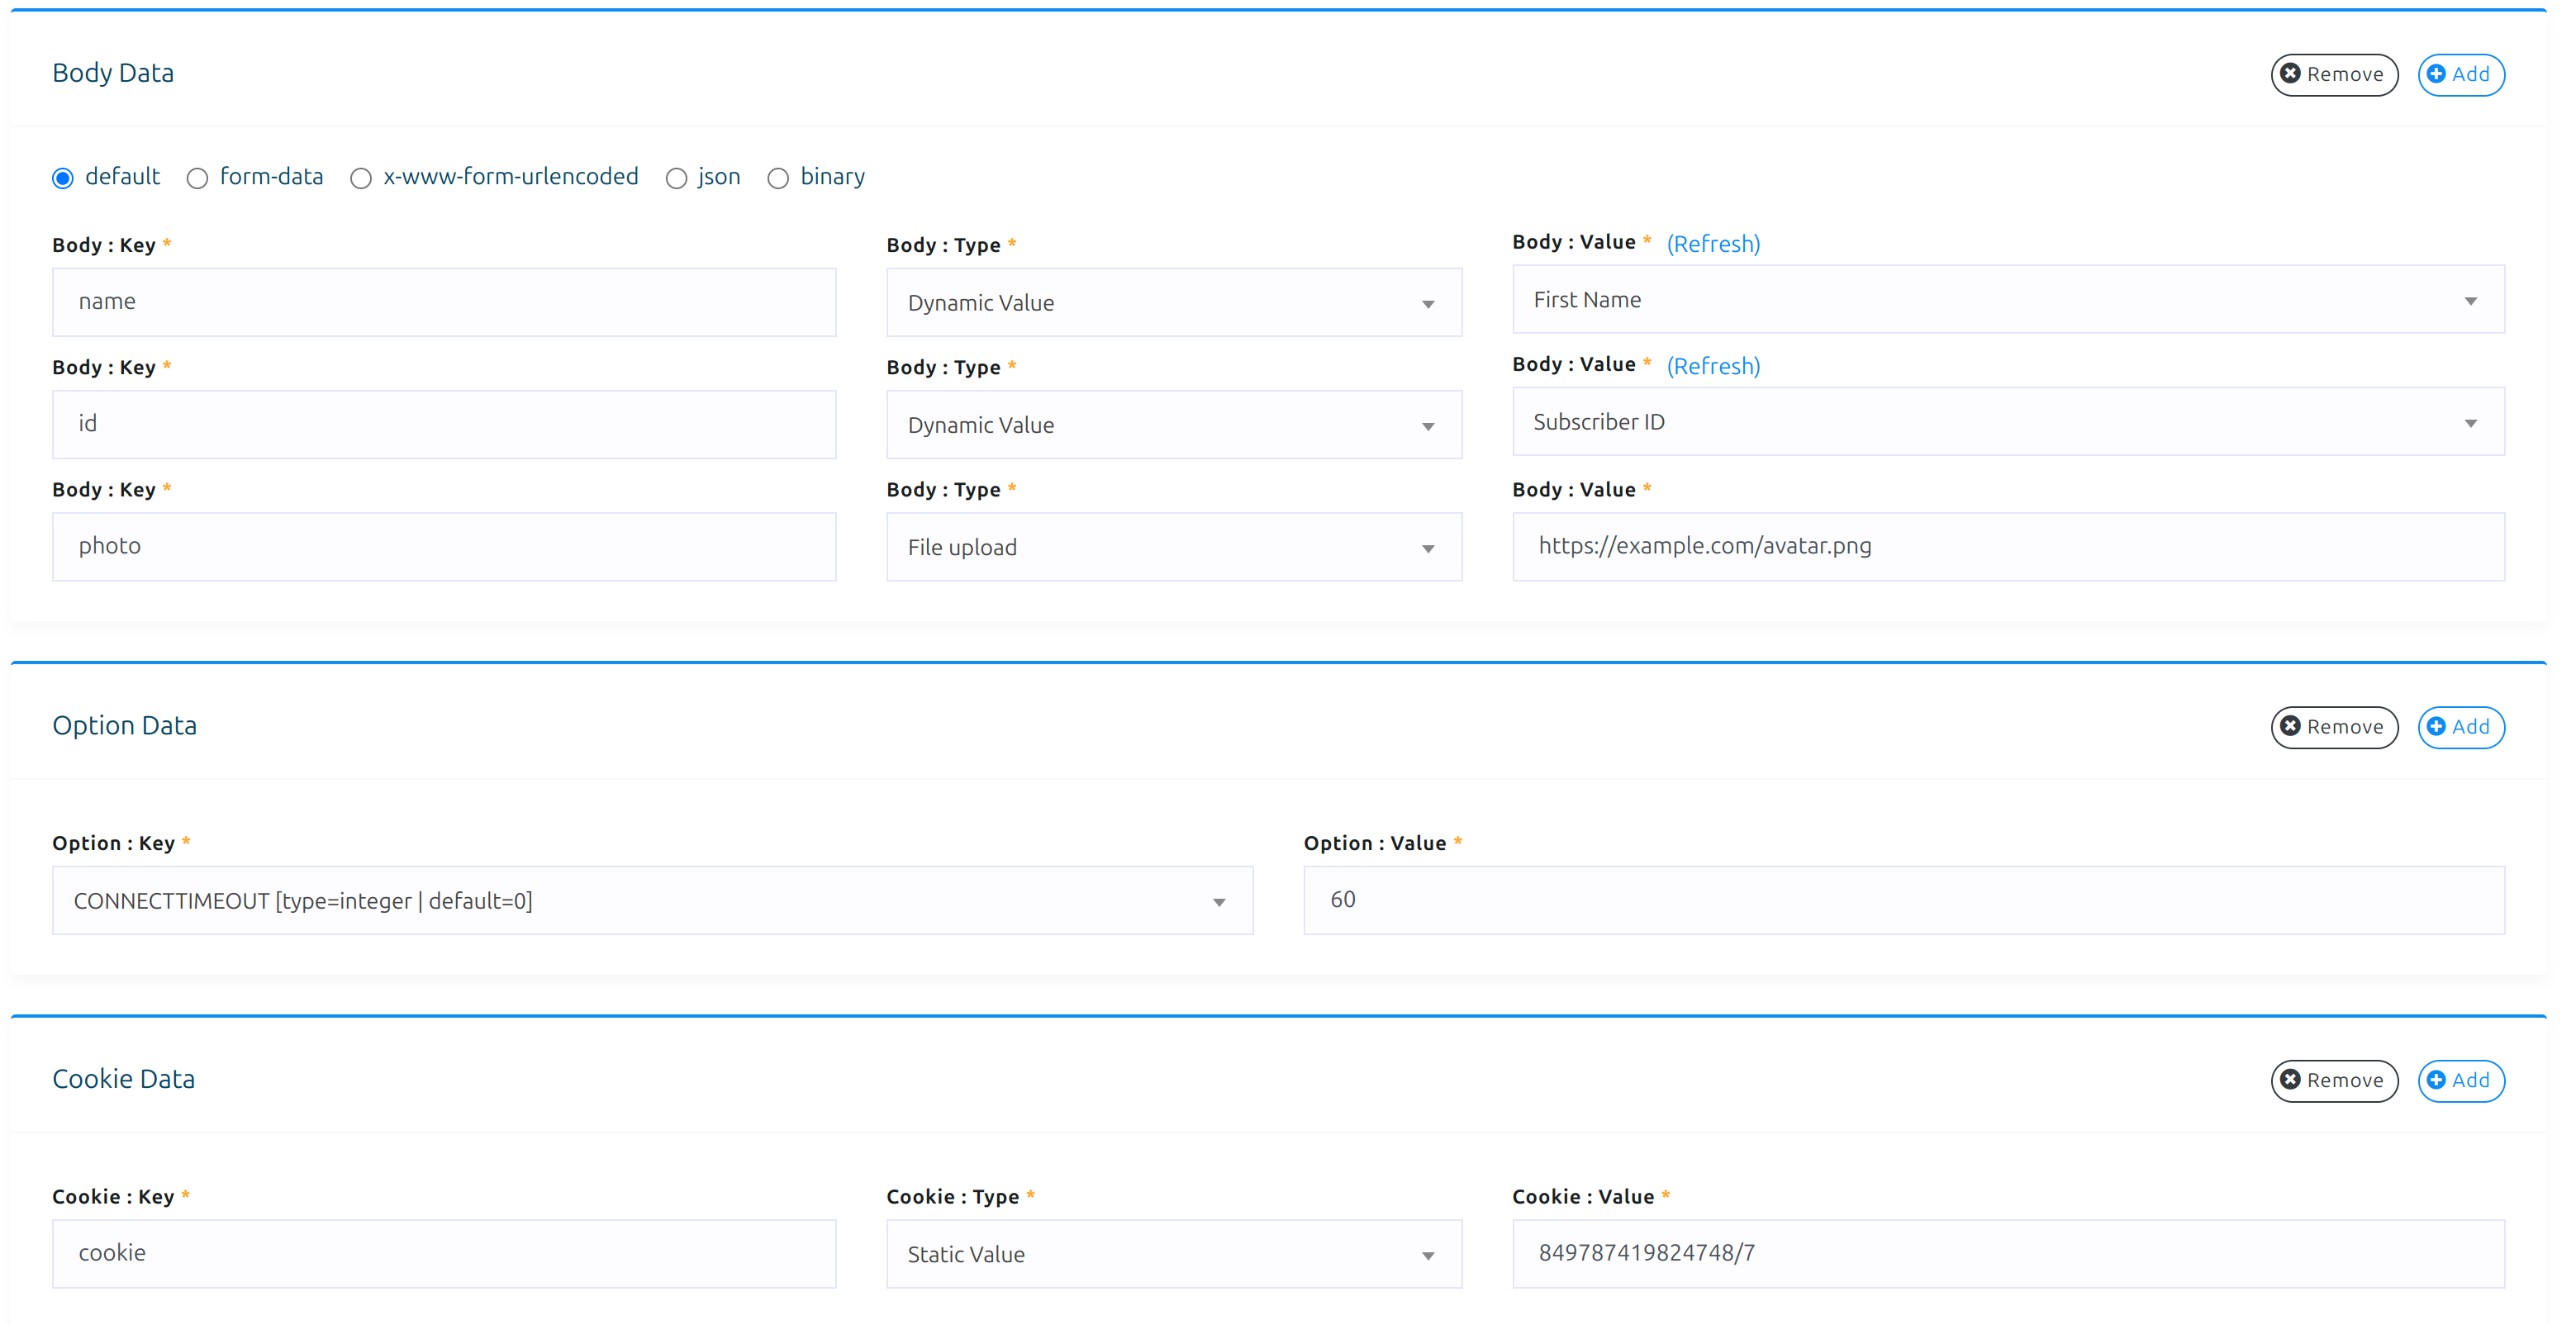
If the API request requires data to be sent in the body (for POST/PUT requests), configure the fields here:
- Body Data Fields: Add the necessary fields for the API request. For instance, in the screenshot, the body includes user data such as
name,id, andphoto.You can define whether each field is a static value (fixed value) or dynamic value (pulled from user input or external data). - You can switch between form data, X-WWW-FORM-URLENCODED, and raw formats depending on the API requirements.

Step 5: Save and Verify the Connection
Once you have entered all the required fields:
- Click on the "Verify Connection" button. ChatPion will send a test request to the external API to ensure everything is configured correctly.
- Once verified, click Save API to finalize the connection.
Step 6: Map API Response Data
After a successful API connection, you can map the response data back into your workflow:
- HTTP API Response Mapping: This section lets you map fields from the API’s response to subscriber data or other variables within ChatPion. For instance, if the API provides a
phone number, you can link it to the subscriber’s profile in ChatPion. Additionally, various formatters can preprocess or modify the API data before assigning it to subscriber data. For example, to remove a country code from a phone number before saving it to the subscriber’s profile, you can apply the "Trim Left" formatter.

Step 7: Use in Flow Builder
Once your API is integrated and the response mapping is set up, you can now use this API connection within your Flow Builder to trigger API calls at different points in your chatbot’s conversation flow.
- HTTP API Element : Inside the Flow Builder, You can add HTTP API Element anywhere you want.
- Configure when and how the API should be called based on user interactions.

Summary
With this setup, you can fully integrate external APIs into your ChatPion workflows, allowing for actions such as creating users, retrieving subscriber data, or updating external systems directly from your ChatPion chatbot flows.


0
5359
Social Media Management