
No need to pay third parties for building email templates!
ChatPion has come up with a brand new module called Drag & Drop Email Template Builder. It has a very simple interface. It has been made such a way that its user can create an HTML Email template within a few seconds. Just drag and drop the elements you need and build your HTML email templates without paying third party services for months.
Let’s see how to build your email templates for your products or any other purposes. Today, I’m going to show you how to create an HTML email template using ChatPion’s Drag & Drop Email Template Builder. Say, we’re going to create a campaign for our specific product.
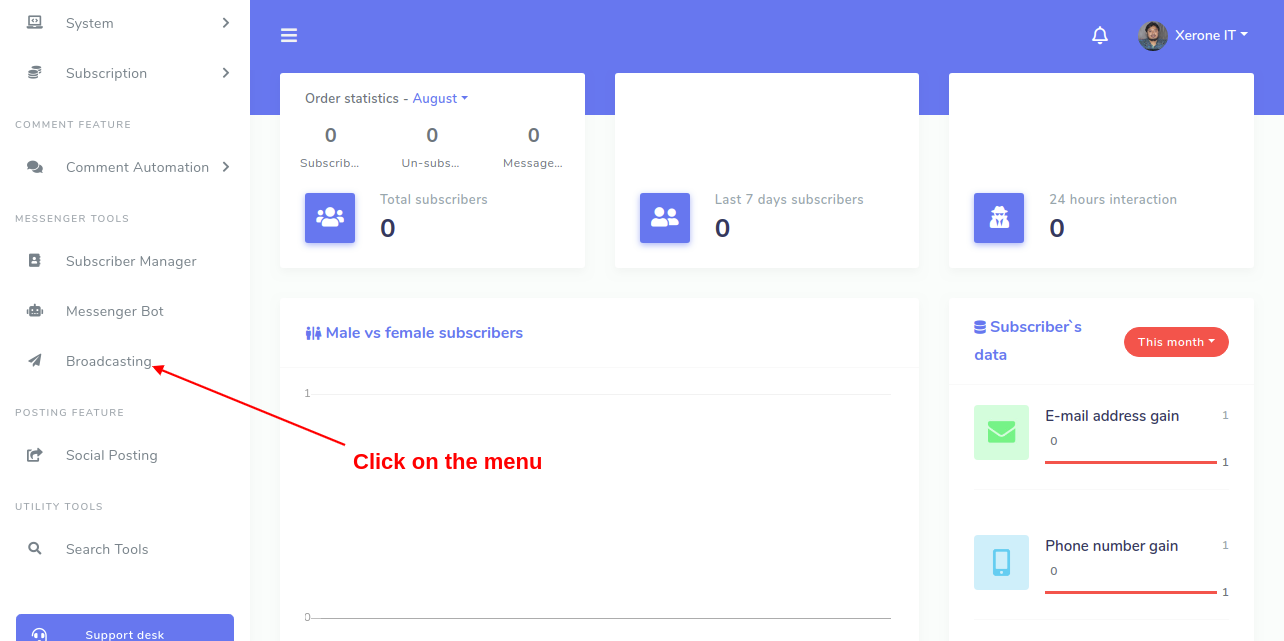
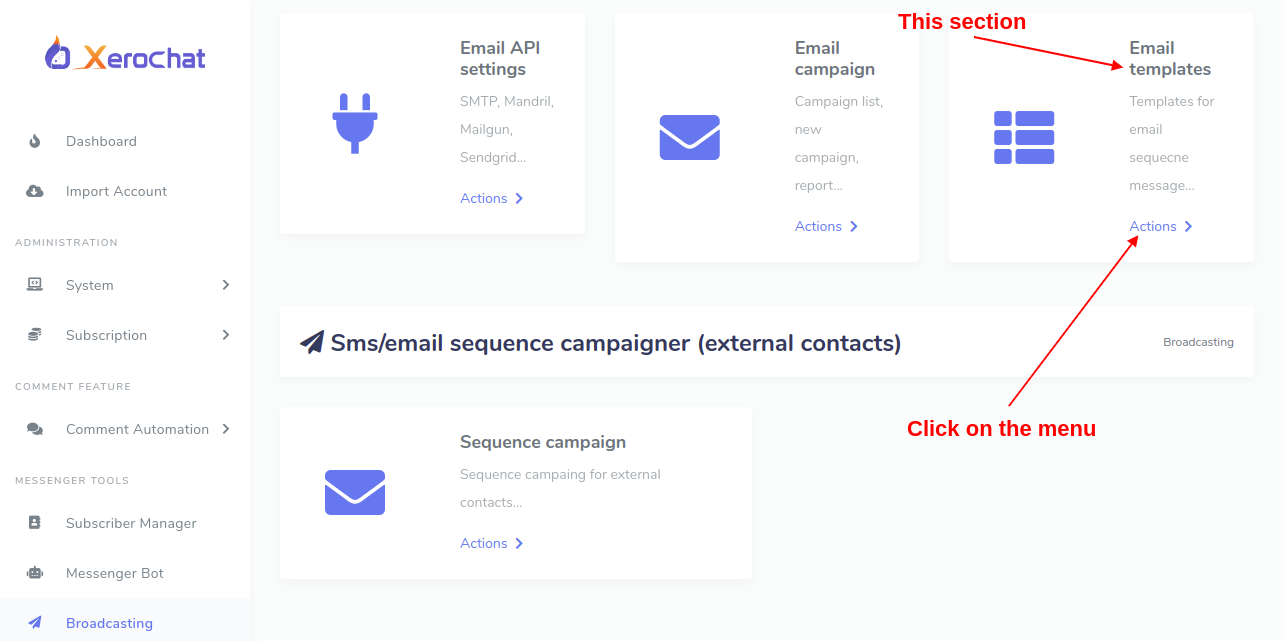
Log in to your ChatPion’s dashboard. Click on the menu named Broadcasting. When you’re on that page, find out the section that says Email Templates. And click on the Actions link. After clicking on that link, you should see an interface where you can find templates that have already been created.
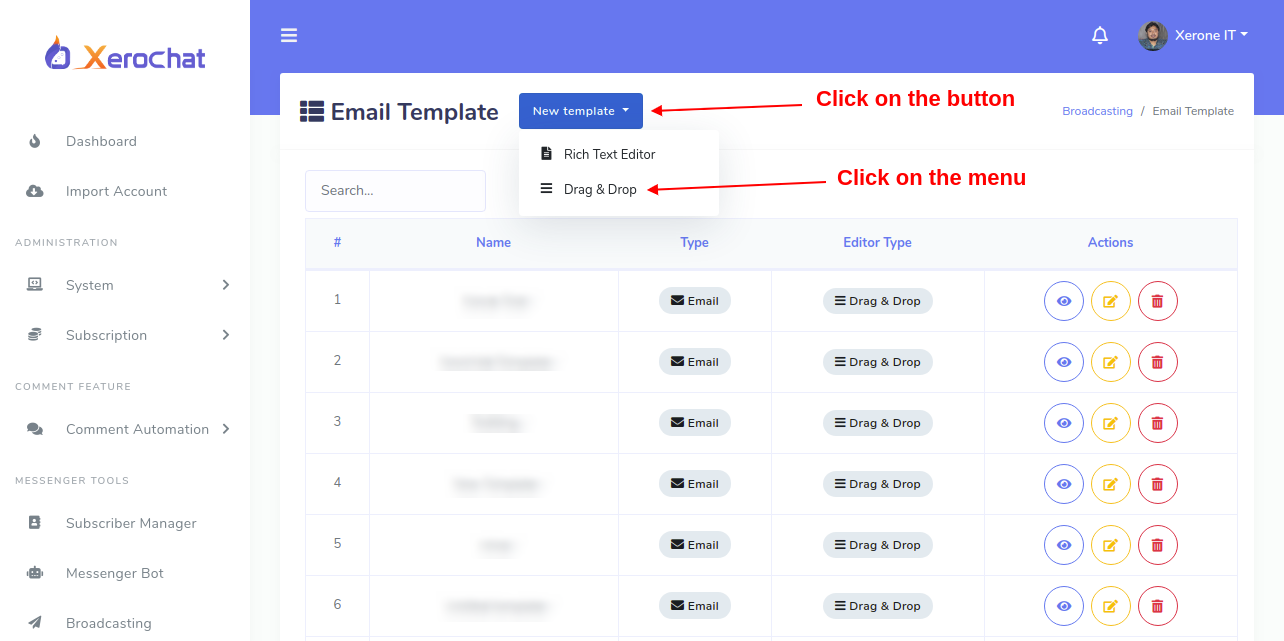
When you’re there, click on the button named New template and then click again on the link named Drag & Drop. It will take you to the interface where you need to choose which template you’re going to work with.
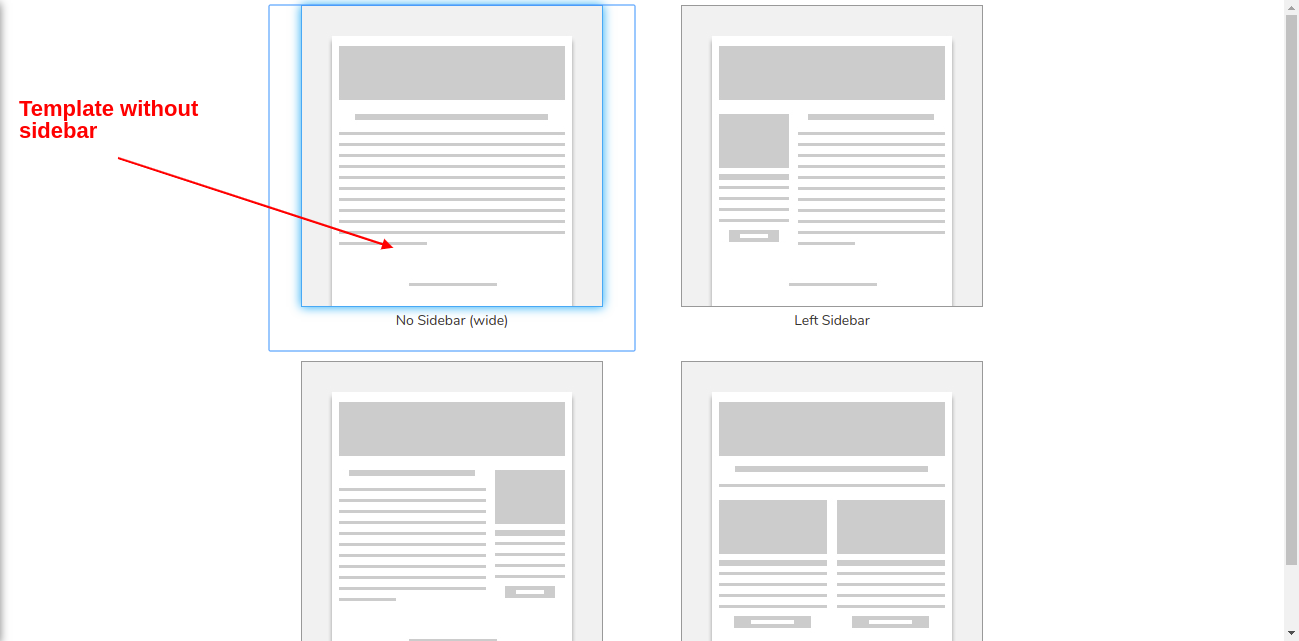
In my case, I’m going to choose the boiler-template without sidebars as marked below:
Now it’s time to build the email template for the product I want to promote/campaign with. But before starting, let me tell you what components do what tasks. Please check out notes on the following screenshot:
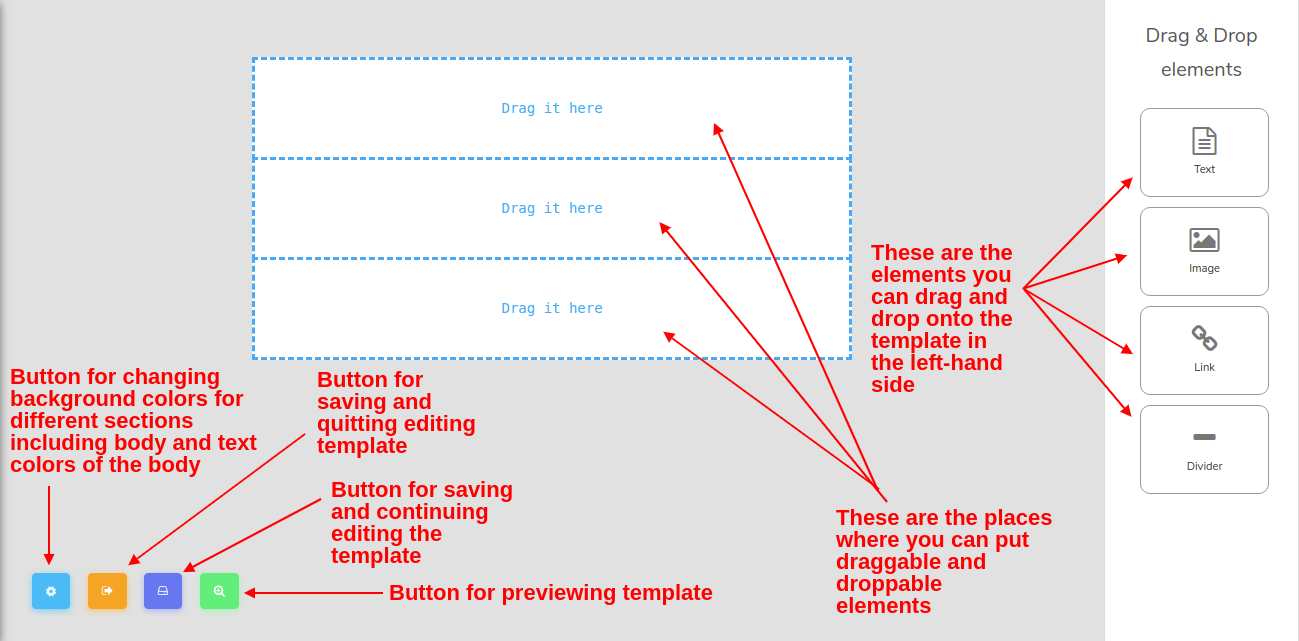
Well, assuming, we are now somewhat familiar to the components and parts of the template builder. Let start building our template. First, I will change the background color of the body. To do that you need to click on the Layout options button which is the 1st button from the left side as the screenshot says below:
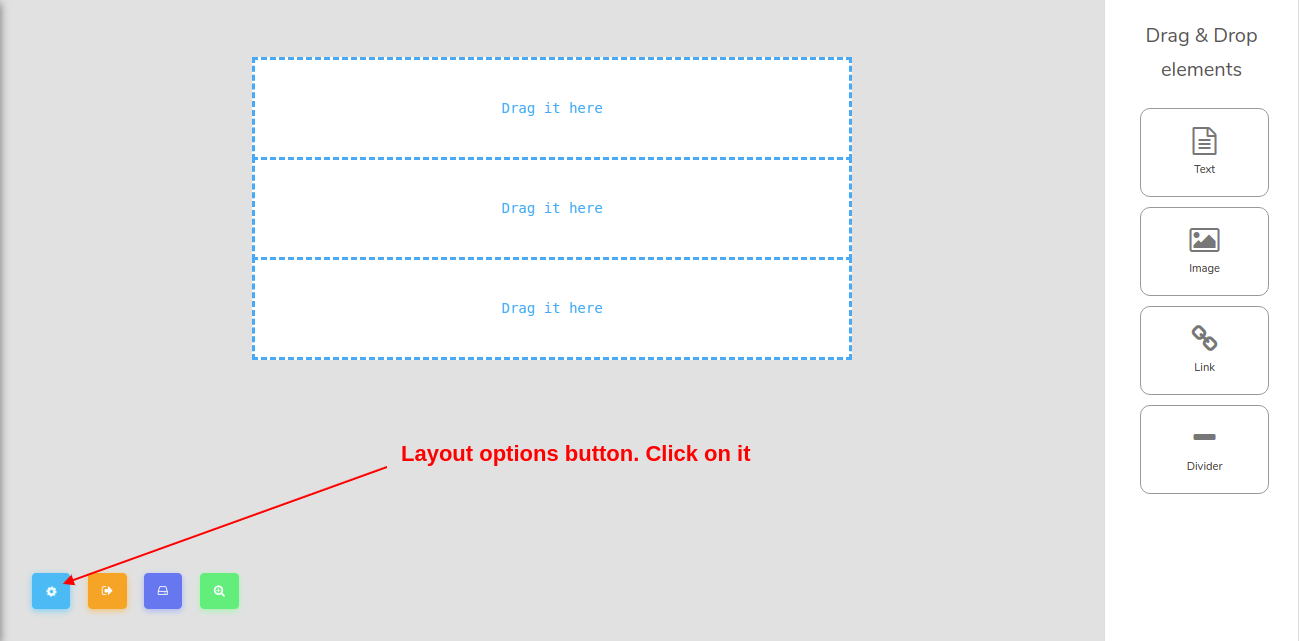
Upon clicking on that button, it will open up a box from the left side. See the screenshot below:
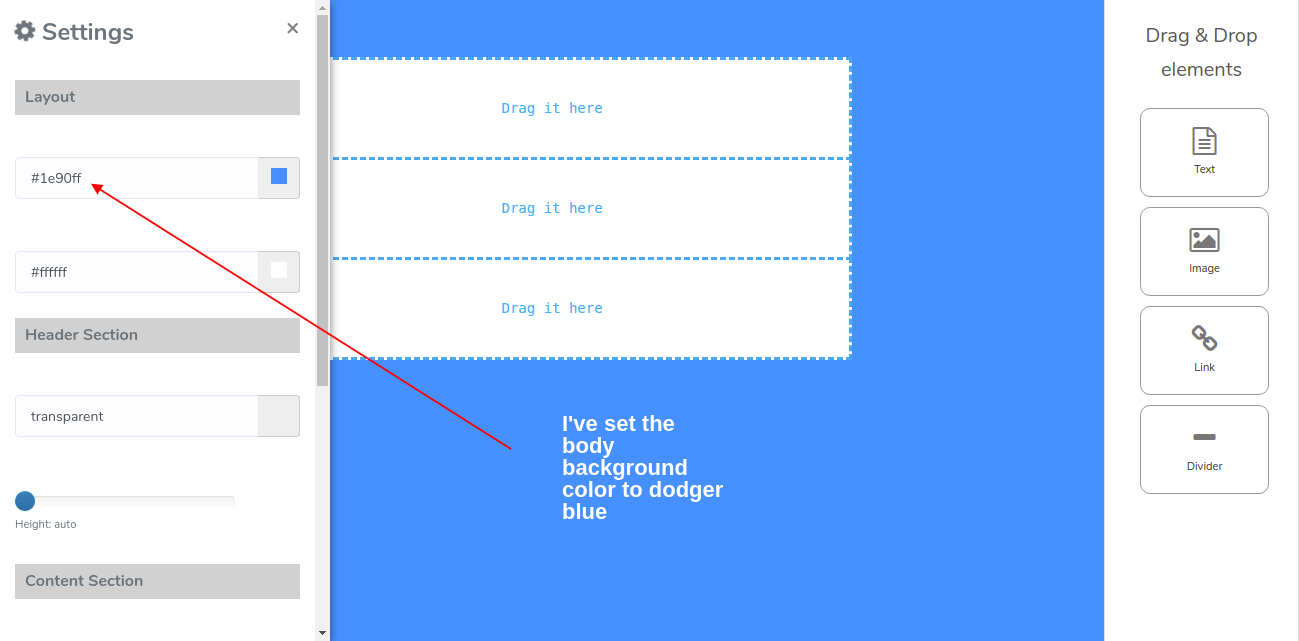
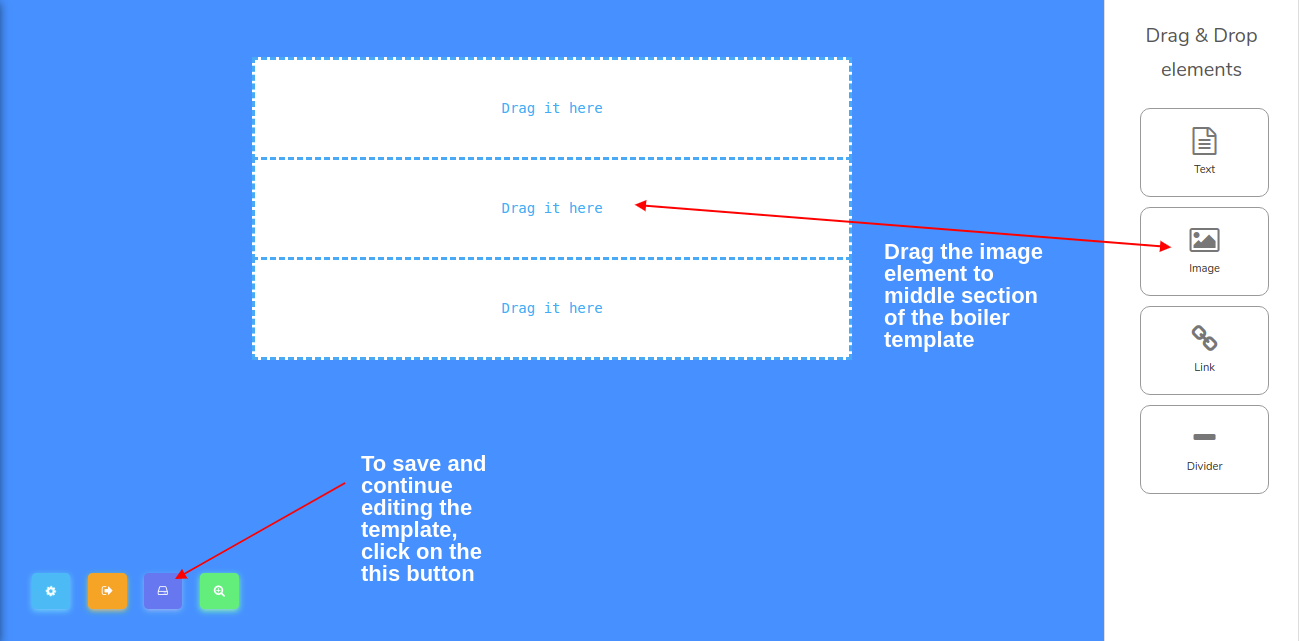
I’ve set up the body background color to dodger blue. You may choose one that you prefer. Now I will save the template and continue editing. To save and continue editing the template, I will click on the Save template button. Okay, now our template has been saved. Now I will drag the image element from the Drag & Drop elements bar to the middle section of the template. It will look like the following screenshot:
Now click on the dummy image that we get after dragging the image element. It will pop up a tiny modal. You can either upload an image from your computer or put the image source in the specified input filed. Check out the following screenshot:
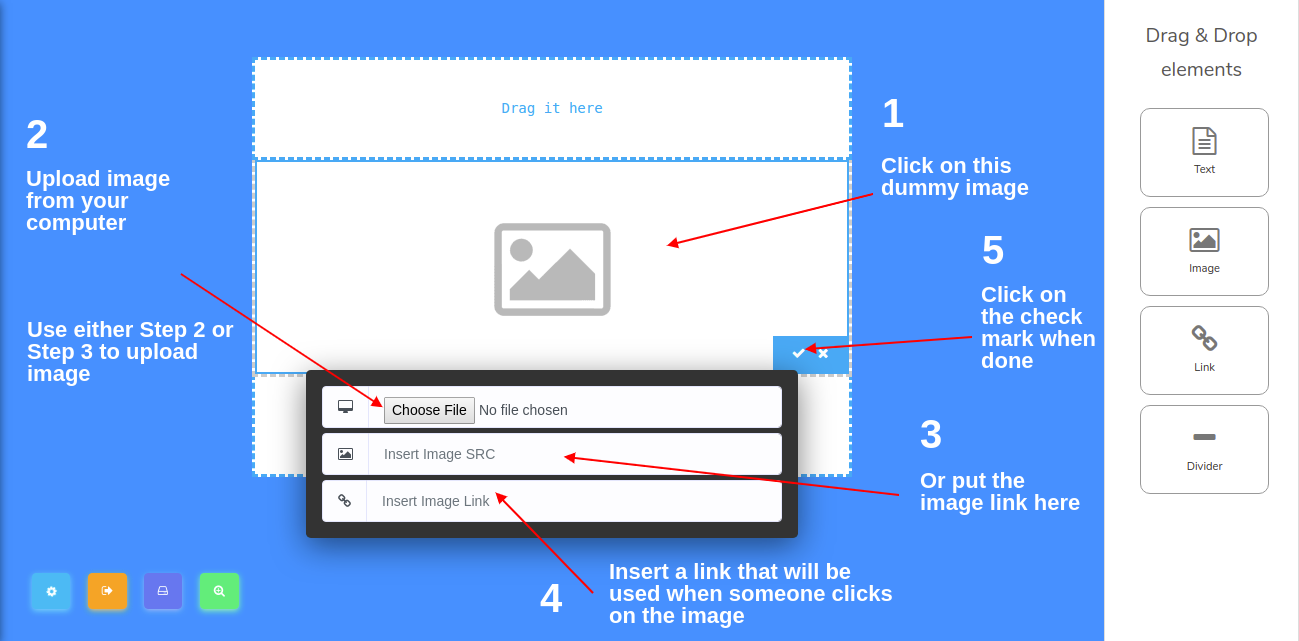
Now I will upload my product’s image, for example, and set the product’s link to the image as described in the screenshot above.
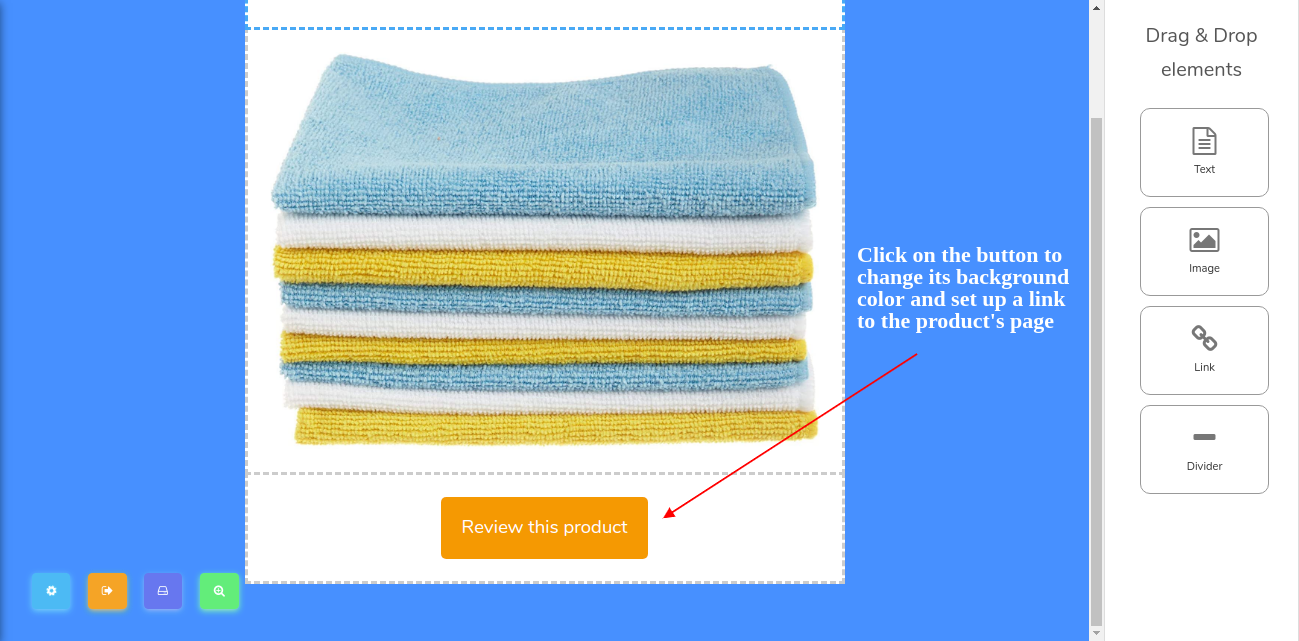
Next, I will add a button. To do that I need to drag the button element to the template’s end section. And to change its background color and to set up a link of the product’s page I need to click on the button. I get this modal when clicking the button:
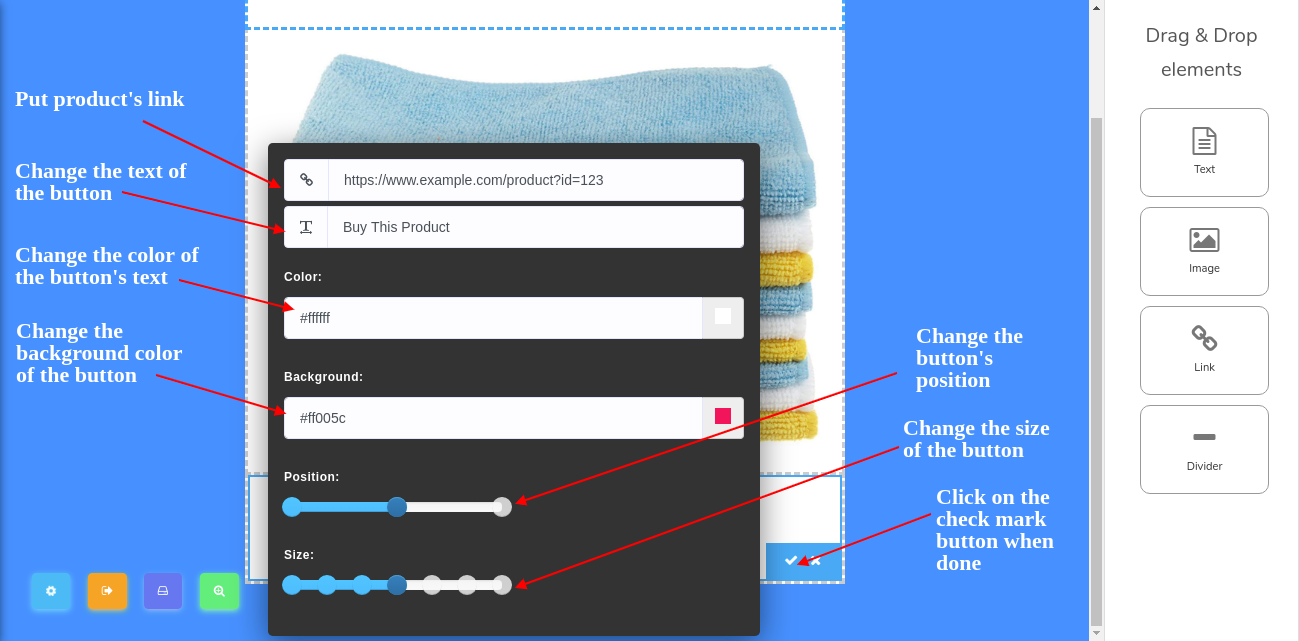
Now I will add a couple of link elements and a text element. Before doing that let’s see what’s in it. Check out the screenshot below:
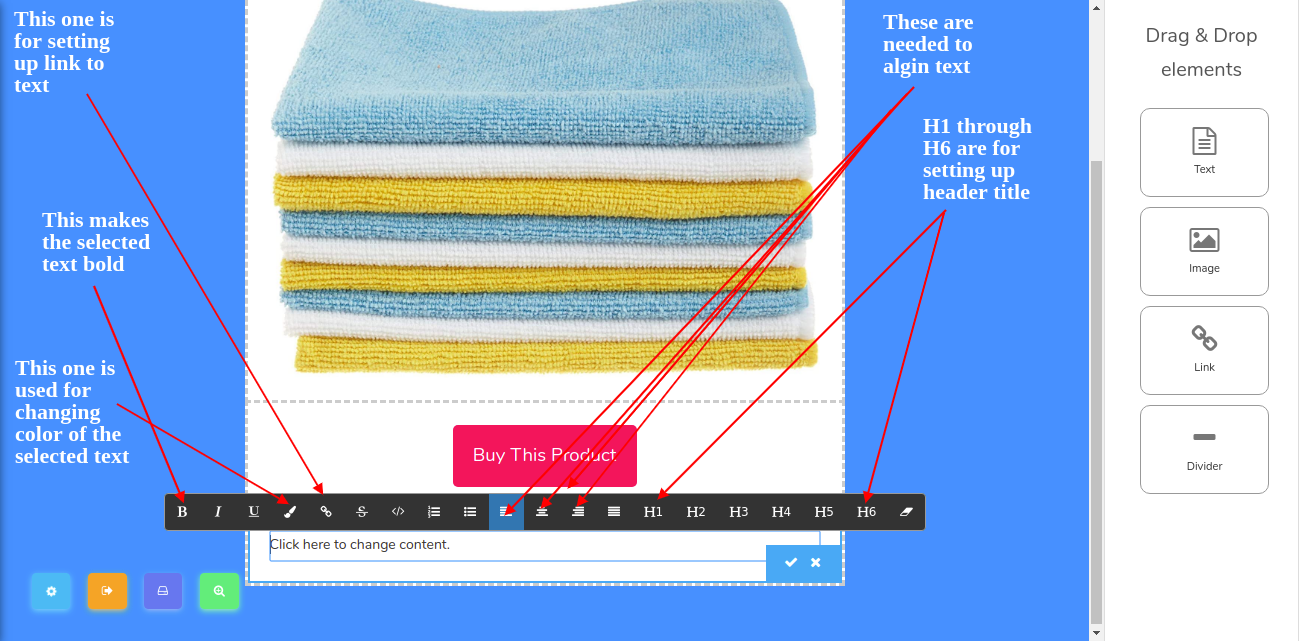
I’ve added two text elements and made two links. One is for the Facebook page and the other is for unsubscribing. Now I’m done. See its preview as the following:
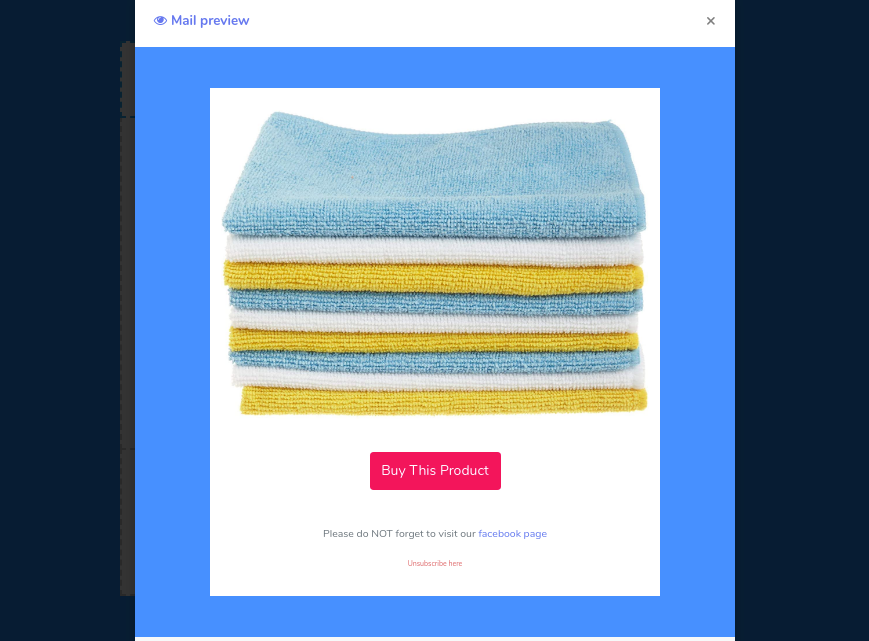
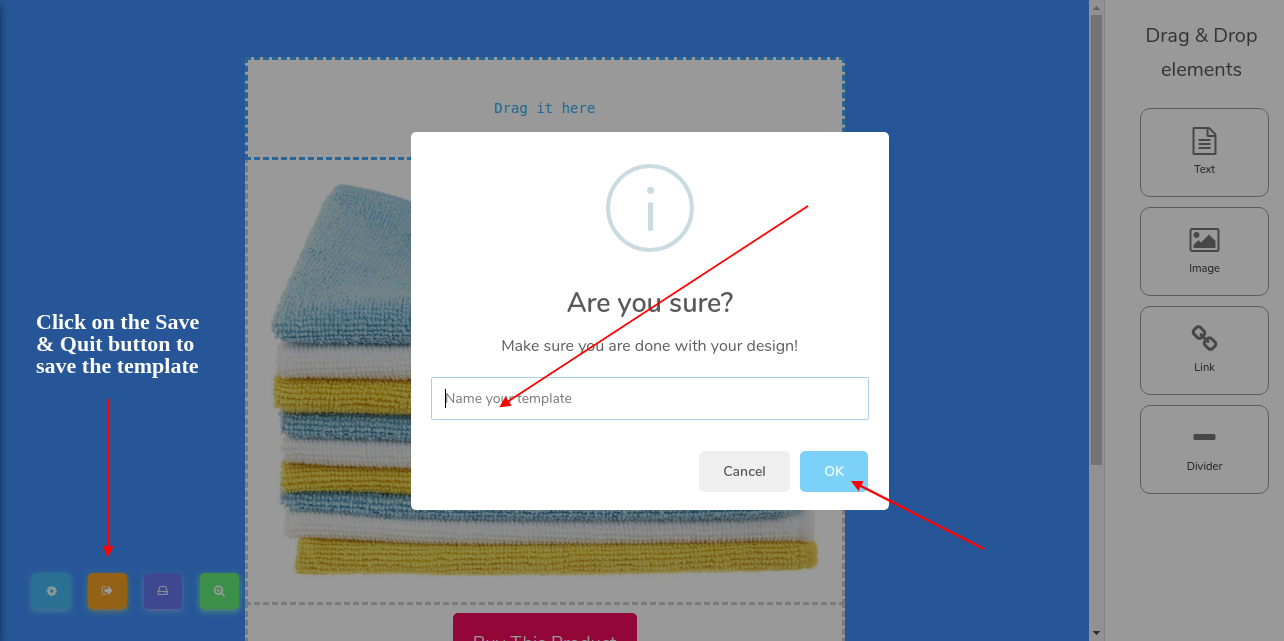
As I'm done with building the HTML email template, it's time to save the template and quit the interface. To do that you need to click on the Save & Quit button. It will then pop up a modal that will ask for the template name. So put the template name as you need. Click on the OK button when done. See the following screenshot:
Video Tutorial
If the above explanation won’t help you, you may proceed with the video tutorial.
Enjoy building email template!
6 Comments Login to comment
-
Hello how can I set image size? I want to upload a logo but it's widht is by default set to 100% so the image occupies all template widht and it's not a good effect for a small logo image.
Thank you -
Hello Xero Team, I have not got this functionallity yet, my system version is v4.2.9, It is comming on the next upgrade? Regards.
-
xeroneitbd Admin
5 years agoYes, It's coming on the next update during XeroChat 5.0 release.
-
xeroneitbd Admin
5 years agoXeroChat 5.0 update has been released.
-
-
Hello Xero Team, I have not got this functionallity yet, my system version is v4.2.9, It is comming on the next upgrade? Regards.
-
xeroneitbd Admin
5 years agoYes, It's coming on the next update during XeroChat 5.0 release.
-


6
9888
Social Media Management