
How to Create Google APP & Submit for Google My Business Approval For XeroBizz
Hi, Welcome to the XeroBizz Google App Settings instructions blog. XeroBizz is the most powerful application for Google My Business Service. In this blog, we will guide you on Google App Creation, Google App submission. So let’s get started !!
How to Create Google App for XeroBizz
As XeroBizz is the application for Google My Business Service, you must have a Google App and have to integrate with XeroBizz application. So please follow the below steps to Create your Google App for XeroBizz.
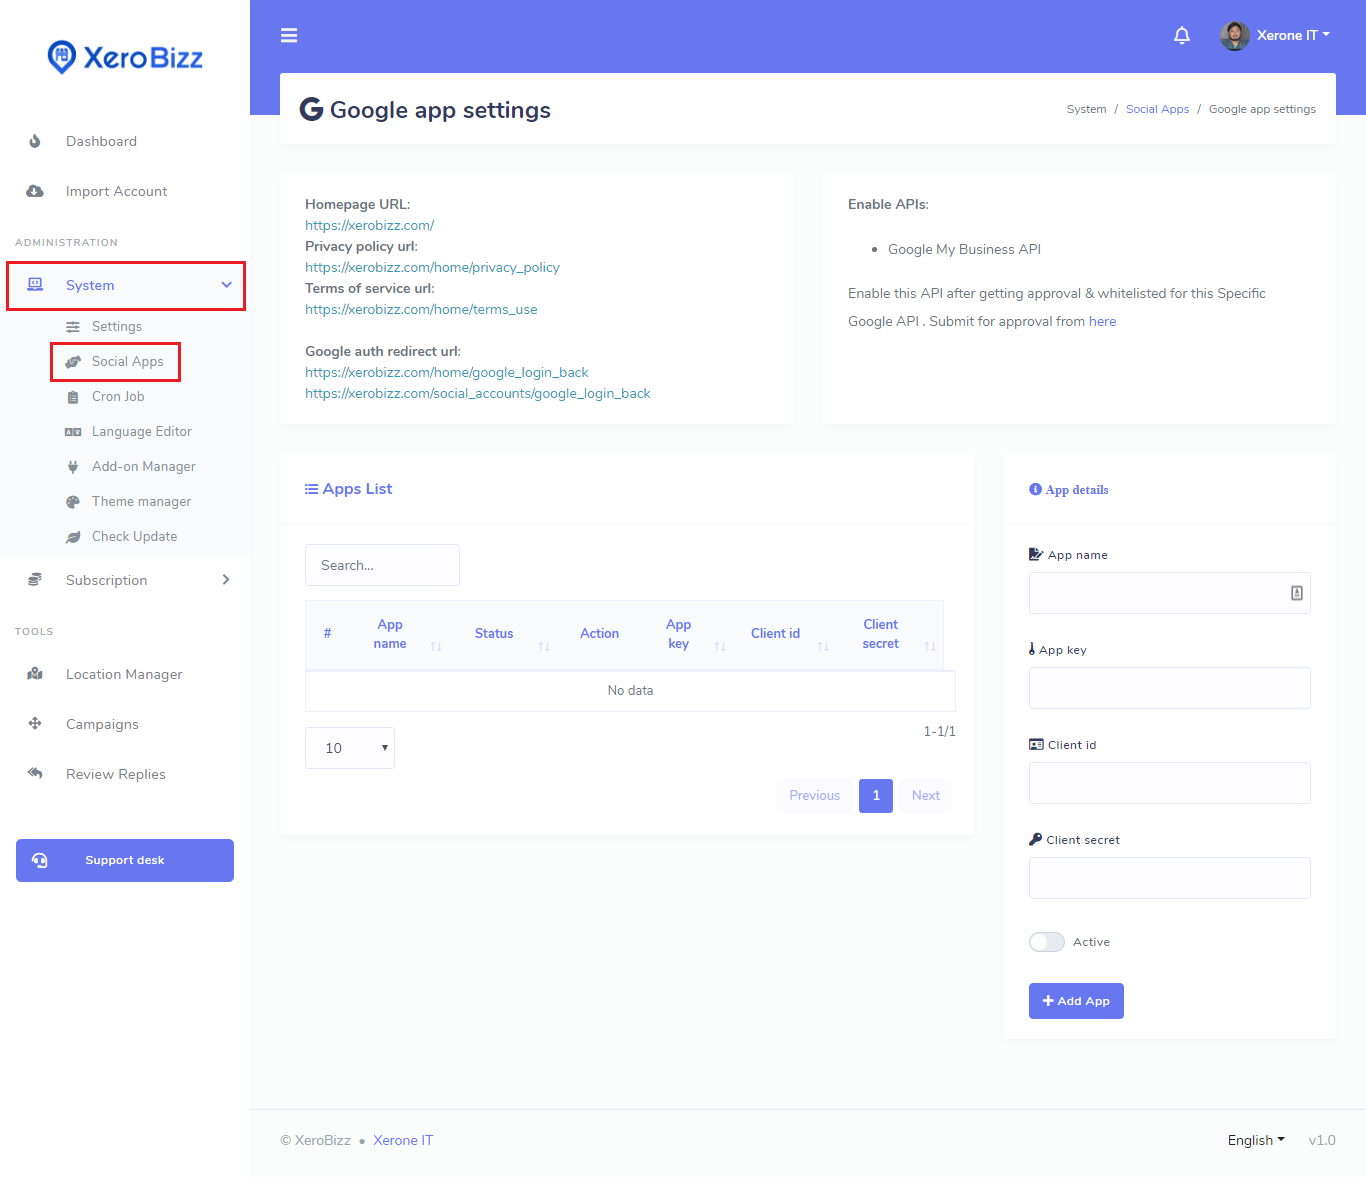
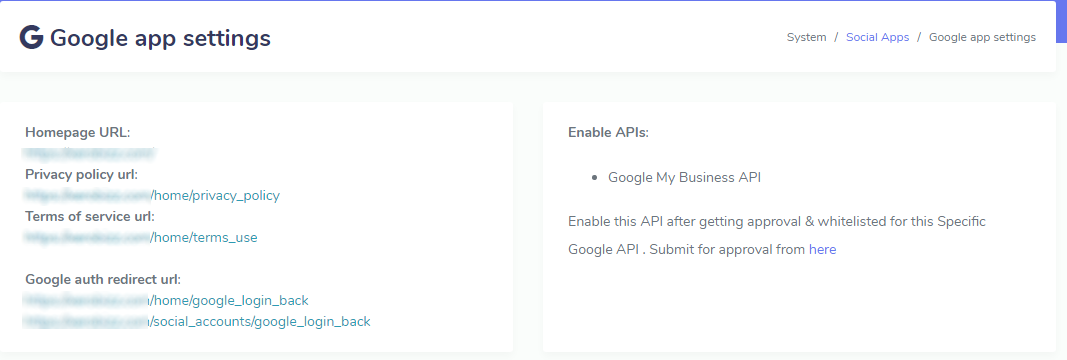
- First Of all, Go to System -> Social Apps -> Google menu of your XeroBizz Application. You’ll find the App integration form there. You’ll need Google App Key, Client ID, Client Secret to integrate Google App with XeroBizz application. So follow the next couple of steps to get done.
- Go to Google API Console
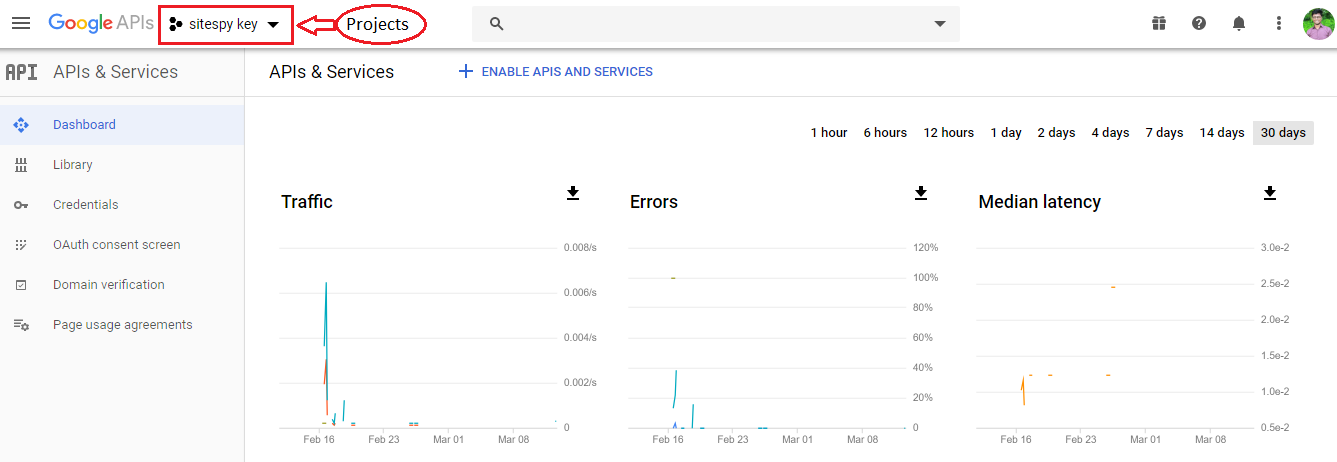
- Click on the Project option of the top left corner and then click on the New Project button on the top right corner in modal (see below images).
- Then click on the Newly Created Project and you will find your newly created project details there.
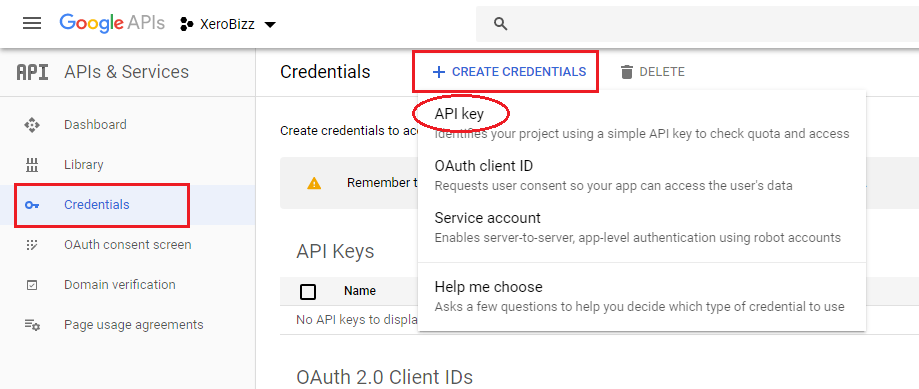
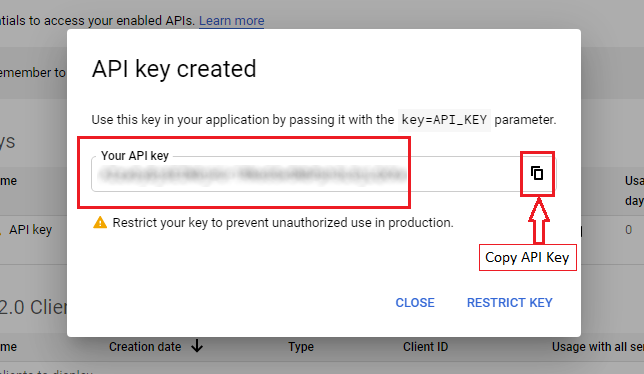
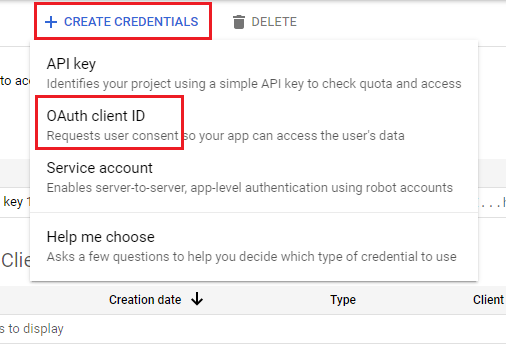
- Now click on the Credentials button from the left-side menus and click on the Create Credentials -> API key option. A modal with API Key will appear. Copy that API Key and paste it on XeroBizz Application’s Google App integration form’s API key field.
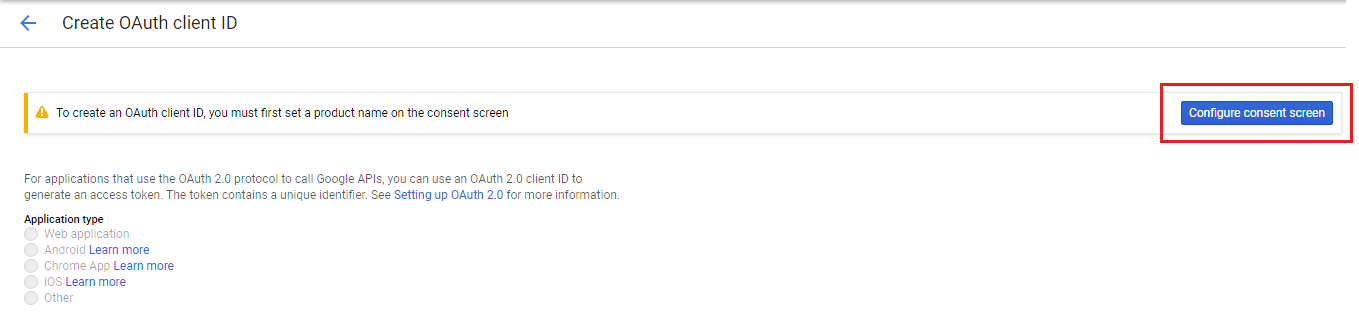
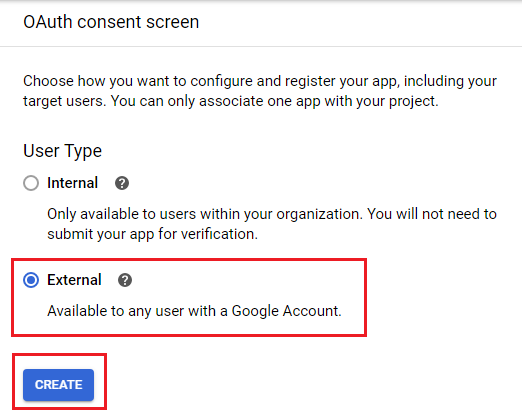
- Now click on Credentials -> OAuth client ID option. Click on the Configure Consent screen button, select External as User Type and hit Create button.
- Now A form will appear where you’ve to provide your application’s details (which is available in your xerobizz application’s Google App settings section at System -> Social Apps -> Google section).

Application Name : Provide your app name.
Application Logo : Upload your app logo here.
Authorized Domains : Provide your application domain and hit Enter key.
Application Homepage Link : Put here XeroBizz application’s Homepage Link here. (see image)
Application Privacy Policy Link : Put here Xerobizz application’s Privacy Policy Url here (see image)
Application Terms of Service link : Put here XeroBizz application’s Terms of service URL ( see image )
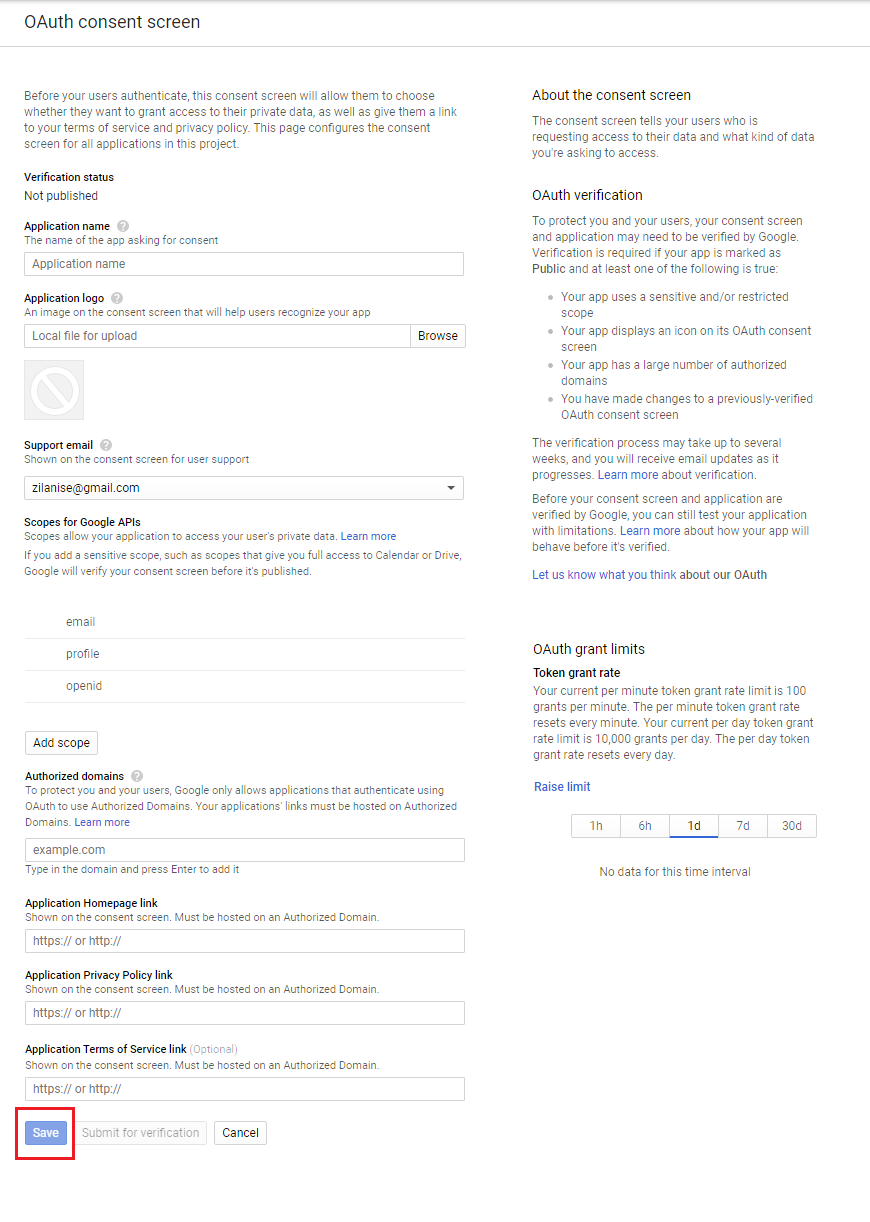
Now hit the Save button.
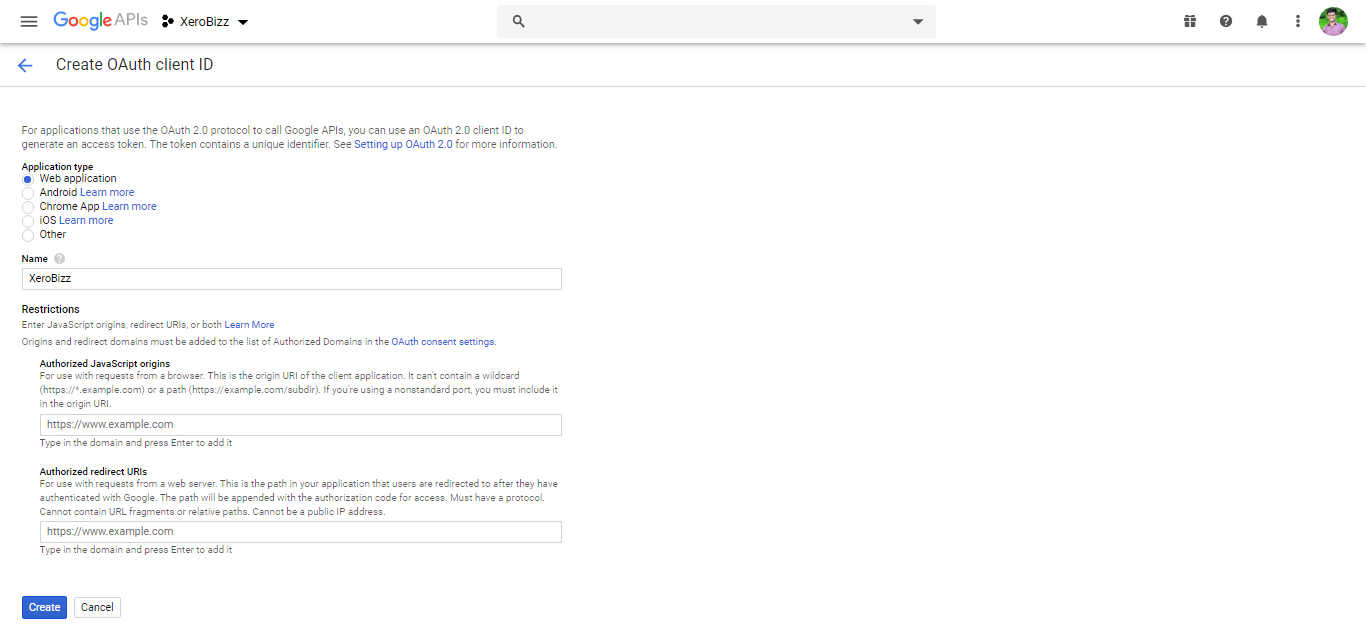
- Now go to Credentials section from the left-side menus and click on Create Credentials -> OAuth client ID and select Web application as Application type, a form will be shown below where you’ve to provide Authorized redirect URIs which are available in XeroBizz applications Google App Settings section (see image ). Copy Google auth redirect url from XeroBizz application and paste here and hit enter key to add. Then click the Create button.
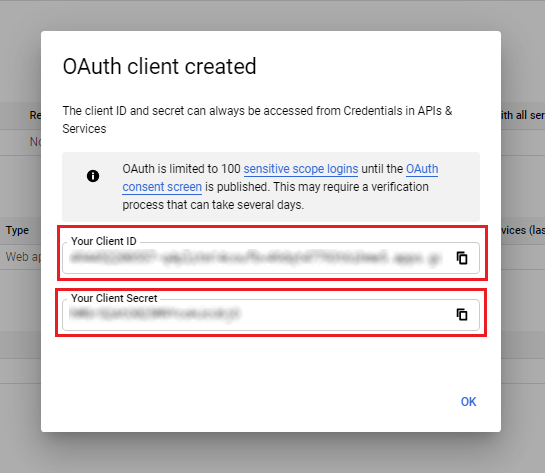
- A modal will appear with your Client ID and Client Secret. Copy them one by one and paste them into the corresponding field of your XeroBizz application’s Google App creation form, hit Save button.
Now you’re done of Google App creation. If above guideline won’t help you, then we’ve also created a video guideline for you on Google App Creation.
How to Submit Google My Business API Approval Request
For Google My Business API Approval Submission , Use your actual business website & google map listing, not XeroBizz website domain.After Creating Google App, now you’ve to submit your Google App for Google My Business service. Please follow the below video tutorial for Google App submission.
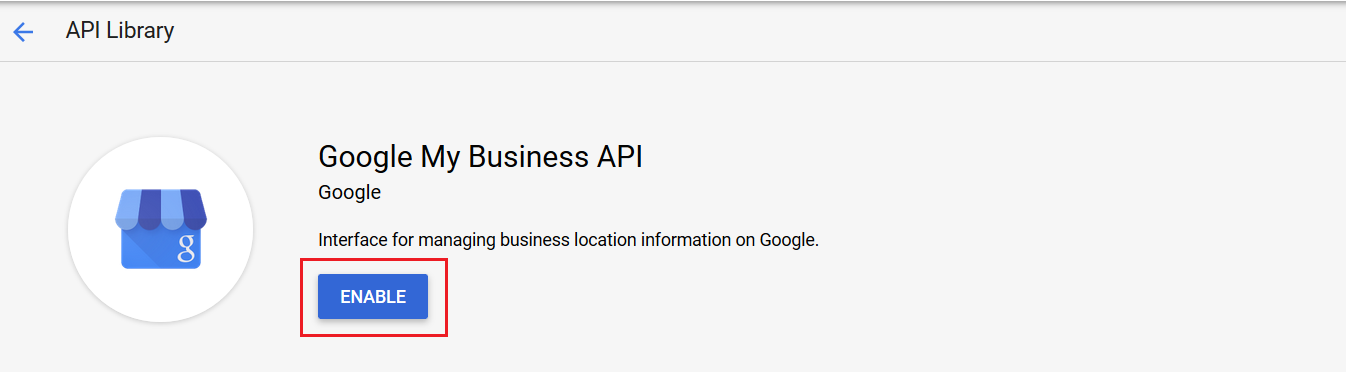
Enable Google My Business API
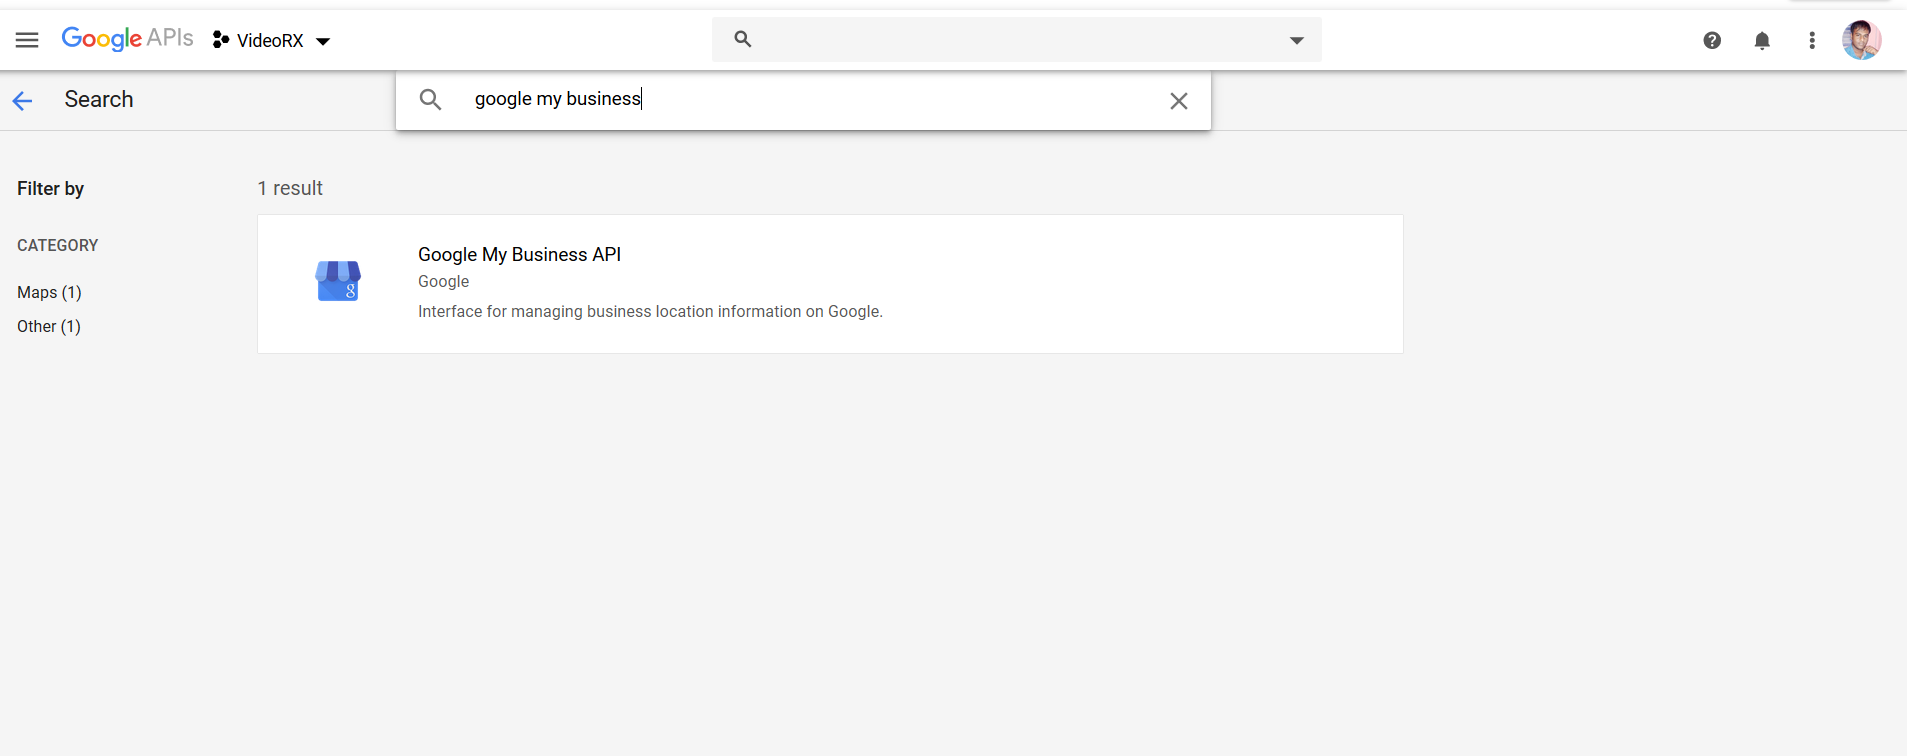
After getting Google App approval, now you need to enable Google My Business API from the library. Click on the Library menu from left-side menus and search for Google My Business API and enable API.
Now you're done. Enjoy all the amazing features of XeroBizz.


1 Comments Login to comment
-

Google my Business API is not approved. I followed the same steps. If its not approved there is no point of buying your script.
1
10050
Social Media Management