Post Planner – a completely brand new module of ChatPion. It allows you to upload bulk image, link, and text campaigns via CSV file to be posted on specified social media.
Today, you’re going to see how to deal with Post Planner and make campaigns using CSV file upload. First of all, take a look at how the CSV file should be formatted with data.
The CSV file has to have 4 header fields with the exact name as the following – campaign_name, campaign_type, message, and source. These are the required header fields. The values for the campaign_name field may be optional. But you have to put values for the campaign_type and message fields. The campaign_type must be one of three types – text, image, or link. The values for the source field may be optional, but we recommend you provide values for the source header field, especially for image and link campaign types.
How it Works
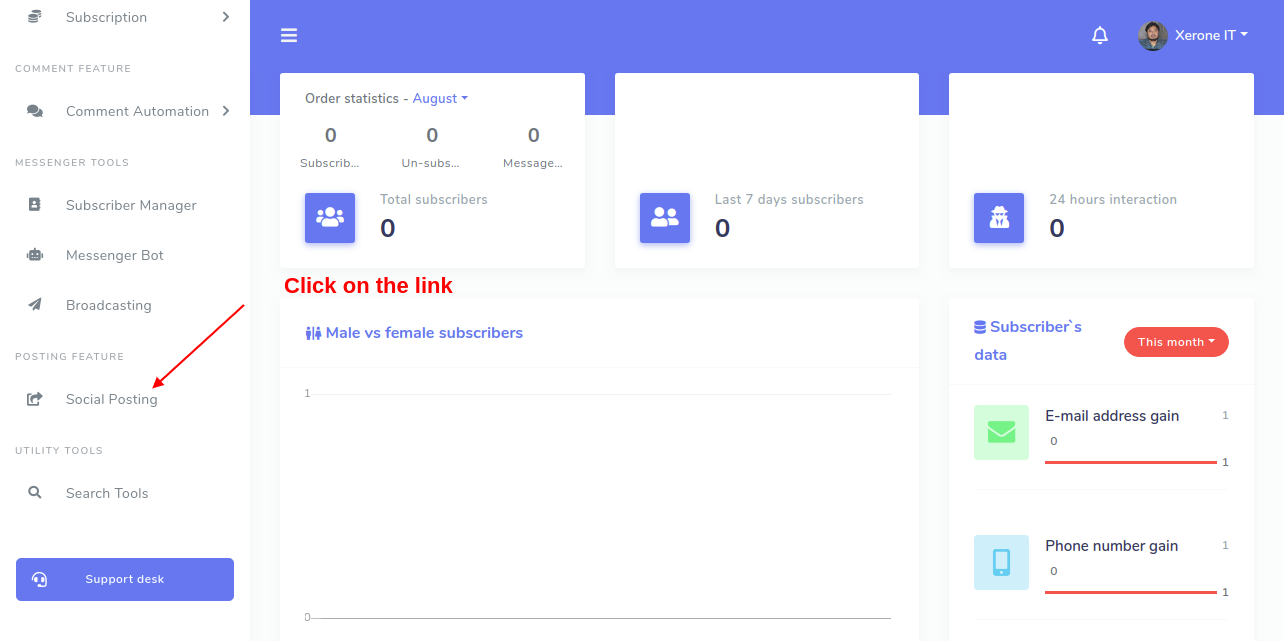
Log in to your dashboard then find out the Social Posting menu from the left-hand side menu box. Click on that menu. See the screenshot below:
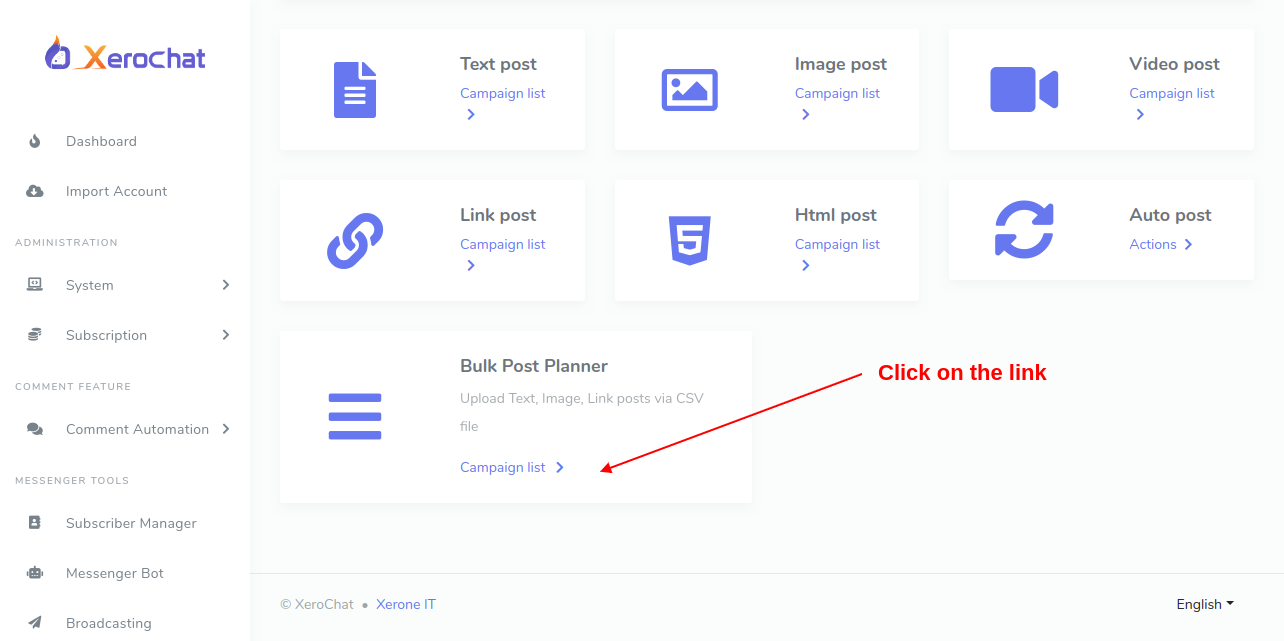
Now you need to scroll down onto the Social Posting page. Find out Bulk Post Planner module navigating box under the Social Poster section and click on the Campaign list link there as red-marked on the screenshot:
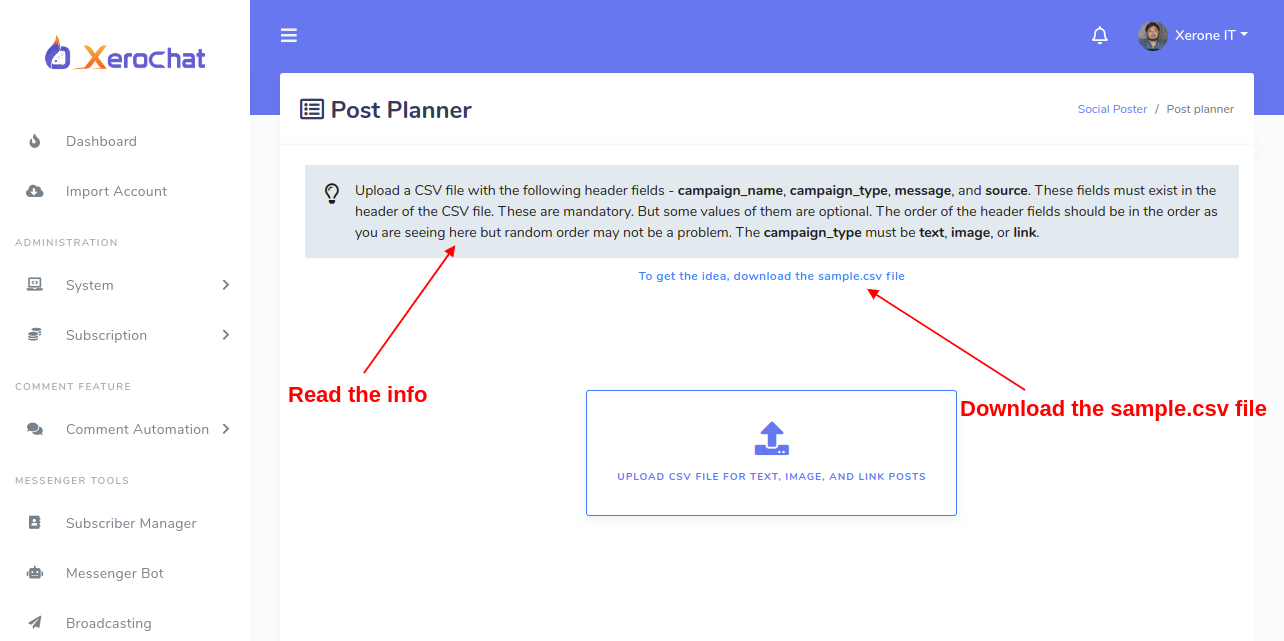
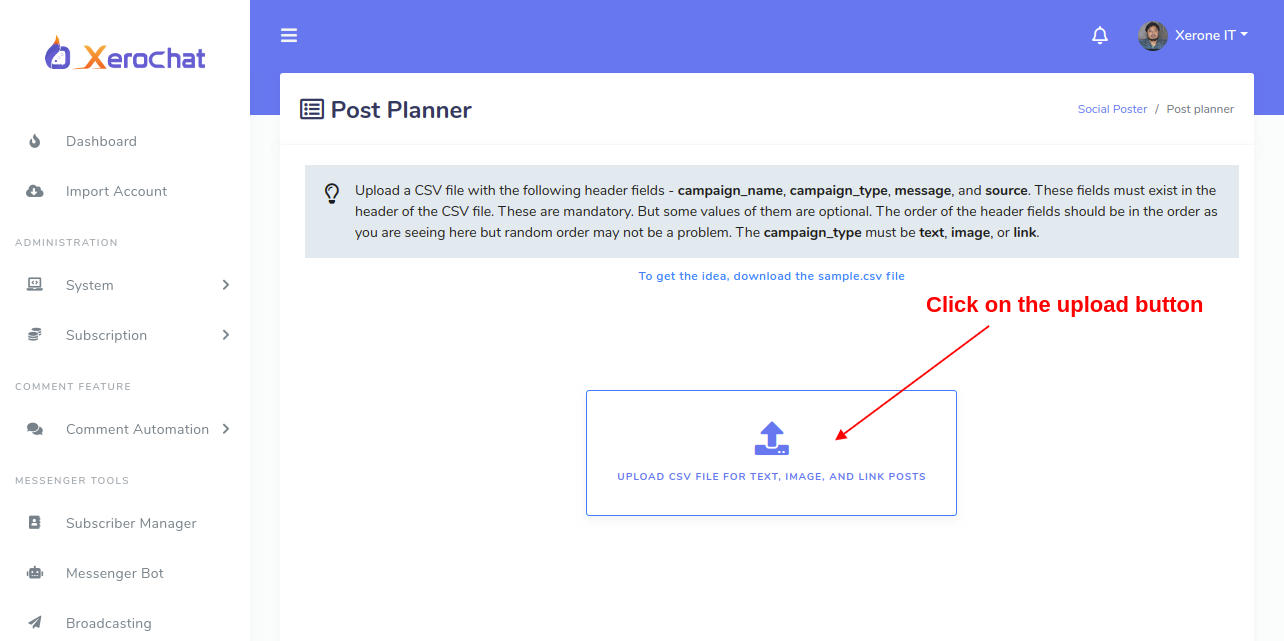
This will take you to the following interface. Read the information about how the data in the CSV file should be formatted. To get the idea, you could download the sample.csv file. Do it as described in the image below:
Once you’ve downloaded the sample CSV file or you’ve prepared CSV file, then you can upload it via the upload interface as described below on the screenshot:
Once you’ve uploaded the CSV file, you should then get an interface with a table that contains the data you’ve uploaded. At the top of the data-table, you should see two buttons named – Manual and Automatic.
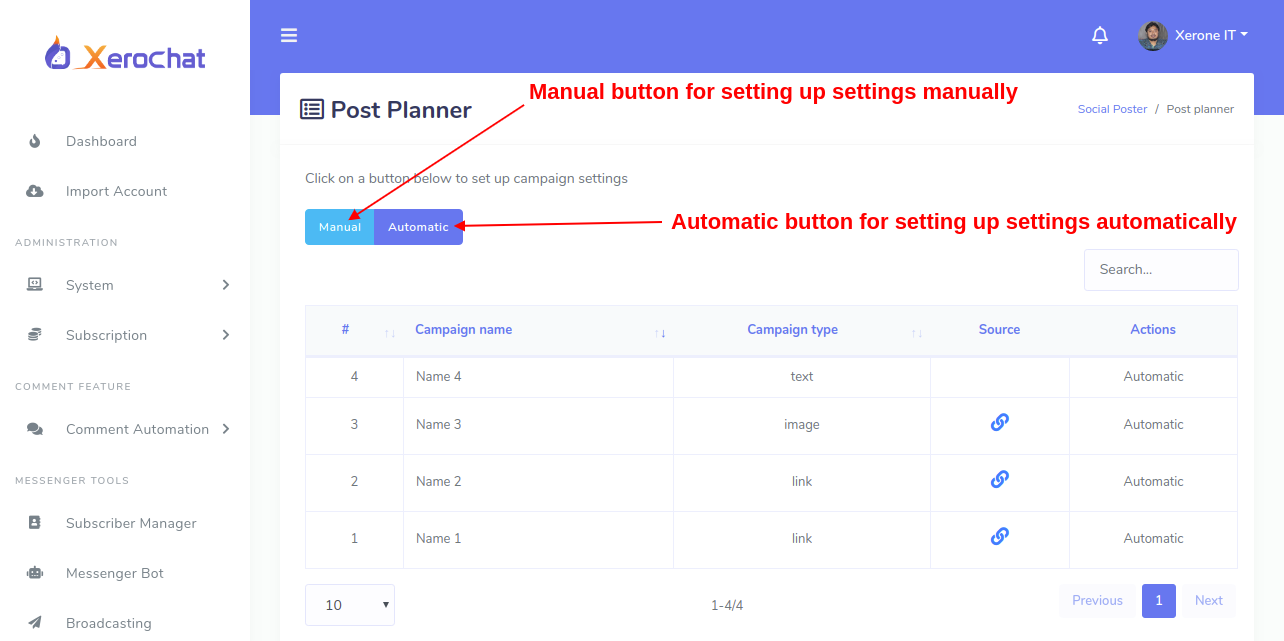
The Manual button allows you to set up date-time for each and every campaign manually while the Automatic button allows you to set up start-date, post-time-range, post-interval, and day-off for the campaigns and after that, the system will then automatically calculate your settings and apply them to the campaigns.
Automatic Settings
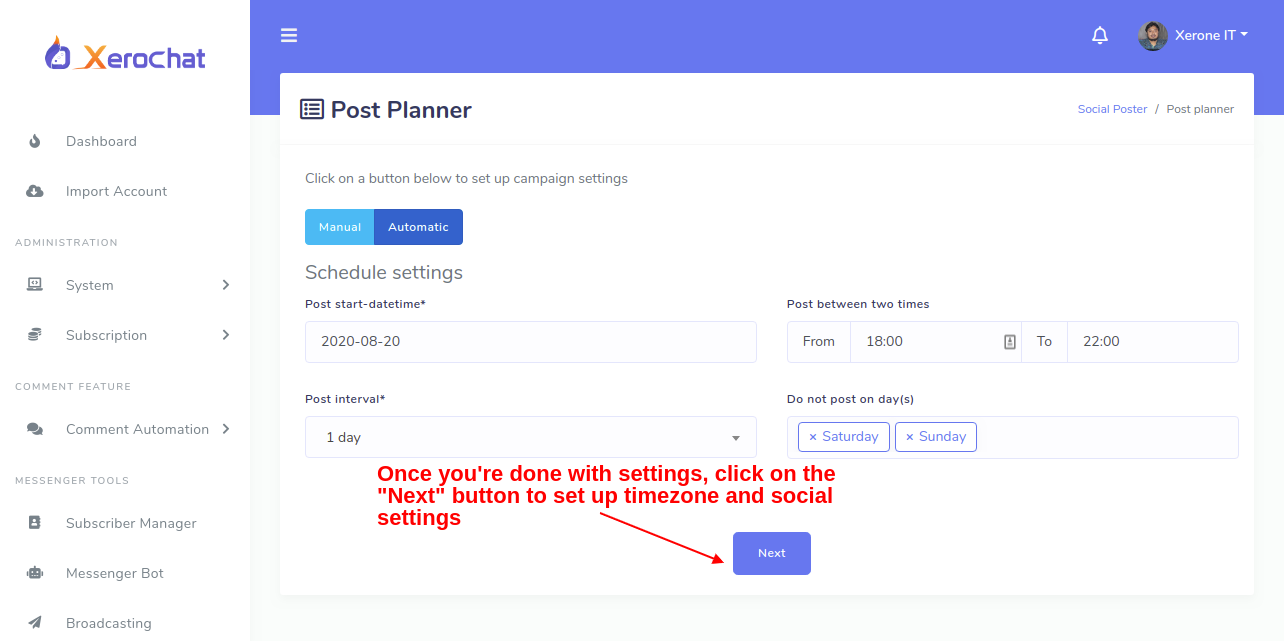
Let’s start with Automatic settings. Click on the Automatic button. It will hide the data-table and pop up another interface by which you can set up start-date, post-time-range, post-interval, and day-off. The start-date tells on which date you want the system to start posting on social media. By setting up post-time-range you tell the system to post on social media between two specified times of each day except those days that are off. The post-interval tells how often you want to post on social media. The last one, the day-off tells the system not to post on specified day(s). Once you’ve set up all the settings, click on the button below called Next. It is located under the Schedule Settings section of that page.
By clicking on the Next button, you will get a modal that will tell you to input timezone and social media settings. If you’ve imported social media accounts, then those media will be available via dropdowns on the modal. Click on the red-marked select-boxes to see them and select as your needs.
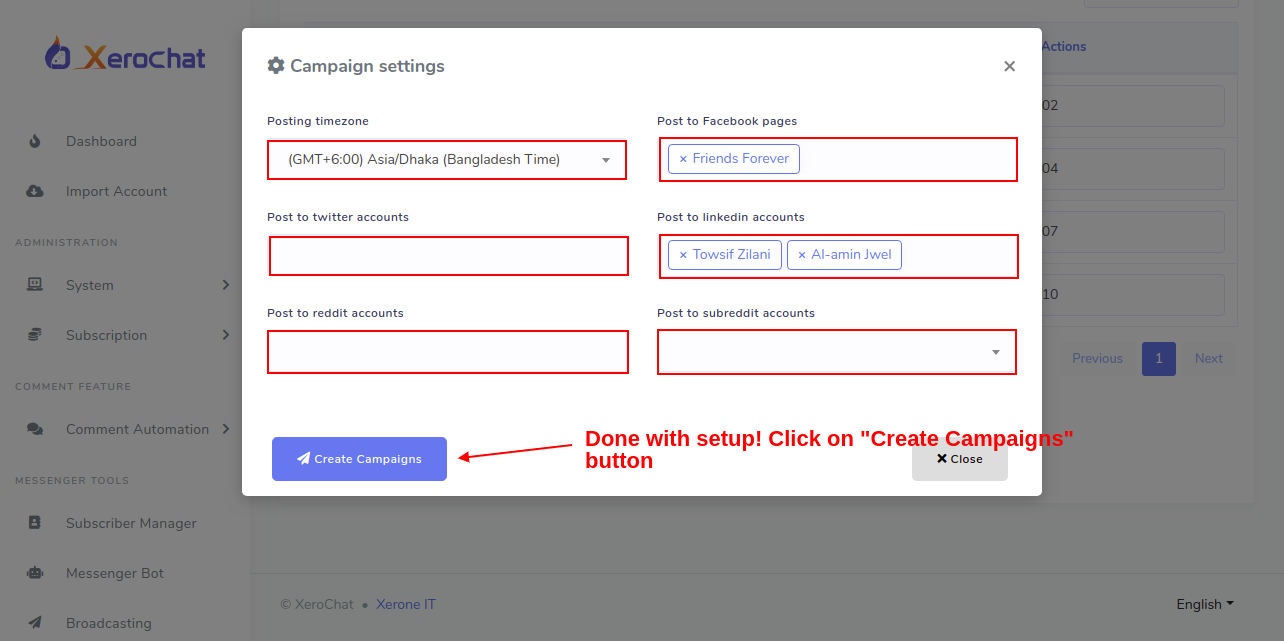
Once you’re done with the setup, you can create campaigns. To create campaigns, click on the button named Create Campaigns.
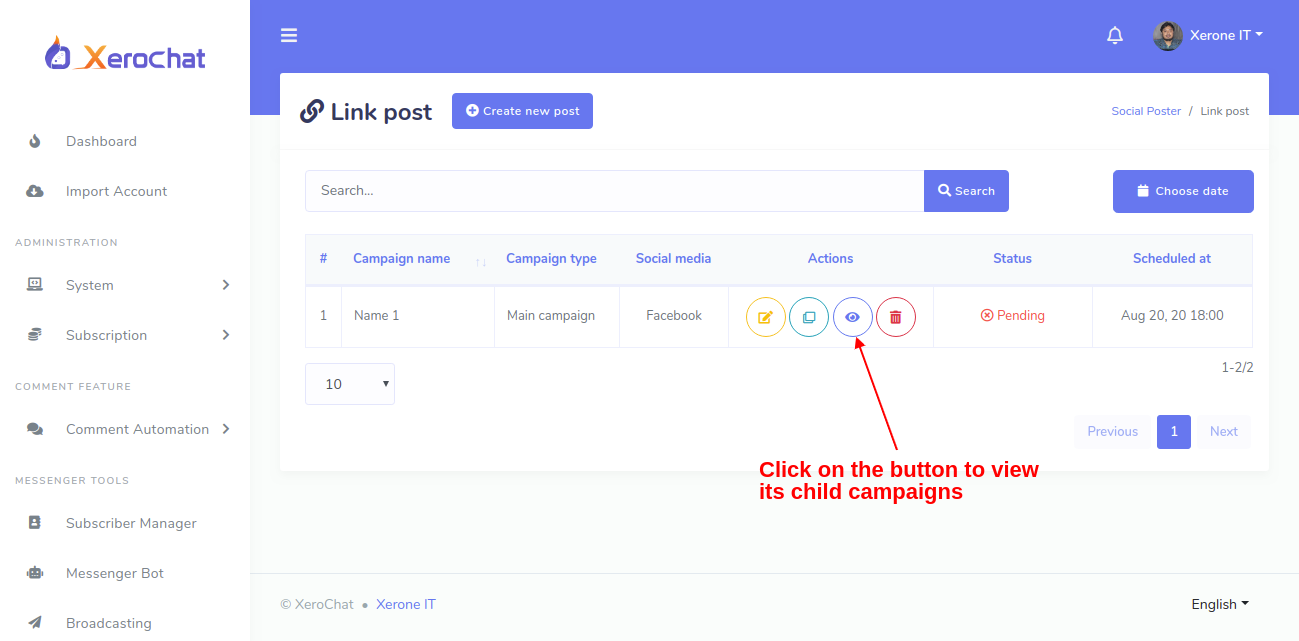
If everything goes well, the system will tell you about how many campaigns have been created from your CSV file upload. Now you can navigate to those campaigns created just now by clicking on them one by one. See the screenshot below:
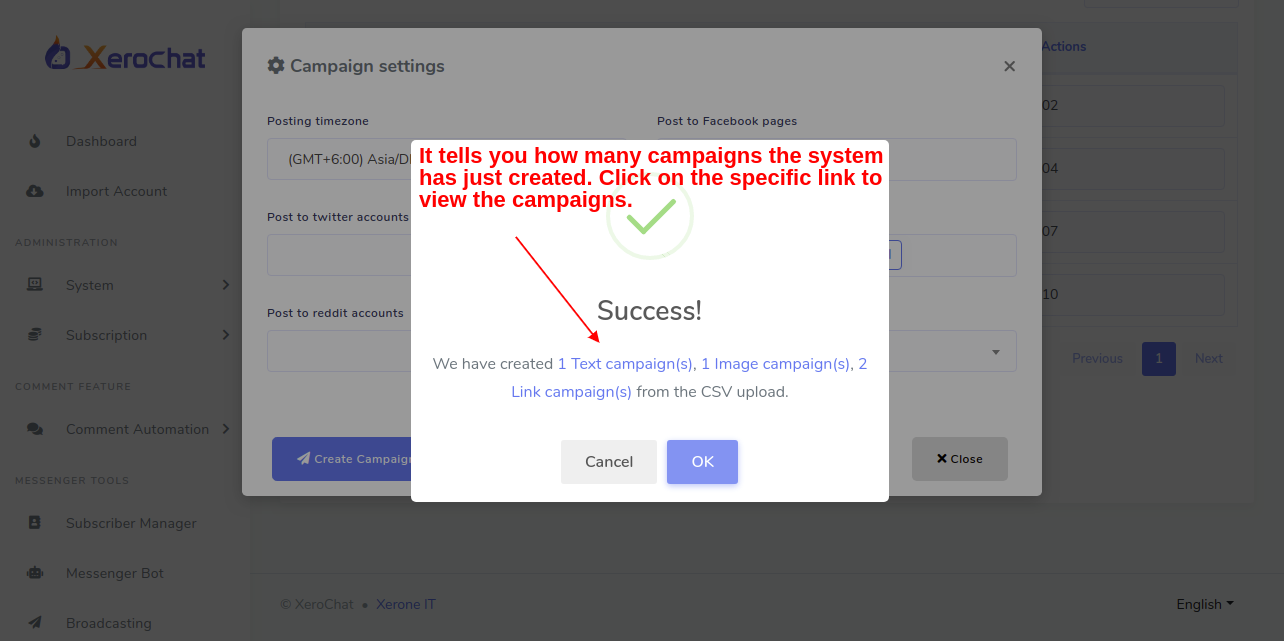
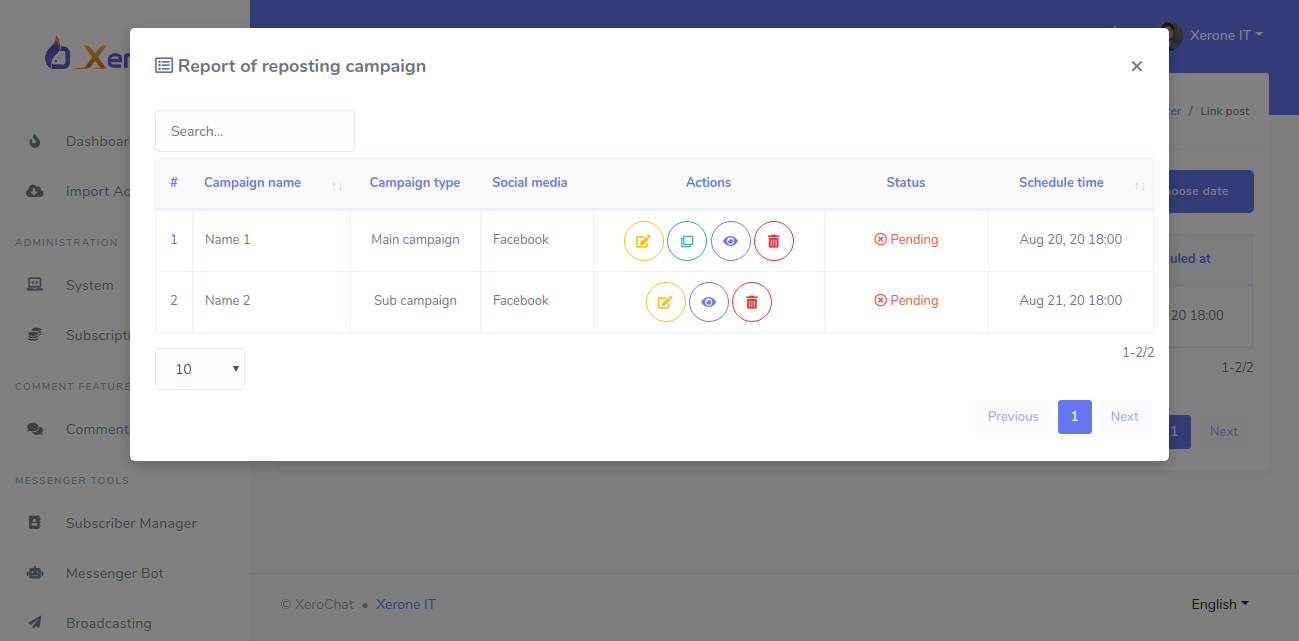
To view the child campaigns you need to click the on the button indicated by the red-marked arrow sign. It will pop up a modal with those campaigns.
Manual Settings
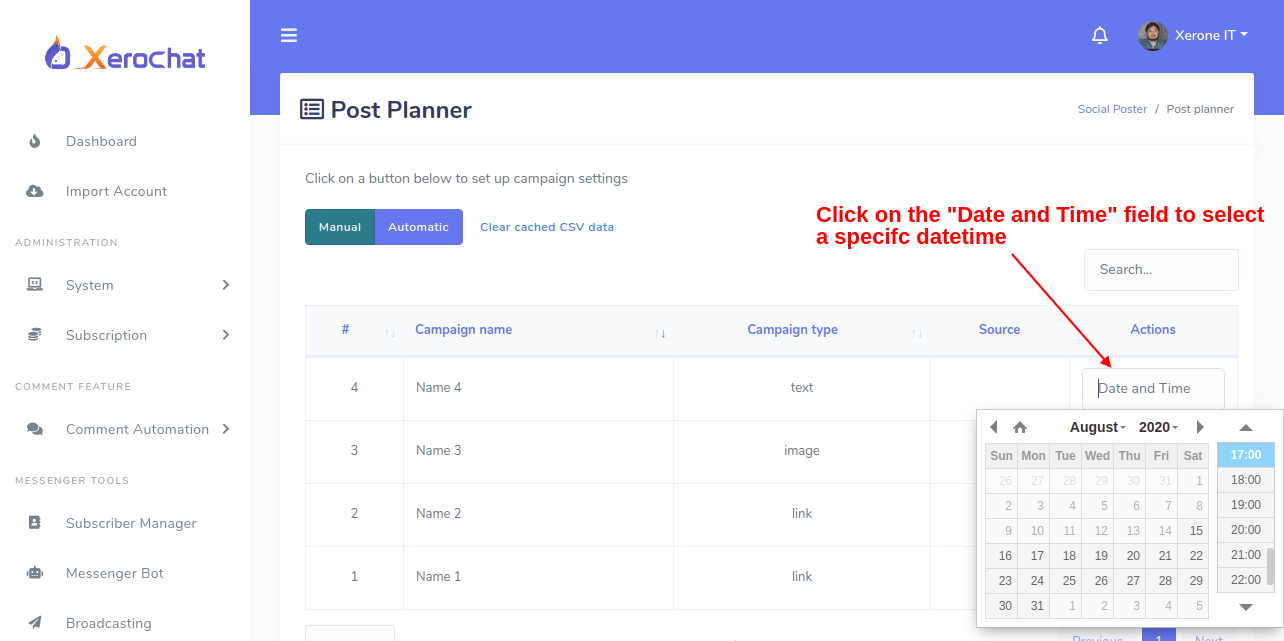
Now we will see how we can create manual campaign settings. It’s really simple. Assuming you’ve uploaded the CSV file. Now you should have the data-table interface. Now you need to click on the Manual button. This will open up date-time fields on the right-hand side of the data-table for each and every campaign. See the screenshot below:
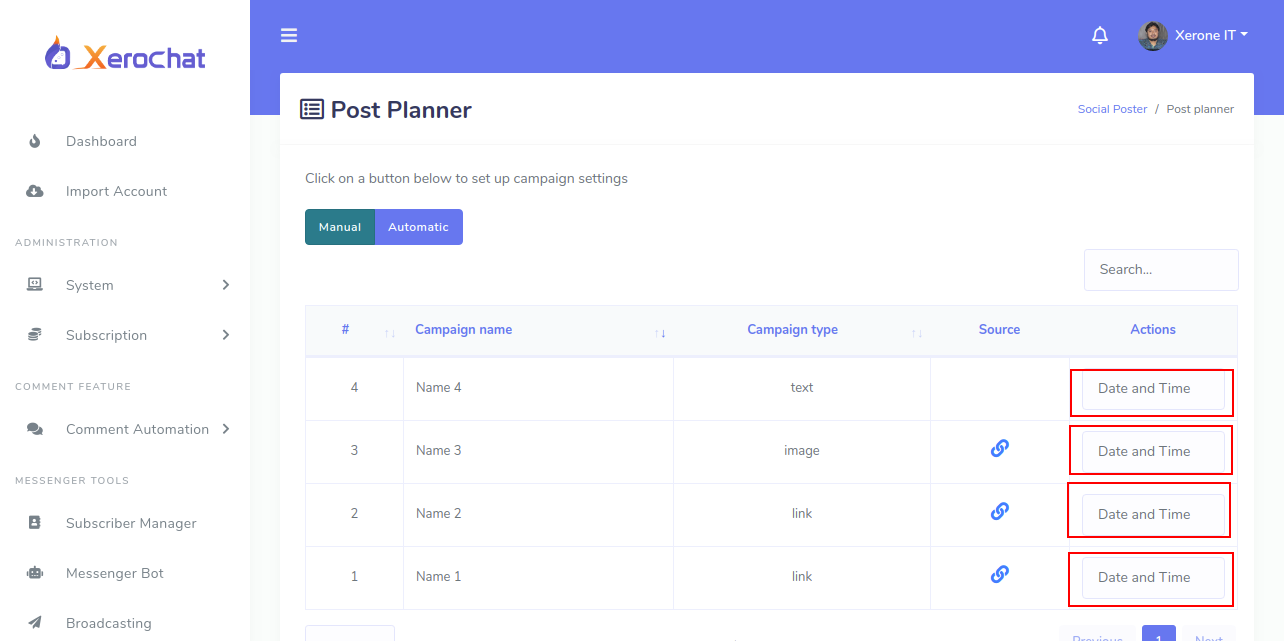
Now you need to put values for the date-time input fields one by one by clicking on it as described below on the screenshot:
Once you’ve done that you can go for the timezone and social media settings by clicking on the Next button as you did it previously in the Automatic Settings. Finally create campaigns by clicking the Create Campaigns button.
Video Tutorial:
If the above explanation won’t help you, you may proceed with the video tutorial.
Enjoy using Post Planner!


6 Comments Login to comment
-

this option now gone
-

Dear author,
Amazing script!
Anyway, do you have more instructions on the image link? -

Hi, can I escape commas to be able to make posts with commas in the text?
-
julfikarshaon1994@gmail.com Team
4 years agoYou can definitely use commas on your post text. Please download the Sample CSV file and see how to create your CSV file. You don't need to separate the post text by a comma. Use different rows for different posts. If you still have a problem please open a ticket to our support team. You can also take help from our Facebook Community.
-
-

Hi, when i download the sample csv im getting this here https://prnt.sc/unsk5j
-
xeroneitbd Admin
5 years agoThis is bit strange. Seems like some encoding issue in excel/CSV in your end.
However create file on this formation https://prnt.sc/uom118
-


6
9798
Social Media Management