To set a messenger engagement plugin on your website, First, go to the main Dashboard of the ChatPion. Now, click on the Visual Flow Builder option at the left sidebar of the Dashboard.
Instantly, the visual Flow Builder page will appear with a button called Create new flow.
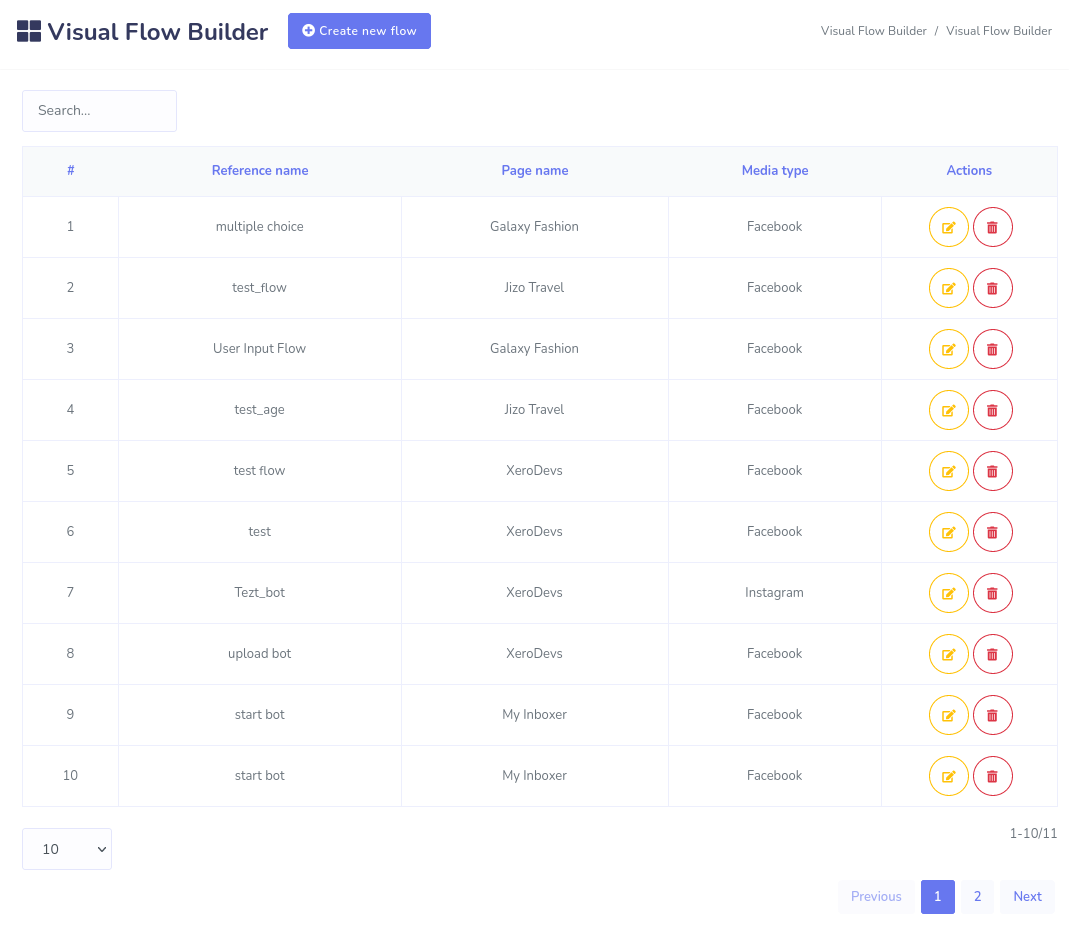
Now click on the Create new flow button and a popover modal form will appear.
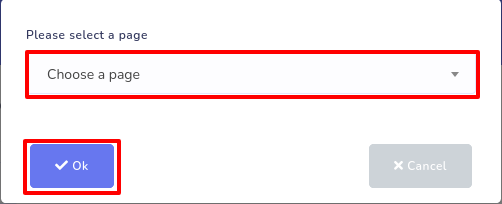
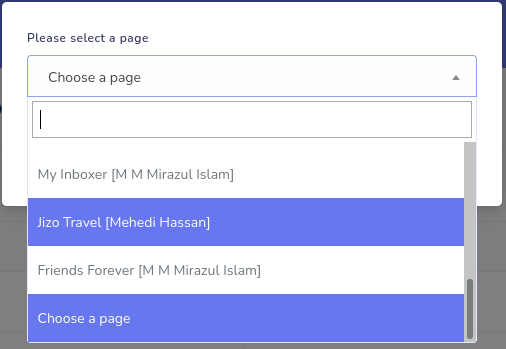
Then click on the Choose a page field and a drop-down menu of the Facebook pages and Instagram accounts will appear. From the drop-down menu, select a Facebook page or Instagram account you want to create a User Input Flow campaign with.
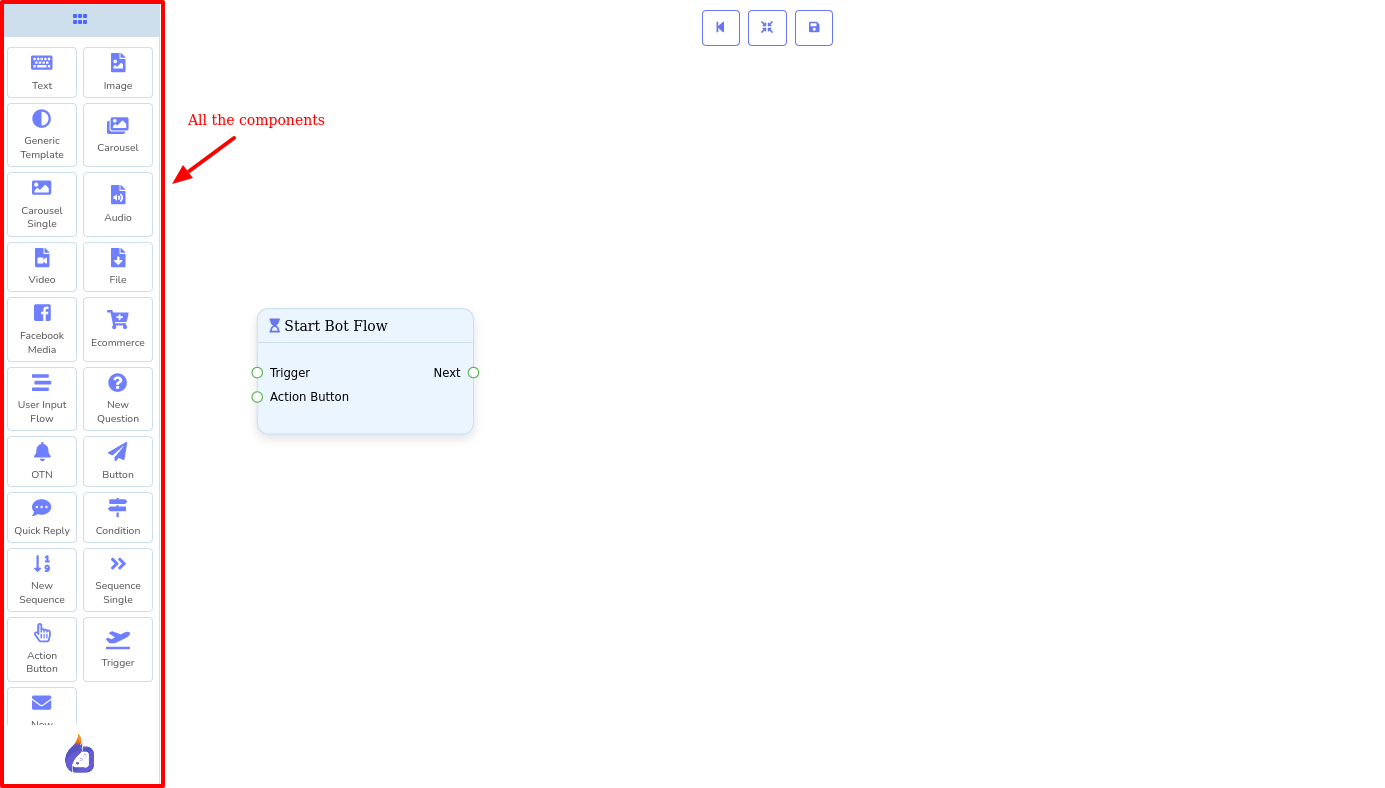
Now click on the okay button and the Flow Builder will editor will appear with all the components are gathered together at the left sidebar and the Start bot flow component on the editor.
Double-click on the component, and instantly a right sidebar will appear with some fields. Now give a title for the campaign in the title fields— the field is required. You can also choose a label and sequence for the campaign. But these two fields are optional. Click on the okay button.
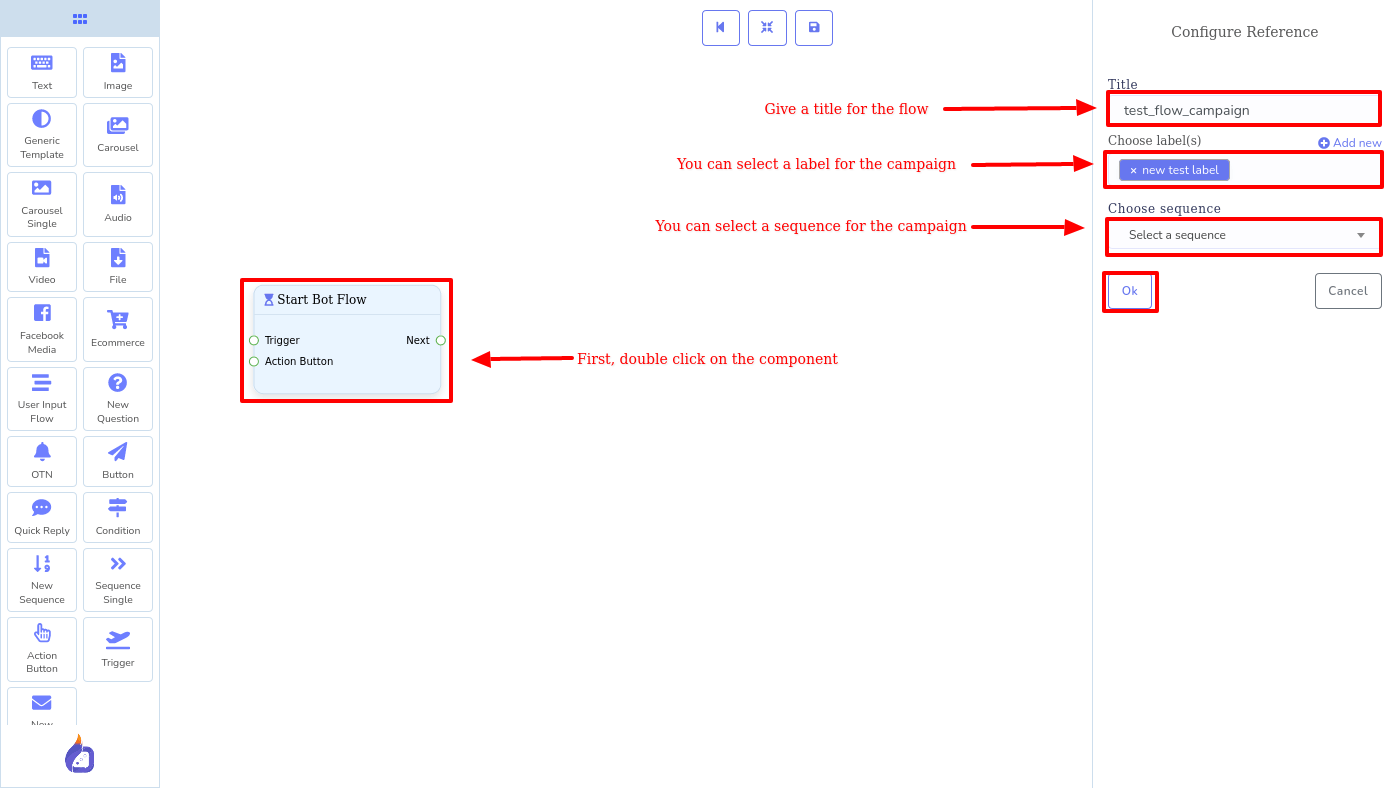
Now the component is filled with title, label, and sequence name.
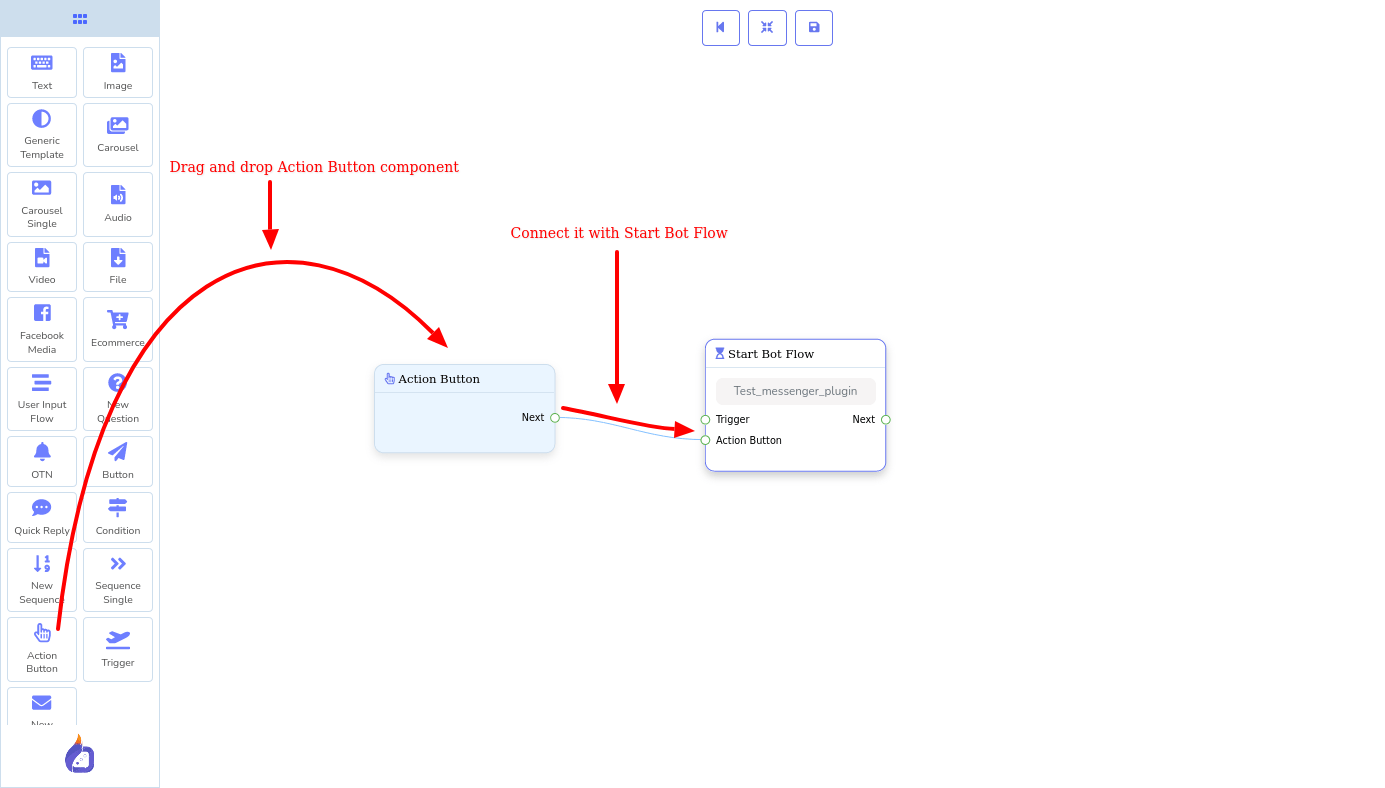
Now drag the Action button component from the left sidebar and drop it on the editor. After that, you have to connect the Action button component with the Start bot flow component.
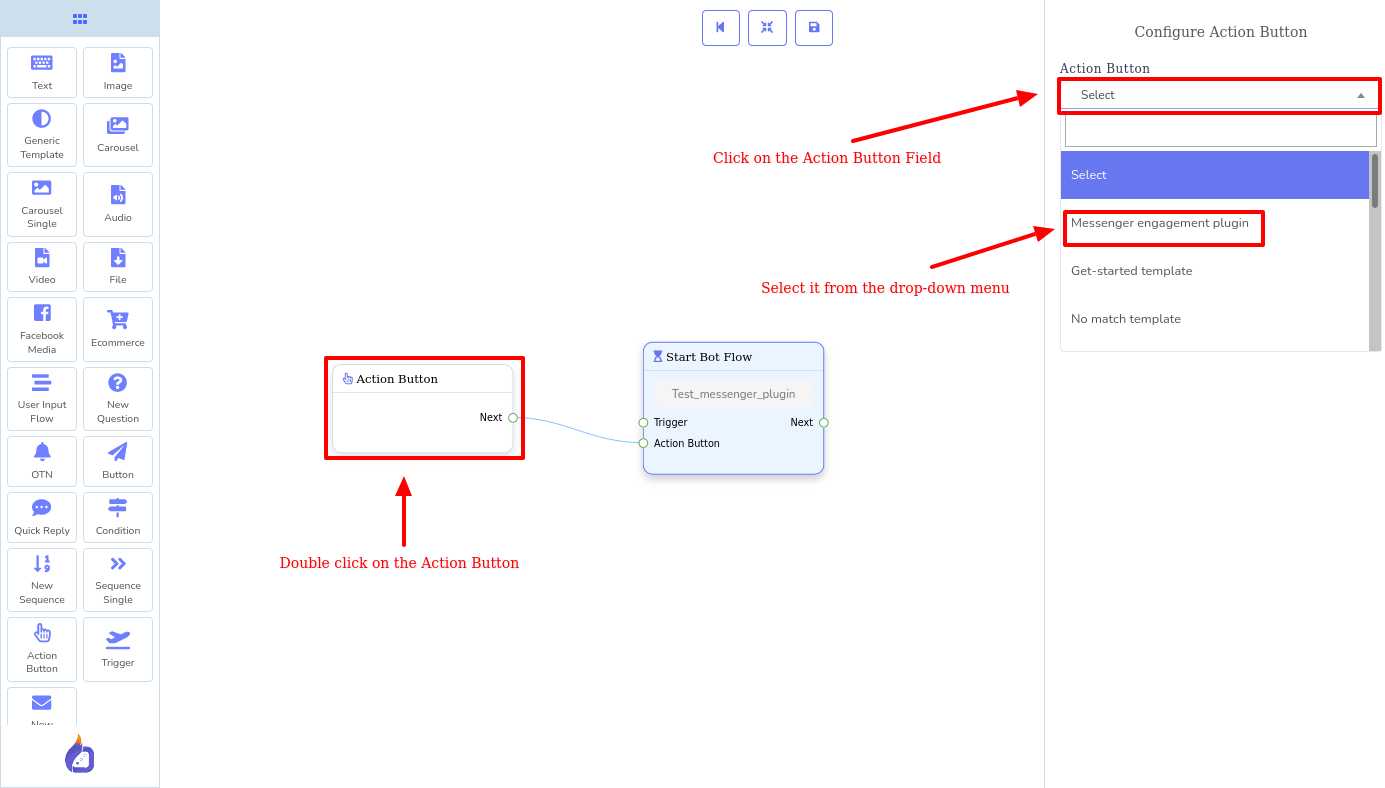
Then double-click on the Action Button component, and instantly a right sidebar called Configure Action Button with Action Button field will appear. Now click on the Action Button field and a drop-down menu of different options will appear.
From the drop-down menu, select the messenger engagement plugin option.
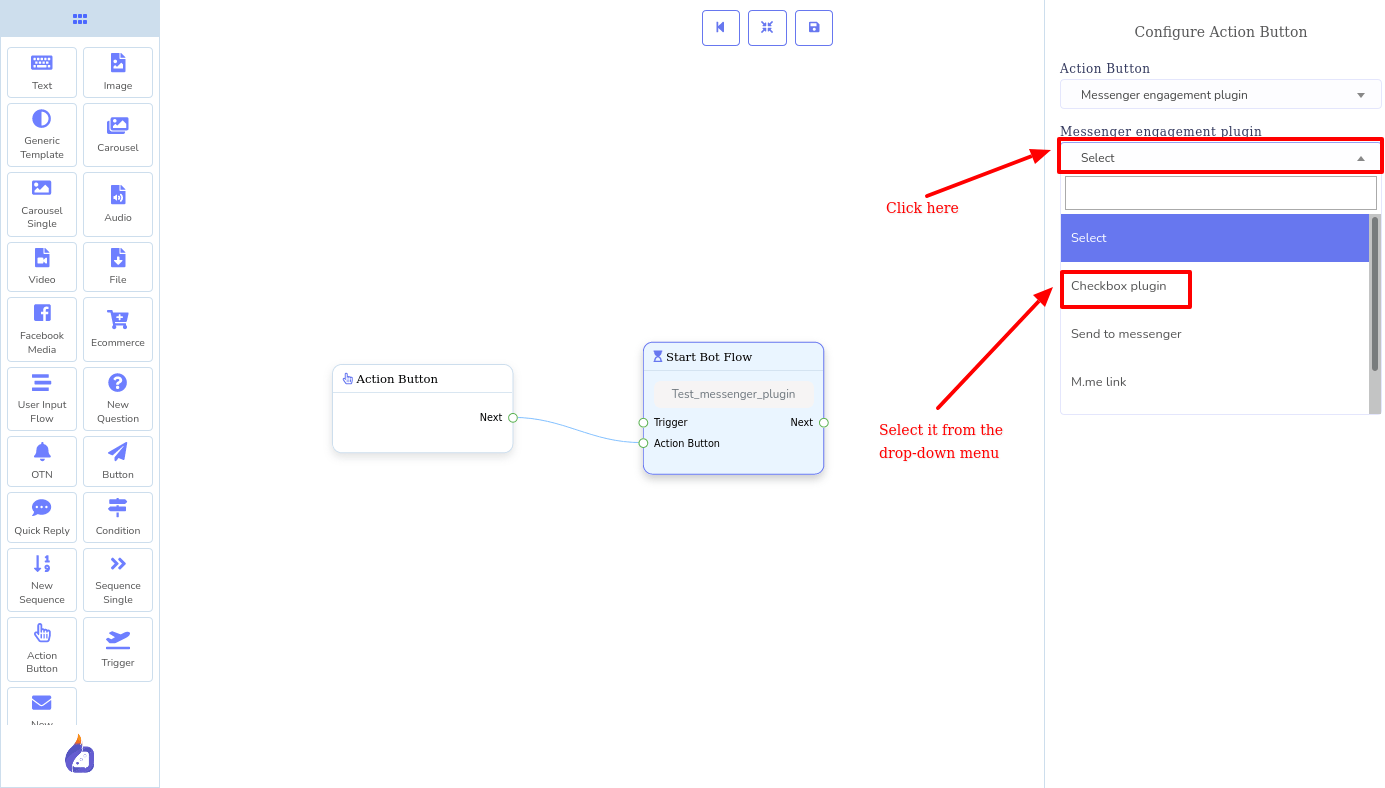
Instantly, the messenger engagement plugin field will appear. Now click on the field and a drop-down menu of four options-- Checkbox plugin, Send to messenger, M.me link, Customer chat plugin-- will appear.
Checkbox Plugin:
To set a checkbox on your website, first, select the checkbox plugin, and some fields will appear.
In the Domain field, put the name of the domain of your website. Hover over your mouse cursor on the tool-tip next to the Domain field to see the instruction.
From the language field, you can select your language. Just click on the language field, and a drop-down menu of different fields will appear. Now select your language from the drop-down menu.
You can also select a plugin skin from light or dark. Hover over on the tool-tip of the plugin-skin field, you will see the suggestion on which plugin-skin you should select for your website based on the background color of your website.
You can also make the plugin center-aligned by selecting Yes. On the other hand, if you select No, the plugin will be centered left.
You can also select the plugin size from Small, Medium, Large, and Extra Large.
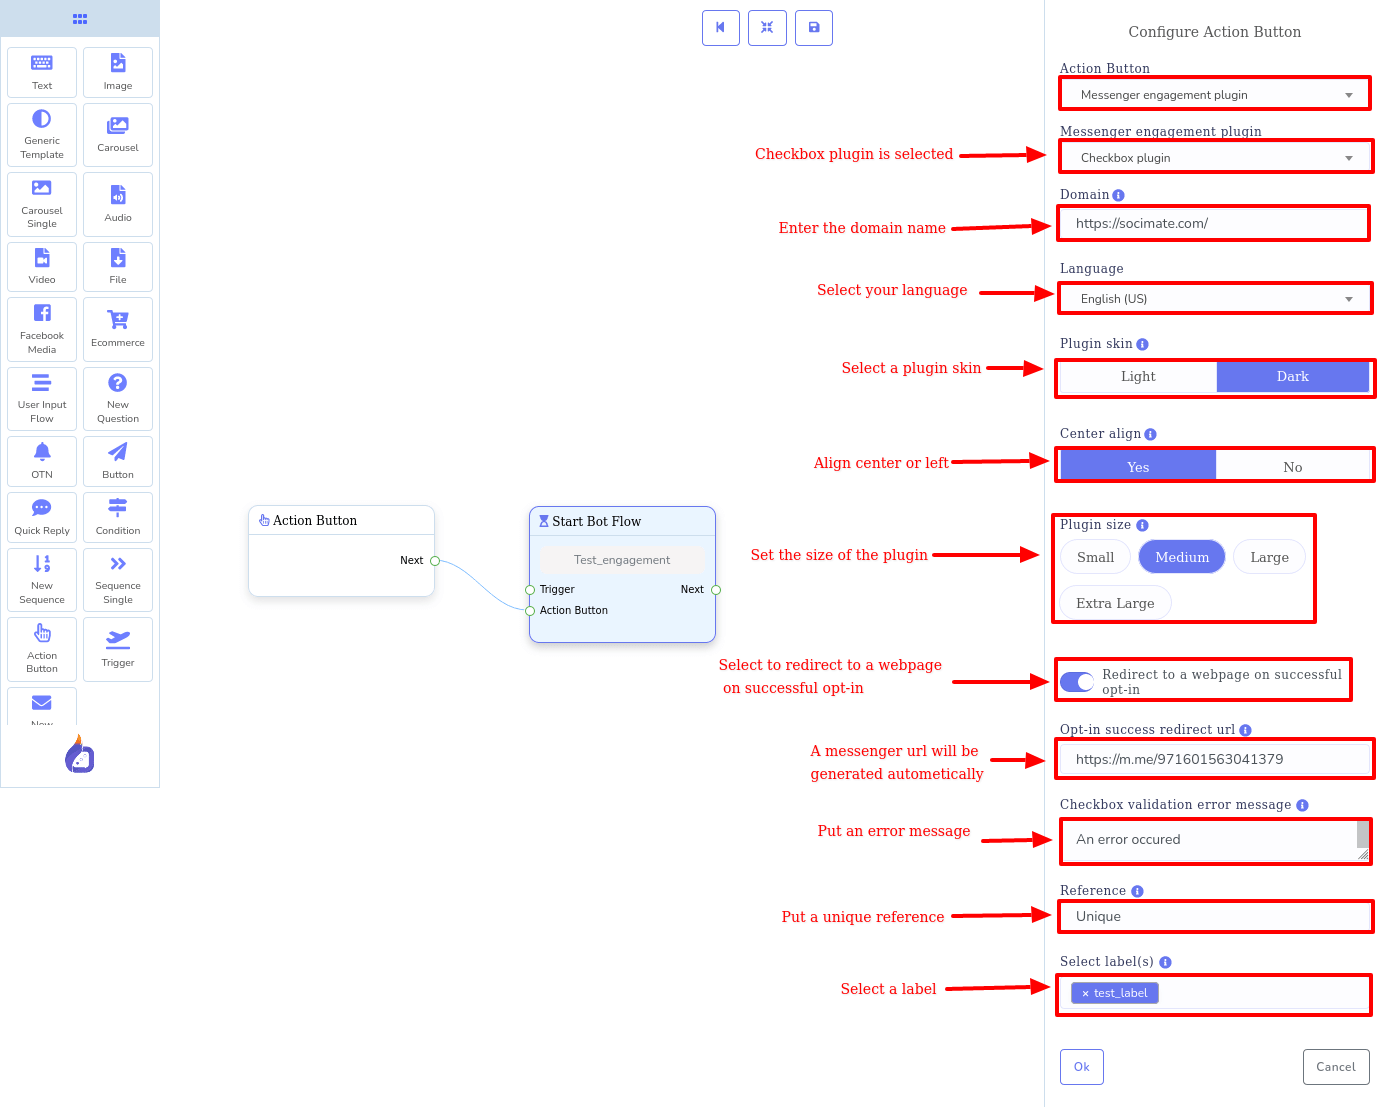
Now, you can select or not select Redirect to a web page on successful opt-in. If you do not select the option, you will see a field called opt-in-success message on the website. There is a default message in the field. If you do not select the option, when a user clicks on the checkbox plugin, the message will appear on the website.
You can, of course, add a button in the success message. To add a button on the success message, select I want to add a button option. And instantly, some field related to the button will appear.
In the button text, there is a default text. You can edit the text. In the button URL, you can give a URL. And when a user clicks on the button, the user will be redirected to the web page.
You can also define the background color of the button from the button background field. You can set the background color by putting the Hex color code of the color in the field. Also, you can set the background color from the color picker. Click on the square at the last of the field, and instantly a color picker will appear. Now select your desired color from the color picker.
Likewise, you can set the button text color, button hovers background, button text hovers color.
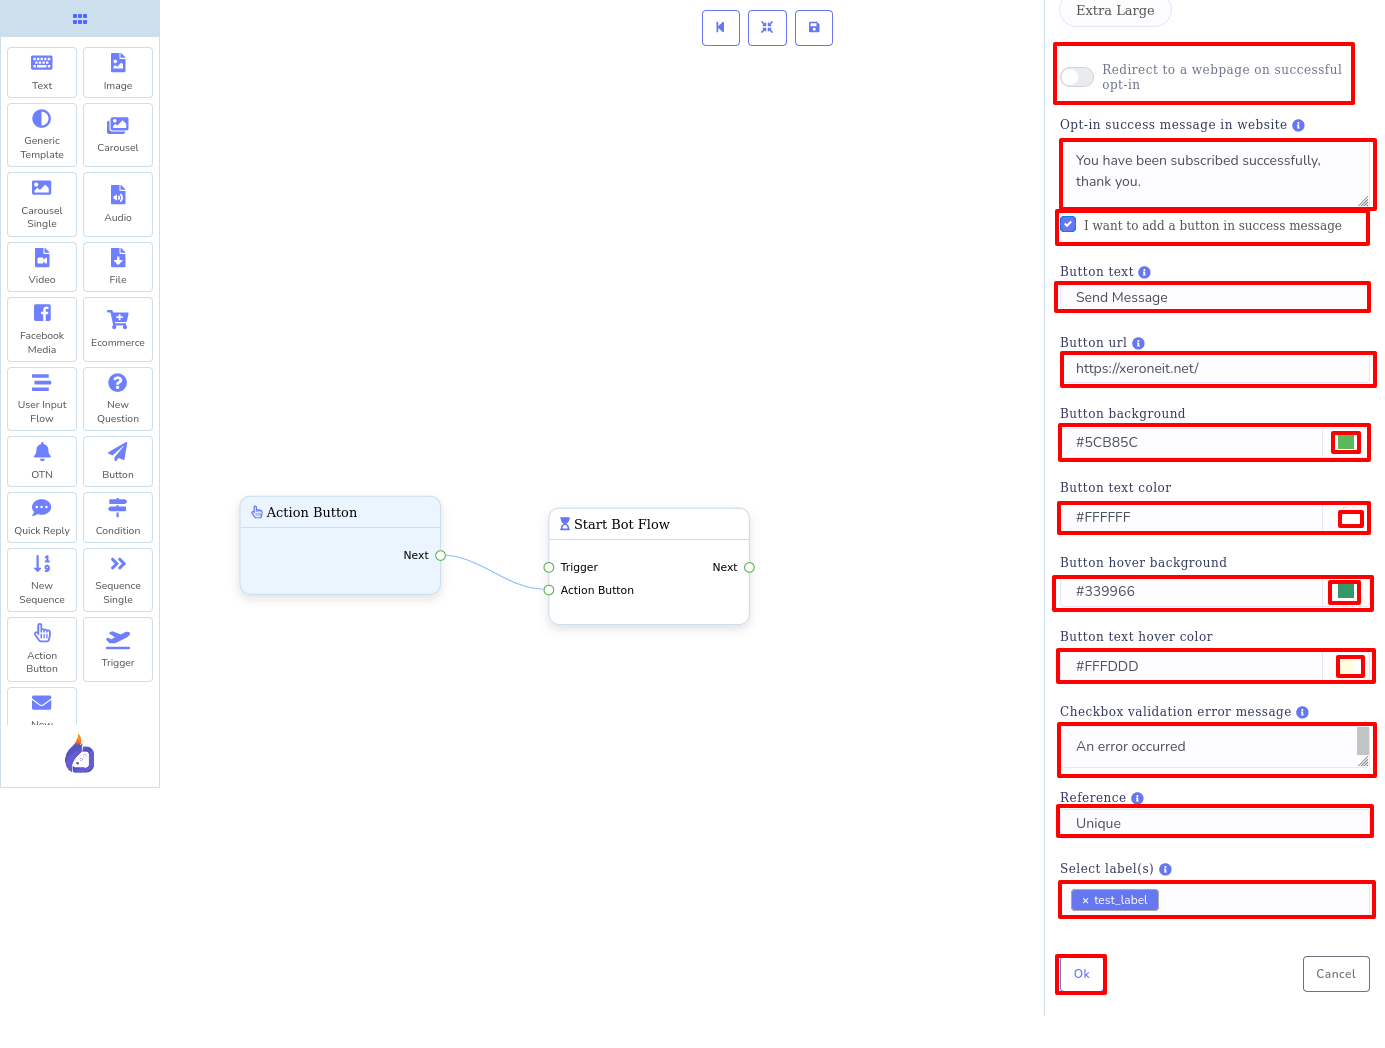
On the other hand, if you select to Redirect to a web page on successful opt-in, an opt-in success redirect URL field will appear with an auto-generated link in the field. This is the link to Facebook Messenger. That is, if a user checks the checkbox on your website, the user will be redirected to the messenger. Also, you can put any link. In this case, when a user checks the checkbox on your website, the user will be redirected to the web page.
You can give a checkbox validation error message. And this message will be displayed if the checkbox is not checked.
Also, you can put a unique reference to track the plugin later in the reference field.
You can also select a label in the select label field. The subscribers obtained from the plugin will be enrolled in the plugin you select. You must select a page to fill this list with data.
Now click on the ok button. And you will see the action button component with all the information you provide.
Likewise, you can set Send to messenger, M.me link and Customer Chat plugin.
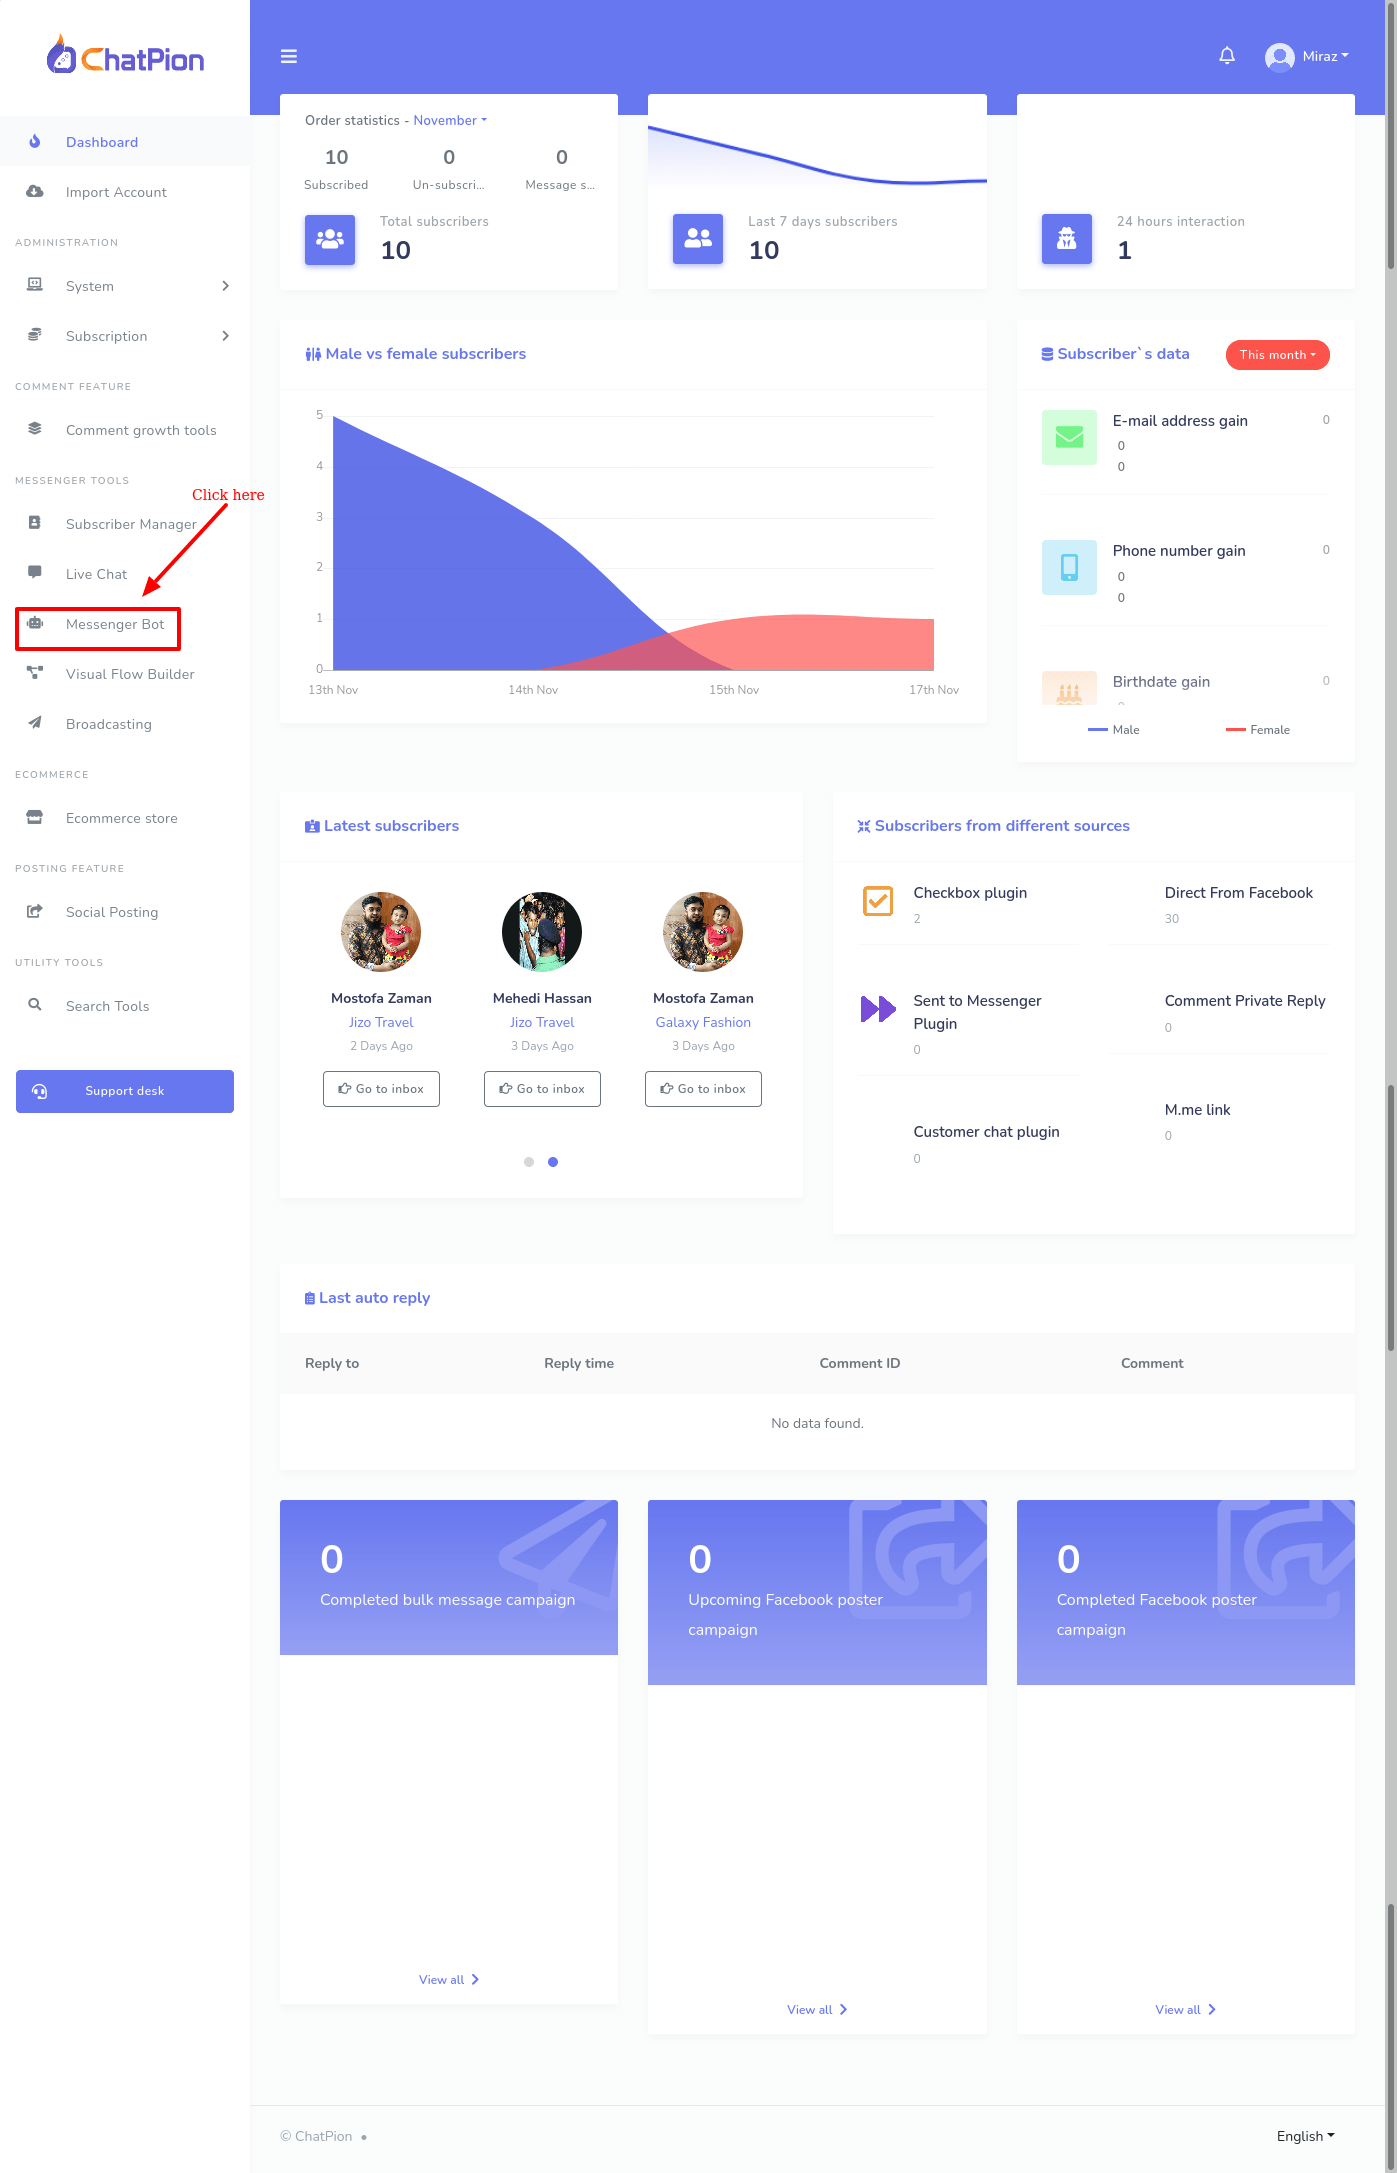
Well, after you have configured the Checkbox plugin, Send to messenger, M.me link, and Customer Chat plugin, go to the Dashboard of the ChatPion again. Now, click on the Messenger Bot option at the left sidebar of the Dashboard.
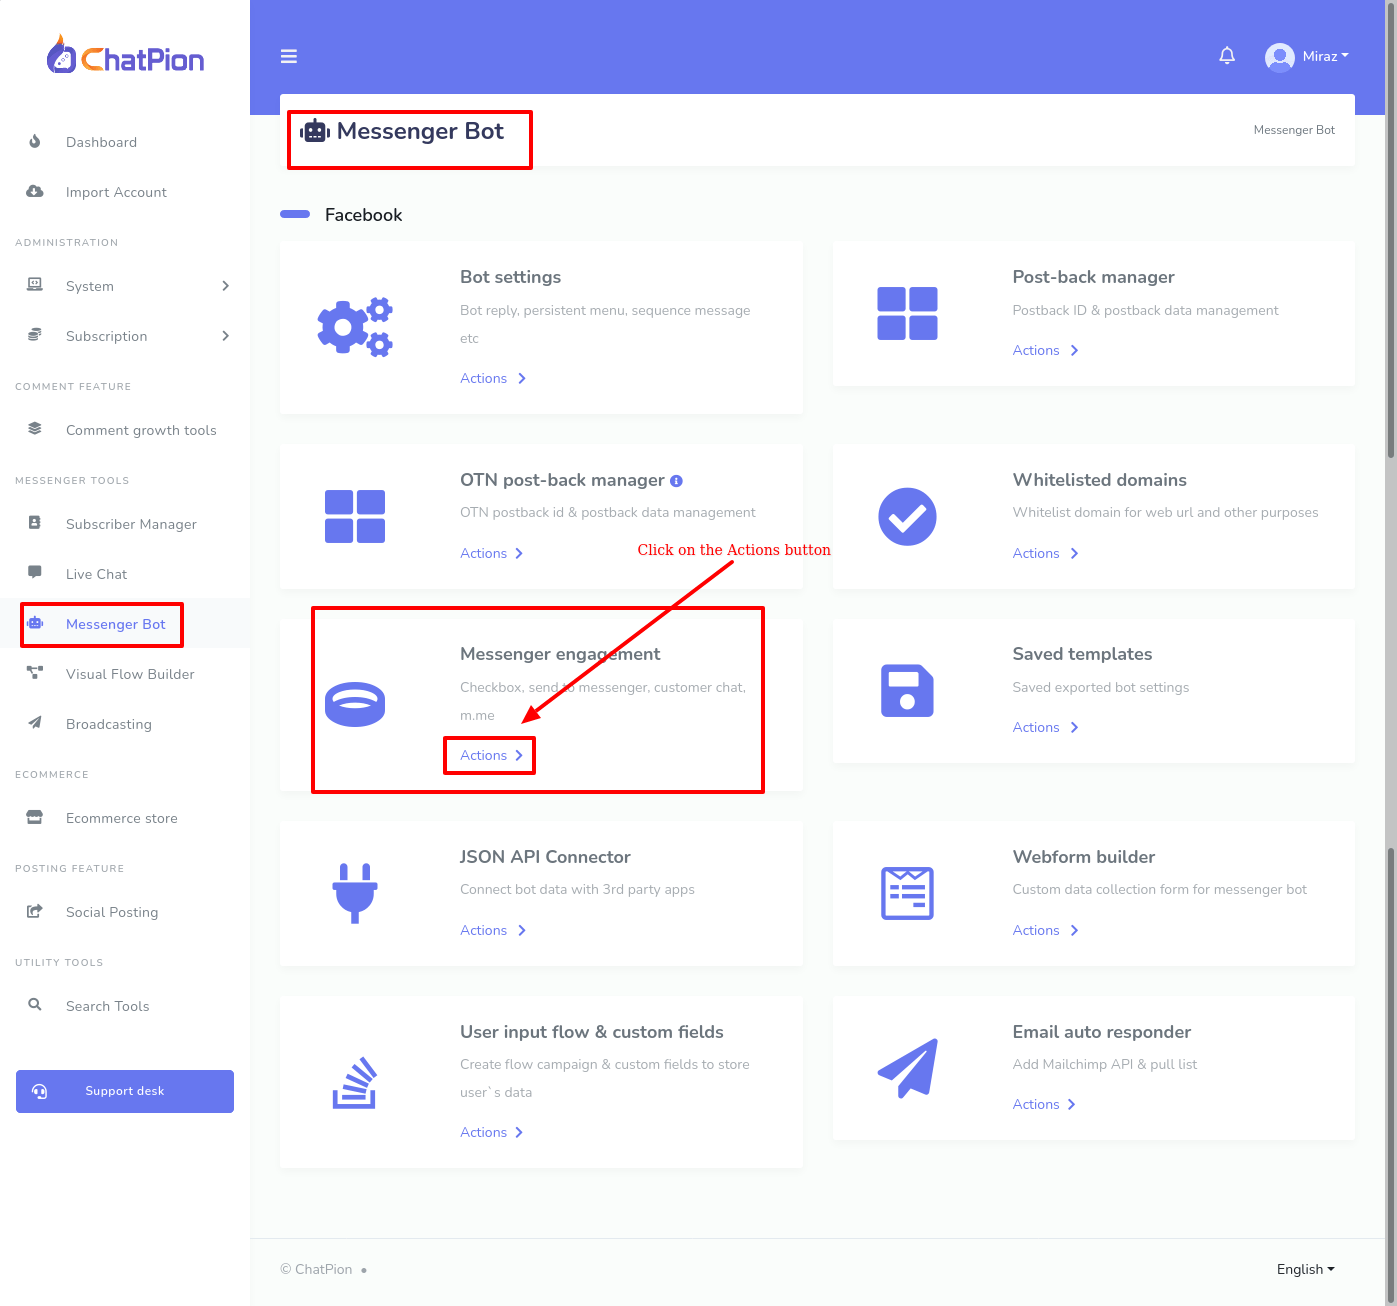
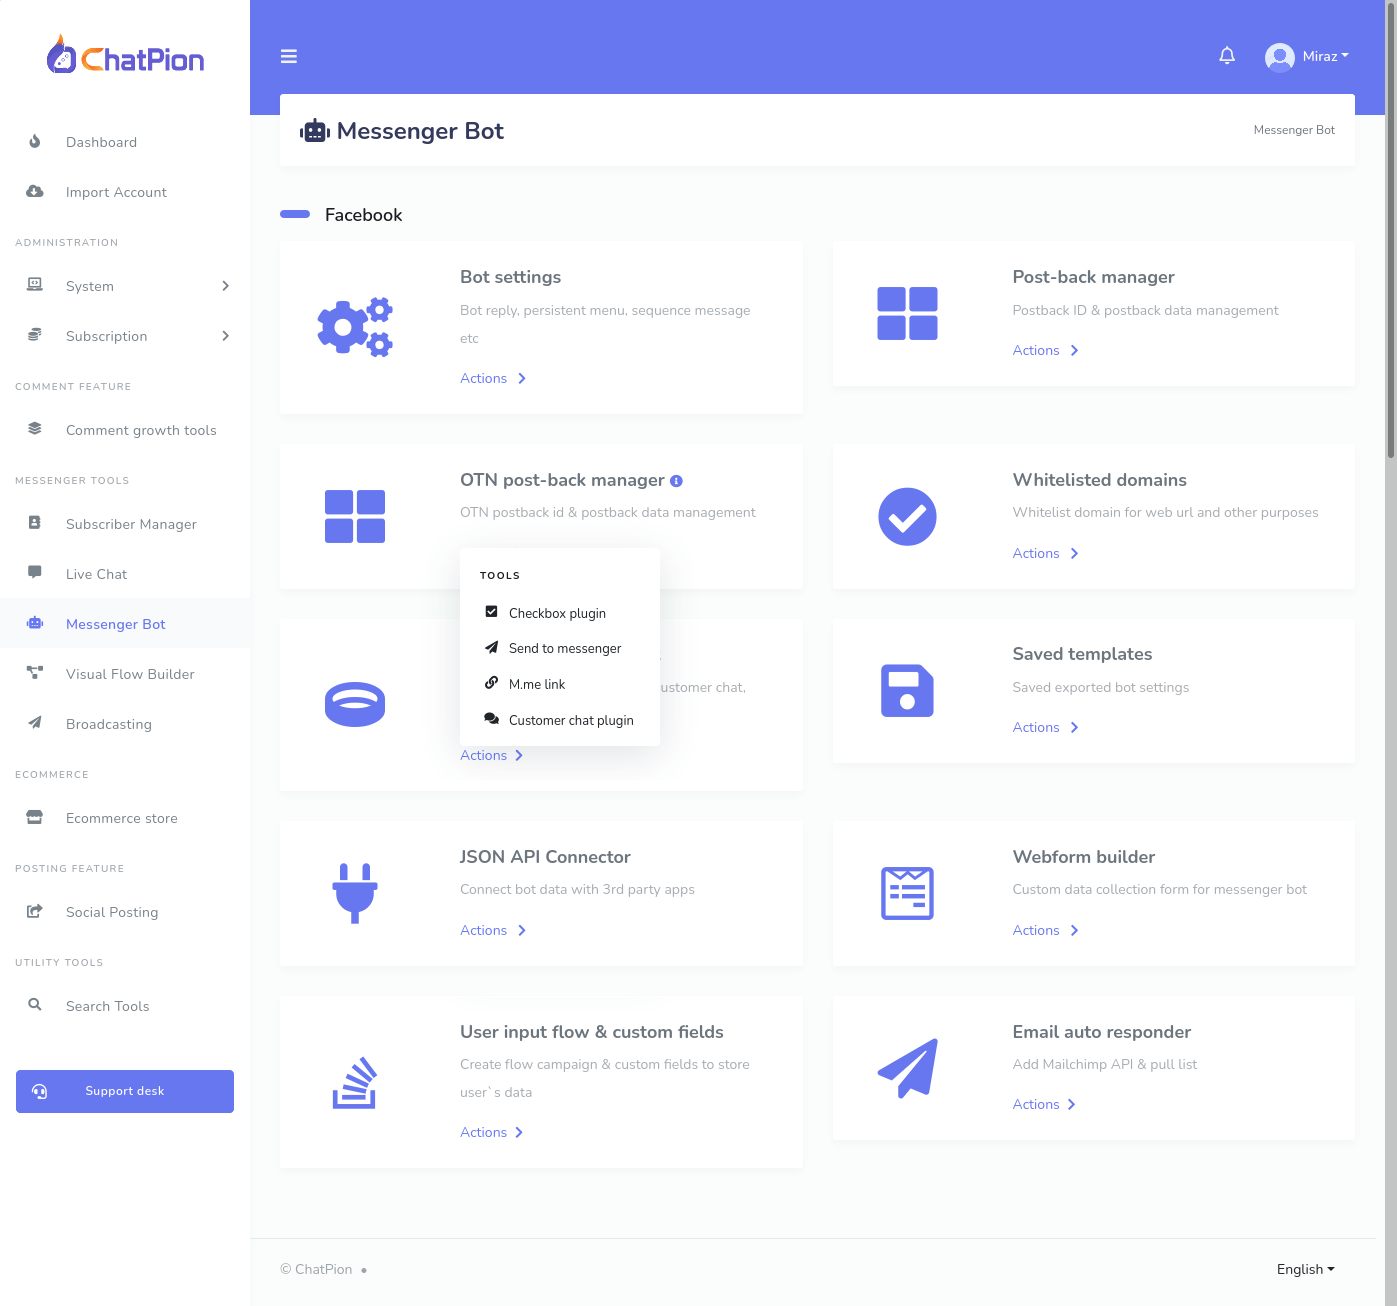
Instantly, a page called Messenger bot will appear. On the page, you will see an option called Messenger Engagement. Now click on the actions button of the option.
Instantly, a pop-up menu of Checkbox plugin, Send to messenger, M.me link and Customer chat plugin will appear. If you want to set the Checkbox plugin on your website, click on the checkbox option.
Instantly, a page called Checkbox plugin will appear. On the page, you will see the list of the Checkbox plugin configuration. You can see the primary information of each configuration. By clicking on the delete icon, you can delete the configuration. You can also edit the edit icon by clicking on the edit icon. Just as you click on the edit icon, the flow builder editor with the configuration of the checkbox plugin will appear. Now you can edit the configuration of the checkbox plugin.
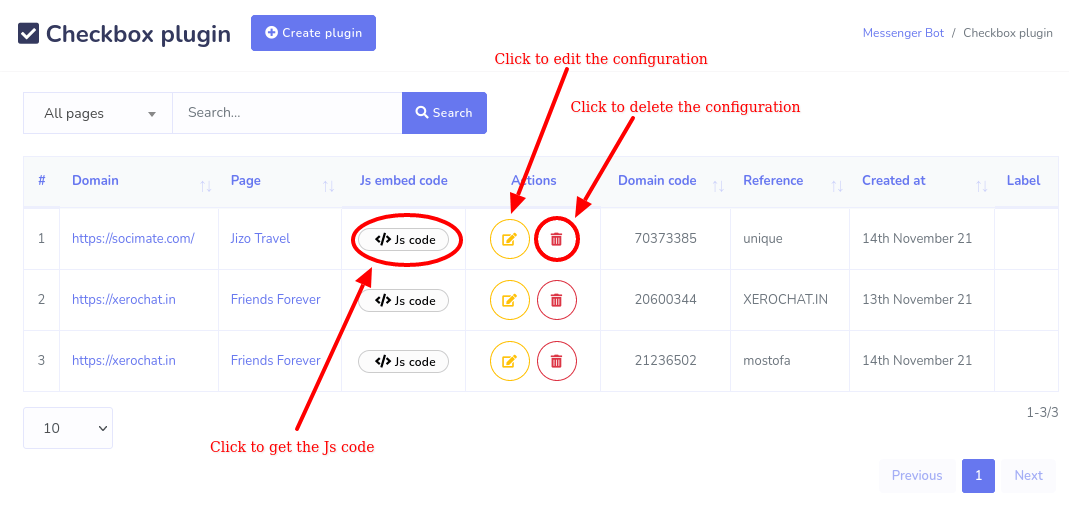
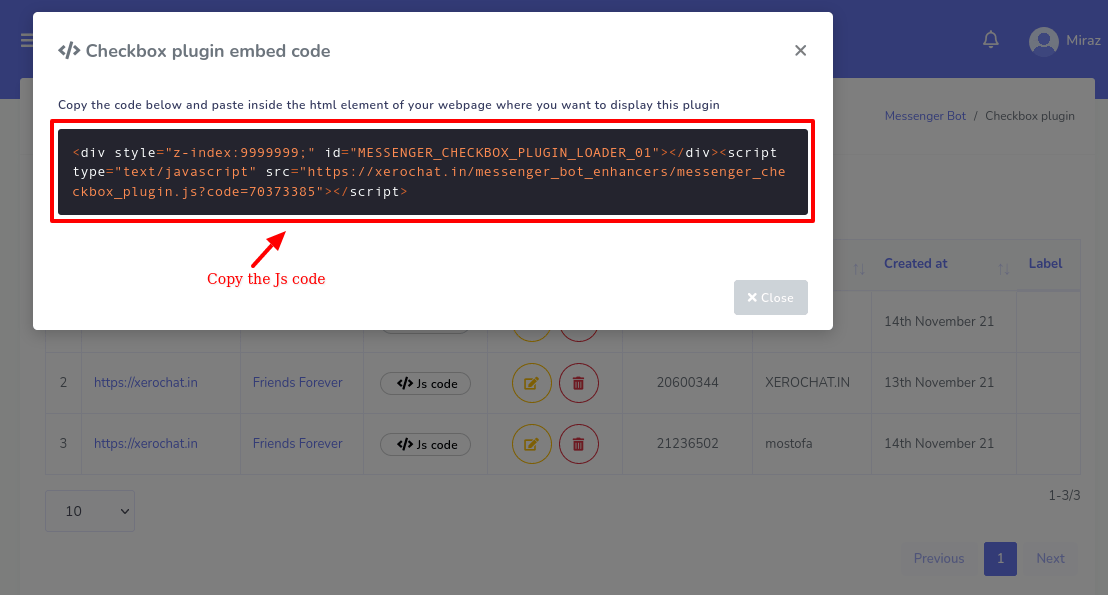
Anyway, to set the Checkbox plugin on the website, you have to copy the Js embedded code and paste the code on the HTML file of your website. Now click on the JS code option and instantly, a pop-up modal will appear with the embedded JS code. Now copy the JS code and paste the code into the HTML file of your website.
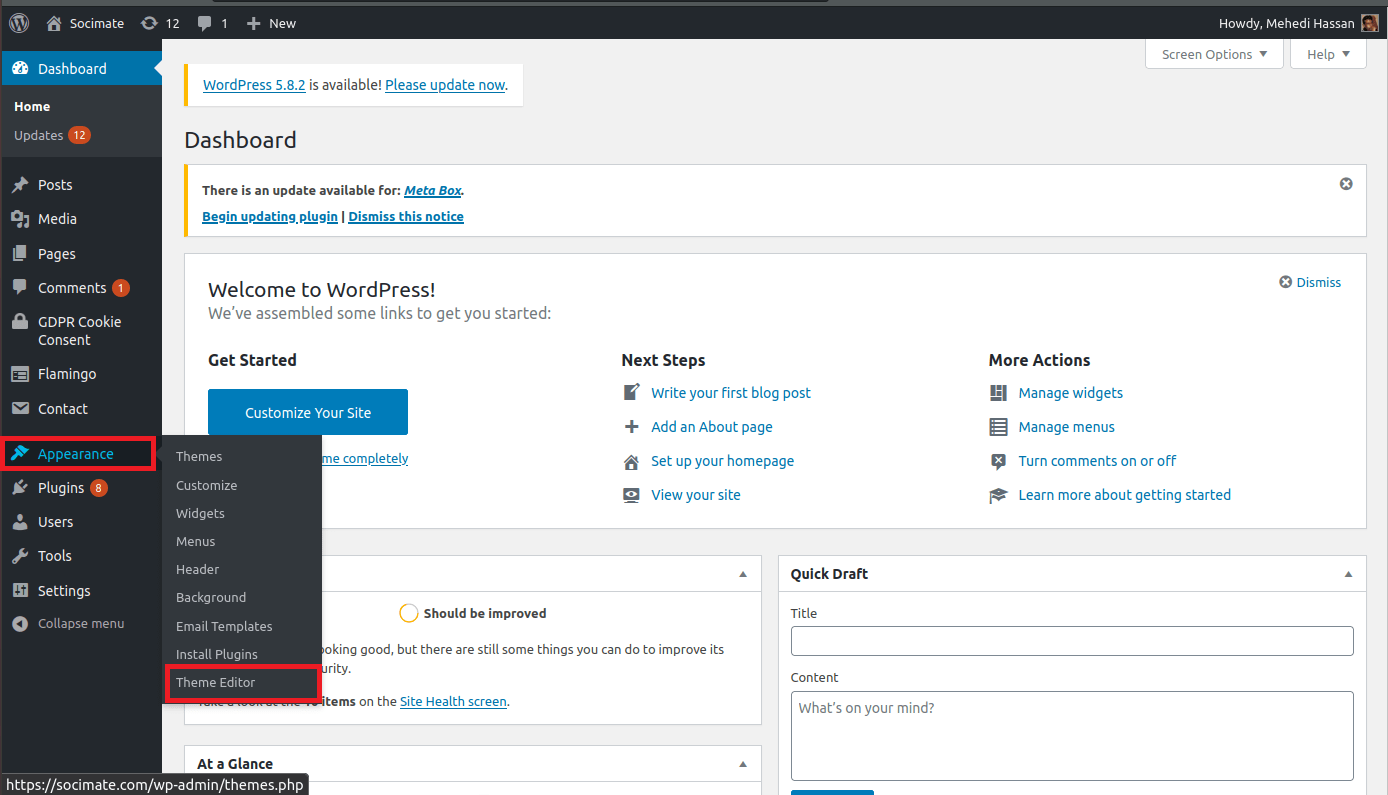
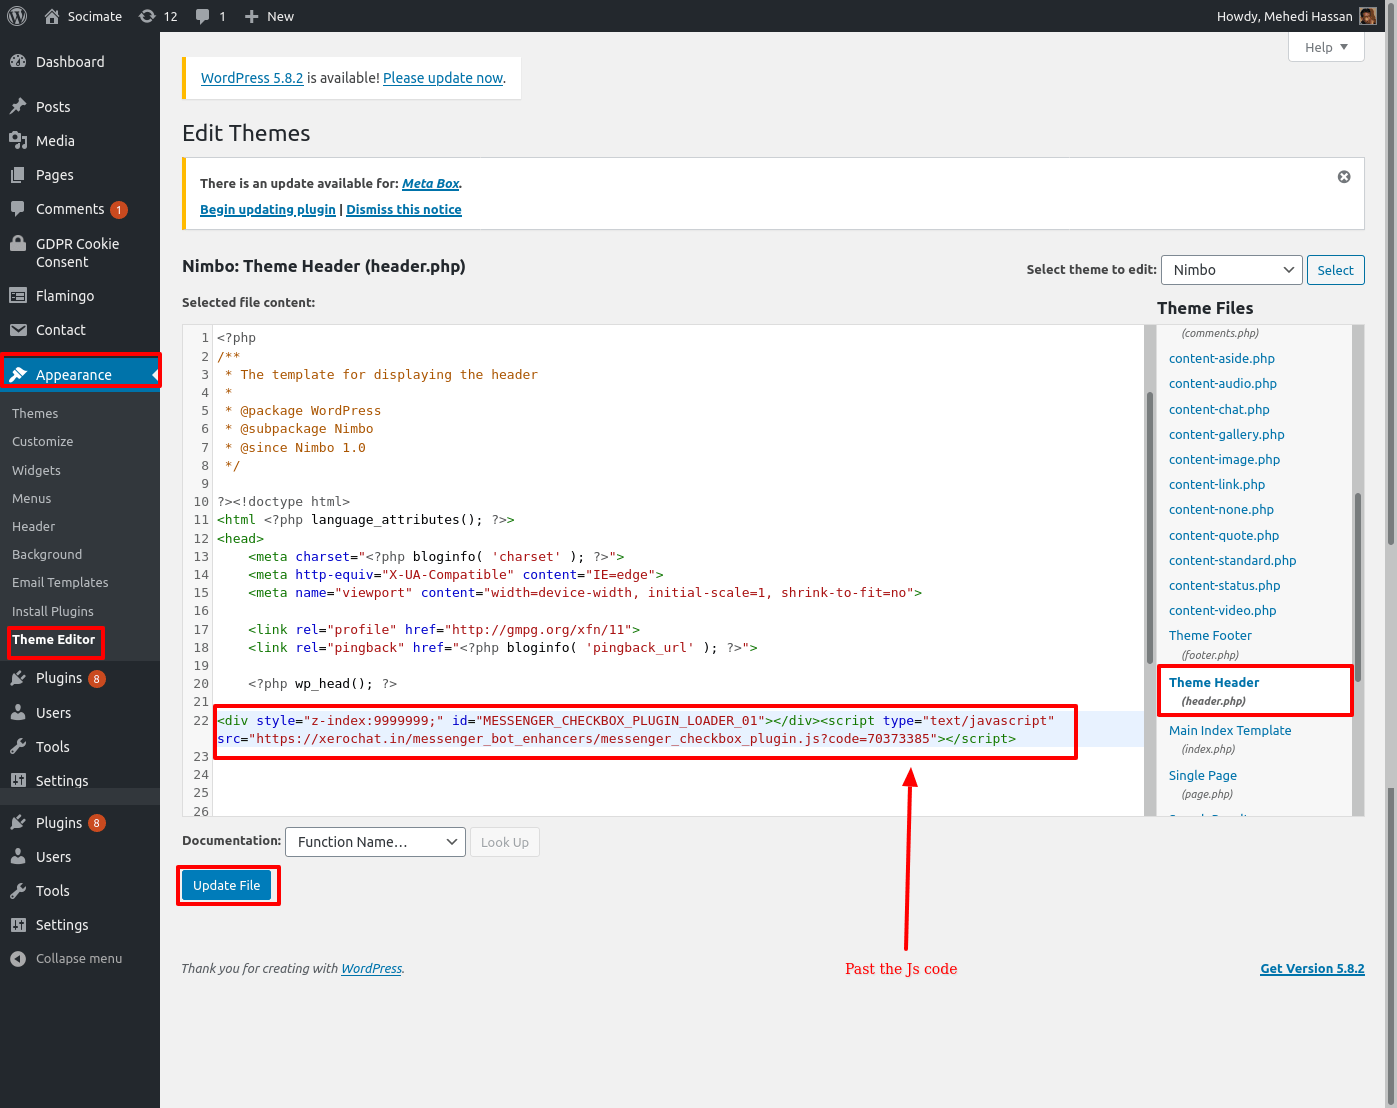
To paste the Js code into the HTML of your wordpress website, go to the dashboard of the website. Now go to the Appearance > Theme Editor> Theme Heare or Theme Footer.
Now paste the Js code in the Head Section.
After you have pasted the JS embedded code in the HTML of your website, now enter your website. Now, on the website, you will see the Checkbox plugin on your website.
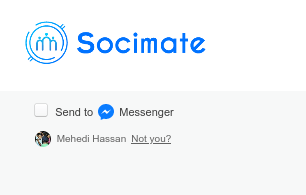
Just as a user click on the checkbox plugin on your website, the user will be redirected to the messenger. And via the messenger, the user can easily interact with you.
If you follow the step by step instructions in this blog, you will be able to set messenger engagement plugin on your website via the Flow Builder very easily
You can also watch the video tutorial on how to set Messnger engagement plugin on the Flow Builder


0
5397
Social Media Management