
Instagram Auto Comment Reply With ChatPion:
At this time, Instagram is one of the most popular social media among all social media and it has also become more popular day by day. So as a popular media, Instagram has given some opportunities for third-party app developers to integrate through Instagram API. ChatPion has integrated these features. So to get the instagram features with ChatPion, you’ve to first integrate your Instagram business account with ChatPion.
This blog is written to provide instruction on how you can integrate instagram business account and how you can use Auto Comment Reply feature with ChatPion.
First check Facebook app settings & permission review system from here
As Instagram is associated with Facebook, so at the very first stage you’ve to connect your Instagram business account with your Facebook page.
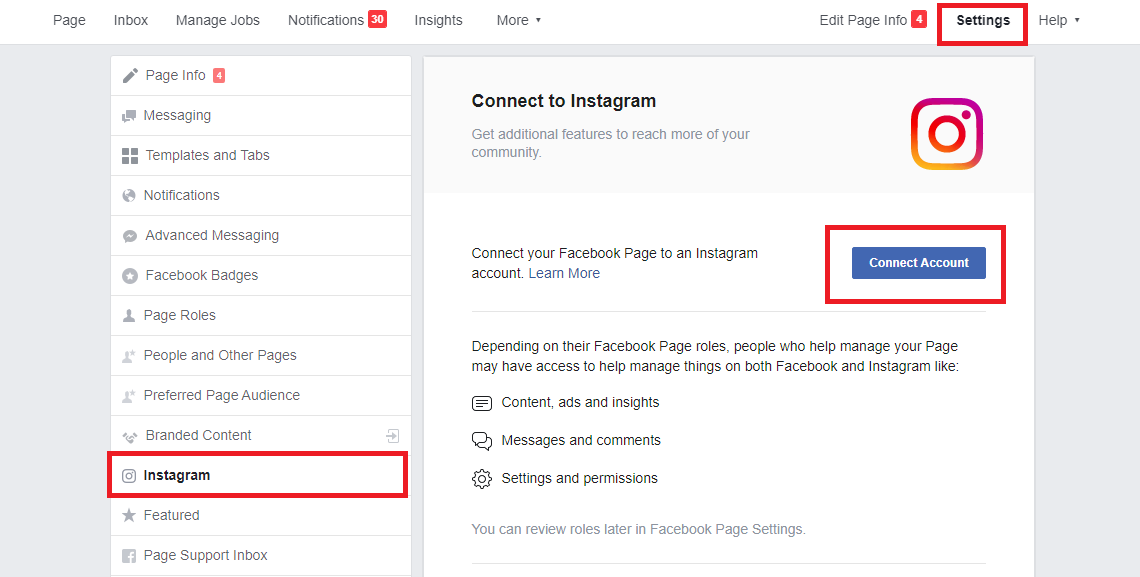
Connect Instagram Business account with Facebook Page:
>>> First of all go to the Settings of your Facebook page.
>>> Now go to Instagram menu from left sided menus.
>>> Click on the Connect Account button to get started off adding Instagram account. Provide all information and connect your Instagram business account with your Facebook page.
Import Instagram business account with ChatPion:
After connecting your Instagram account with your Facebook page, now go to the Import Account menu of your ChatPion application and import your facebook account again by click on Login with Facebook button. After that, you’ll see your Instagram business account under connected Facebook page.
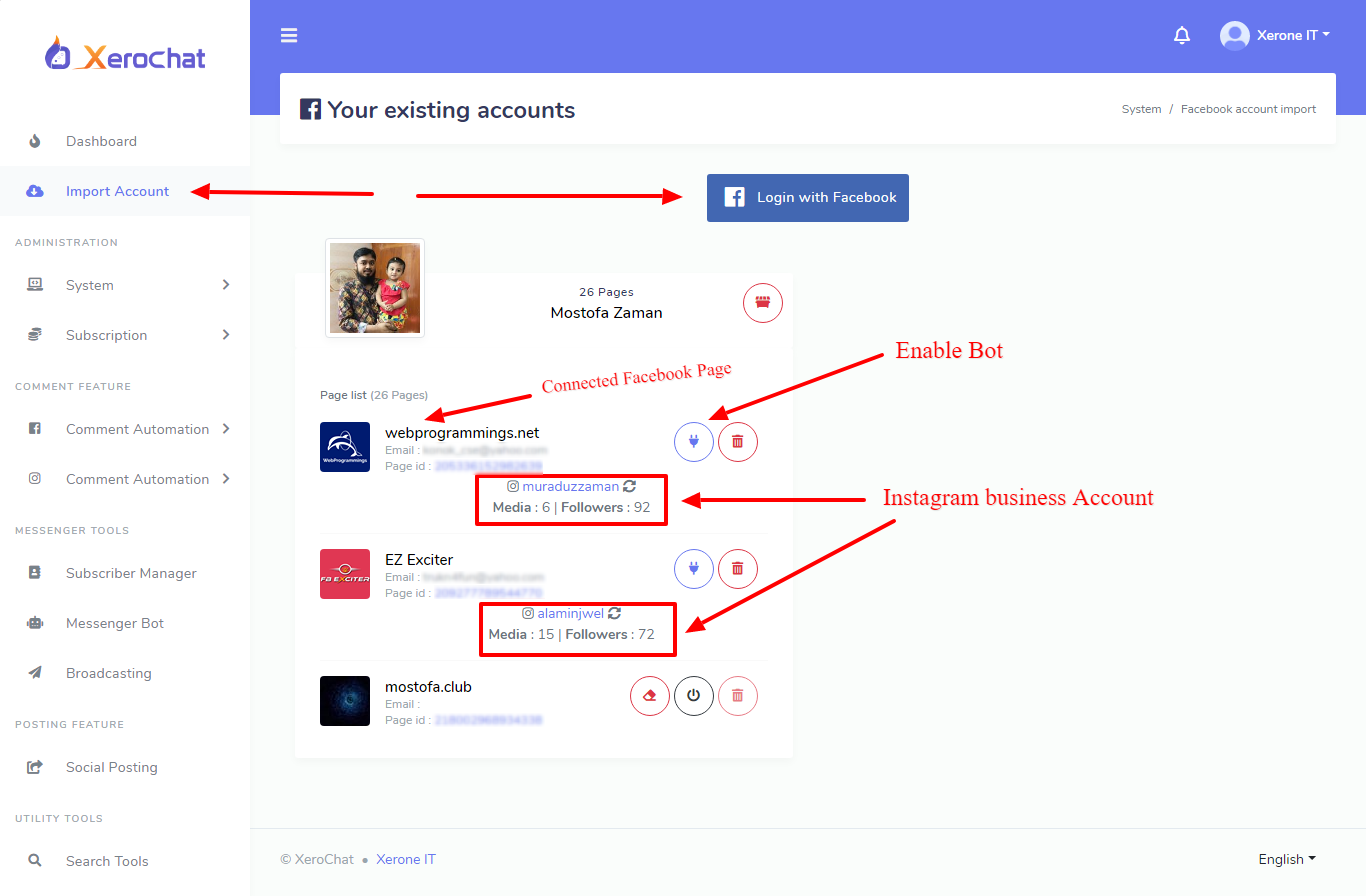
Now Enable Bot Connection by click on the enable bot connection button if it’s not enabled before. Without enabling, you won’t see your instagram account in instagram features section of ChatPion.
Auto Comment Reply with ChatPion:
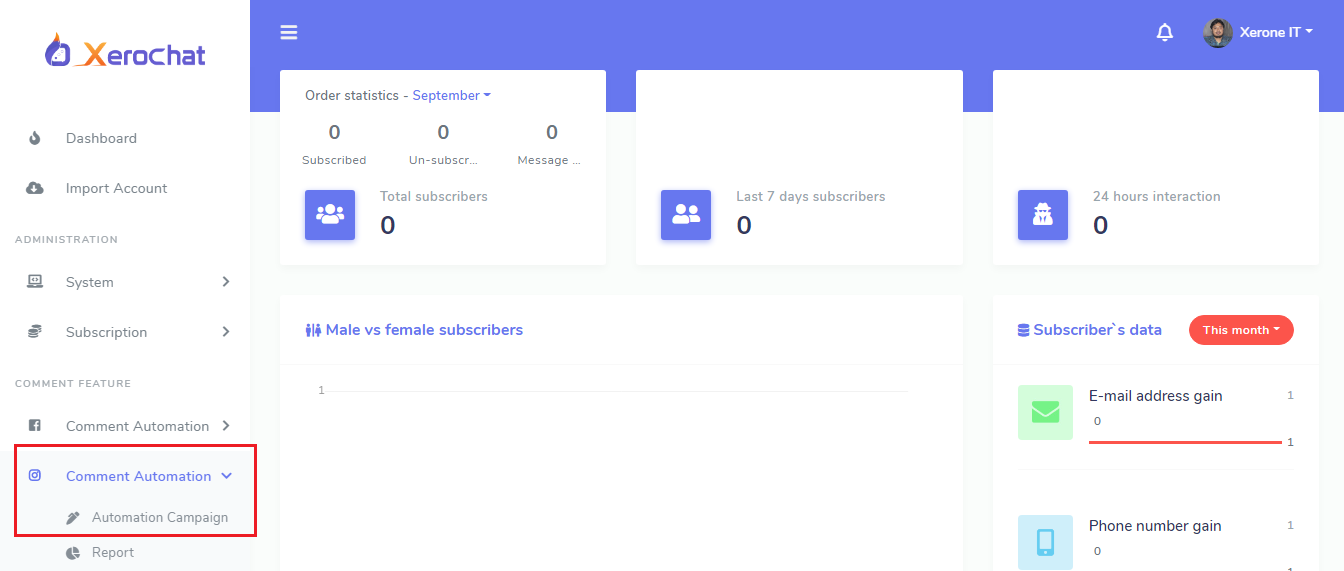
There is also a menu available called Comment Automation for instagram under facebook Comment Automation menu.
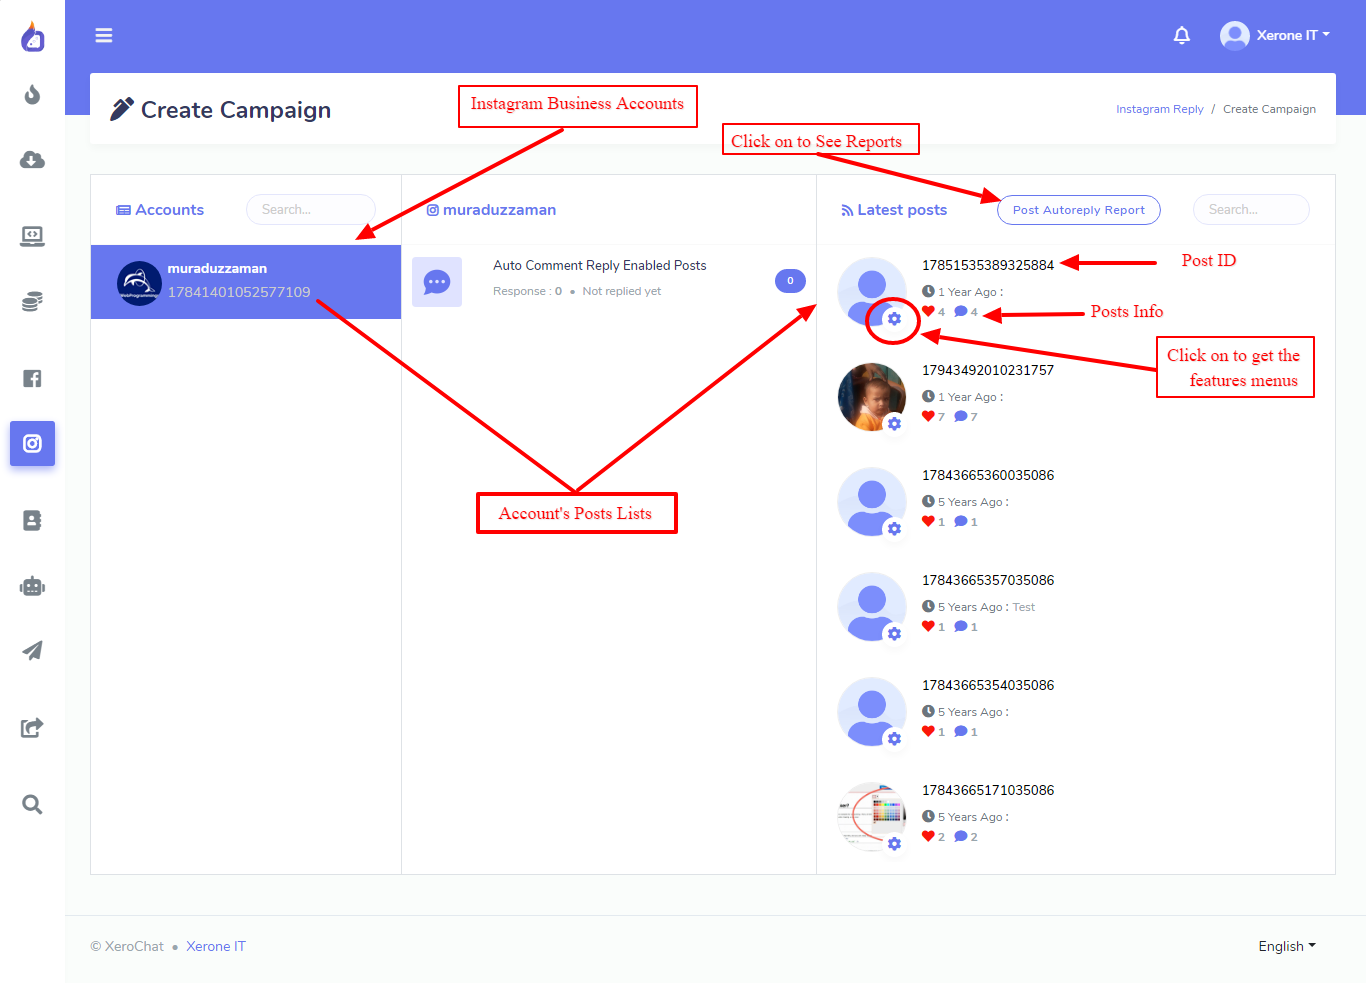
Go to Comment Automation -> Automation Campaign menu and you’ll see your instagram business accounts here with the latest posts of corresponding business account. You can also see how many posts are enabled for auto comment reply from the middle column. At the right column, you can see the posts lists with posted time with posts description and also posts reaction, comments.
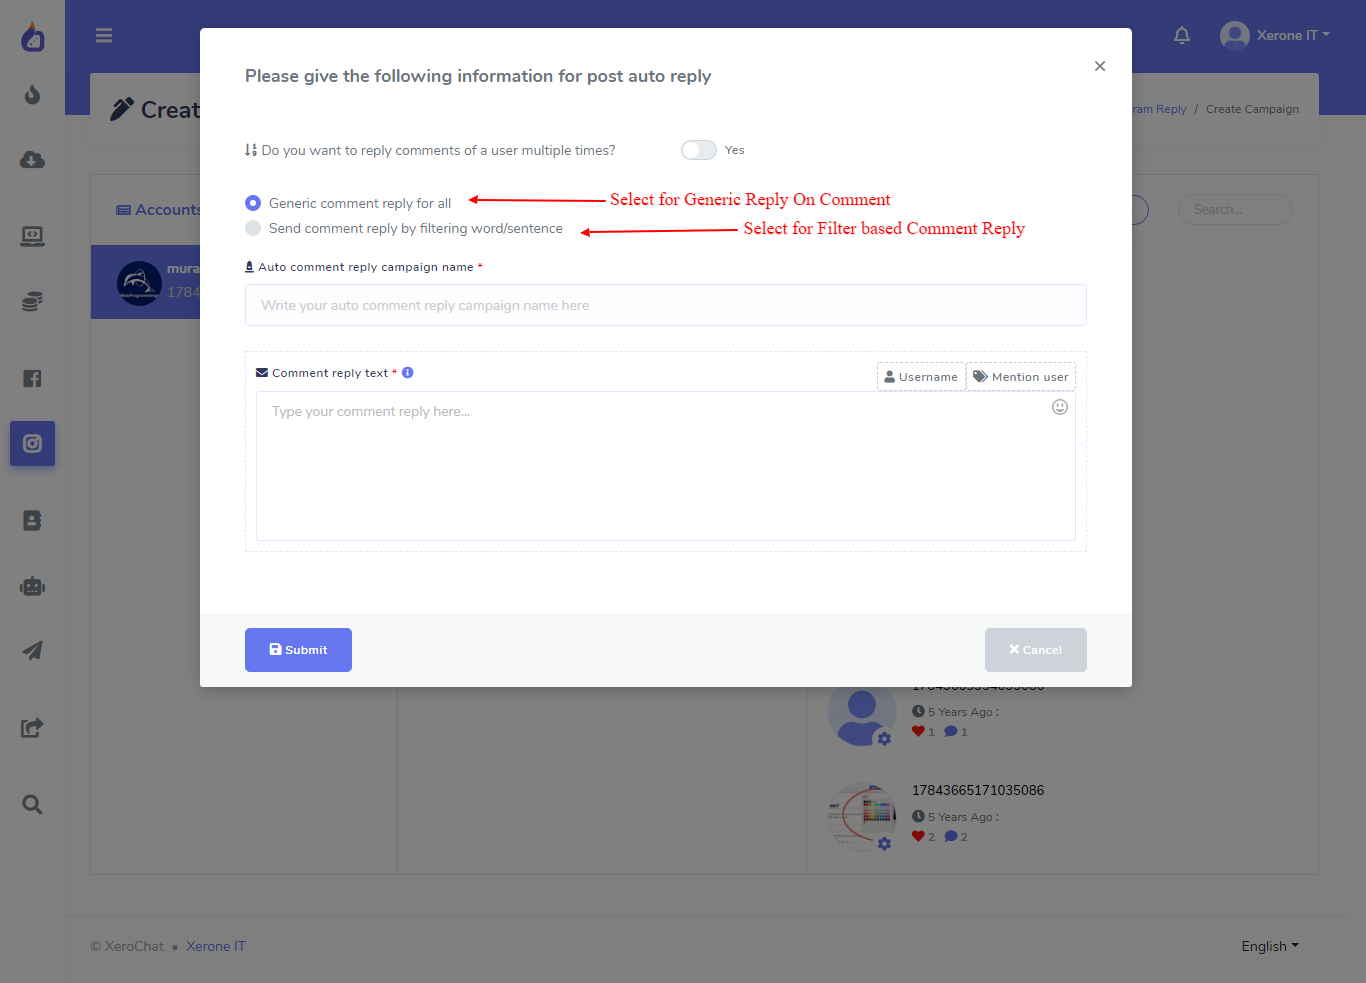
To enable Auto Comment Reply for Posts, click on the mini icon with the post’s thumbnail, you’ll see the dropdown, click on Enable Auto Comment Reply. A modal with form will appear, fill up the information to complete the enabling auto comment reply for the post.
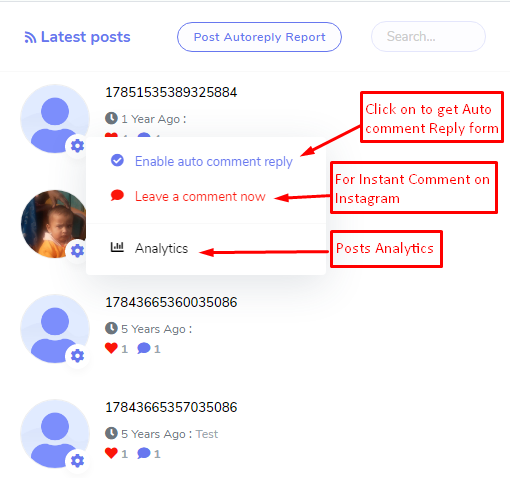
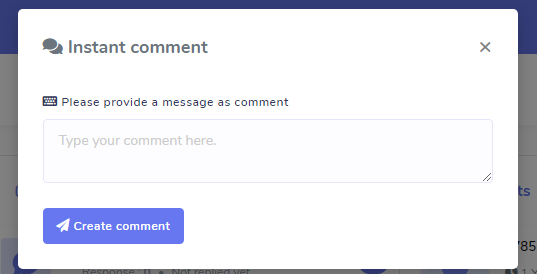
You can comment instantly on a post by Leave a comment now option from the dropdown.
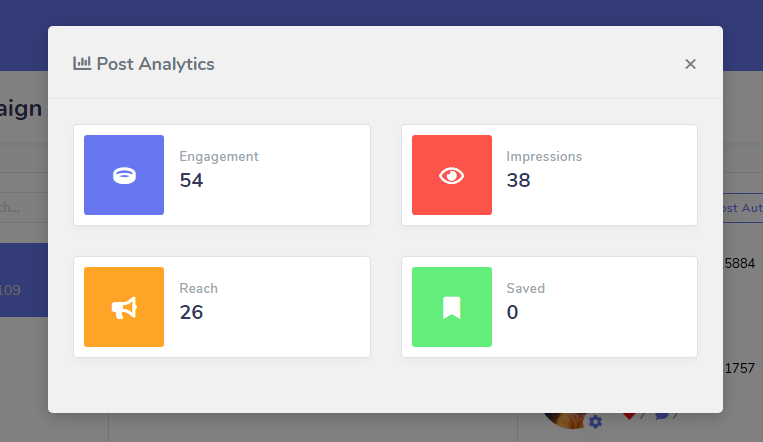
To see the post’s analytics, click on Analytics option and a modal with Post’s analytical information (Engagement, Impressions, Reach and Saved) will appear.
Reports: Click on Post Autoreply Report Button at the top of the right column to see the auto comment reply reports for the corresponding business account’s posts.
To see all business accounts reports in one place, then go to Comment Automation -> Report from the left sided menu and go to Auto Comment reply reports section to see all reports.
Video Tutorial
Enjoy all the awesome features of ChatPion.


11 Comments Login to comment
-

This functionality can be used for ad post comments as well?
-

I updated to the latest version, but I do not see the Instagram comment in the menu, what should I do?
-
xeroneitbd Admin
5 years agoMake sure to enable it from general settings -> preference section.
-
-

Auto Comment Reply supports spintax?
-
xeroneitbd Admin
5 years agoYes, It support spintax.
-
-
Do you need to ask for permissions to use the Instagram function?
-

is this needed an addon?
-
xeroneitbd Admin
5 years agoThis feature listed on this blog is inside Core XeroChat , that will be released soon.
Cheers :)
-
JFOC
5 years agoOh ... thats great. it will be released within v5?
-
xeroneitbd Admin
5 years agoYes, It's already released.
-

11
12786
Social Media Management