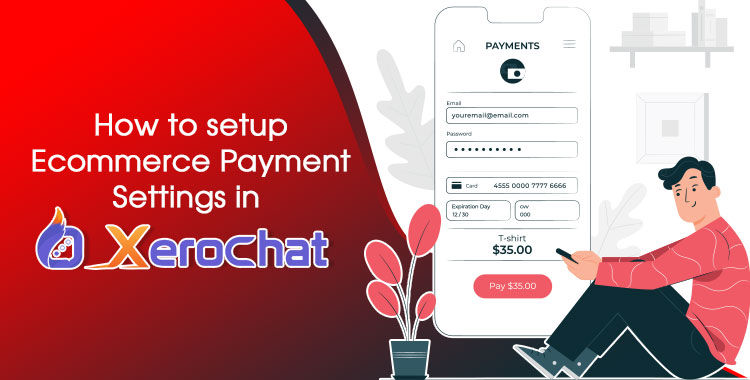
How to set up Ecommerce Payment Settings in ChatPion:
We know that E-commerce is the backbone to build business worldwide. By the way, Alongside all-powerful features of ChatPion has integrated today world's most powerful E-commerce platform to make your business more flexible.
To complete this process you must have payment accounts to get payment from your buyers. So this is for helping to set up Payment system for E-commerce. Payment settings are global for one account, that means all store of the same account will use the same payment system. ChatPion provides multiple payment gateway support for Ecommerce platforms including Paypal, Stripe, Razorpay, Paystack, Mollie, Manual Payment & Cash on Delivery option.
Go to E-commerce Store -> Checkout Settings (From store menu) section. Here you’ll see the Payment accounts form.
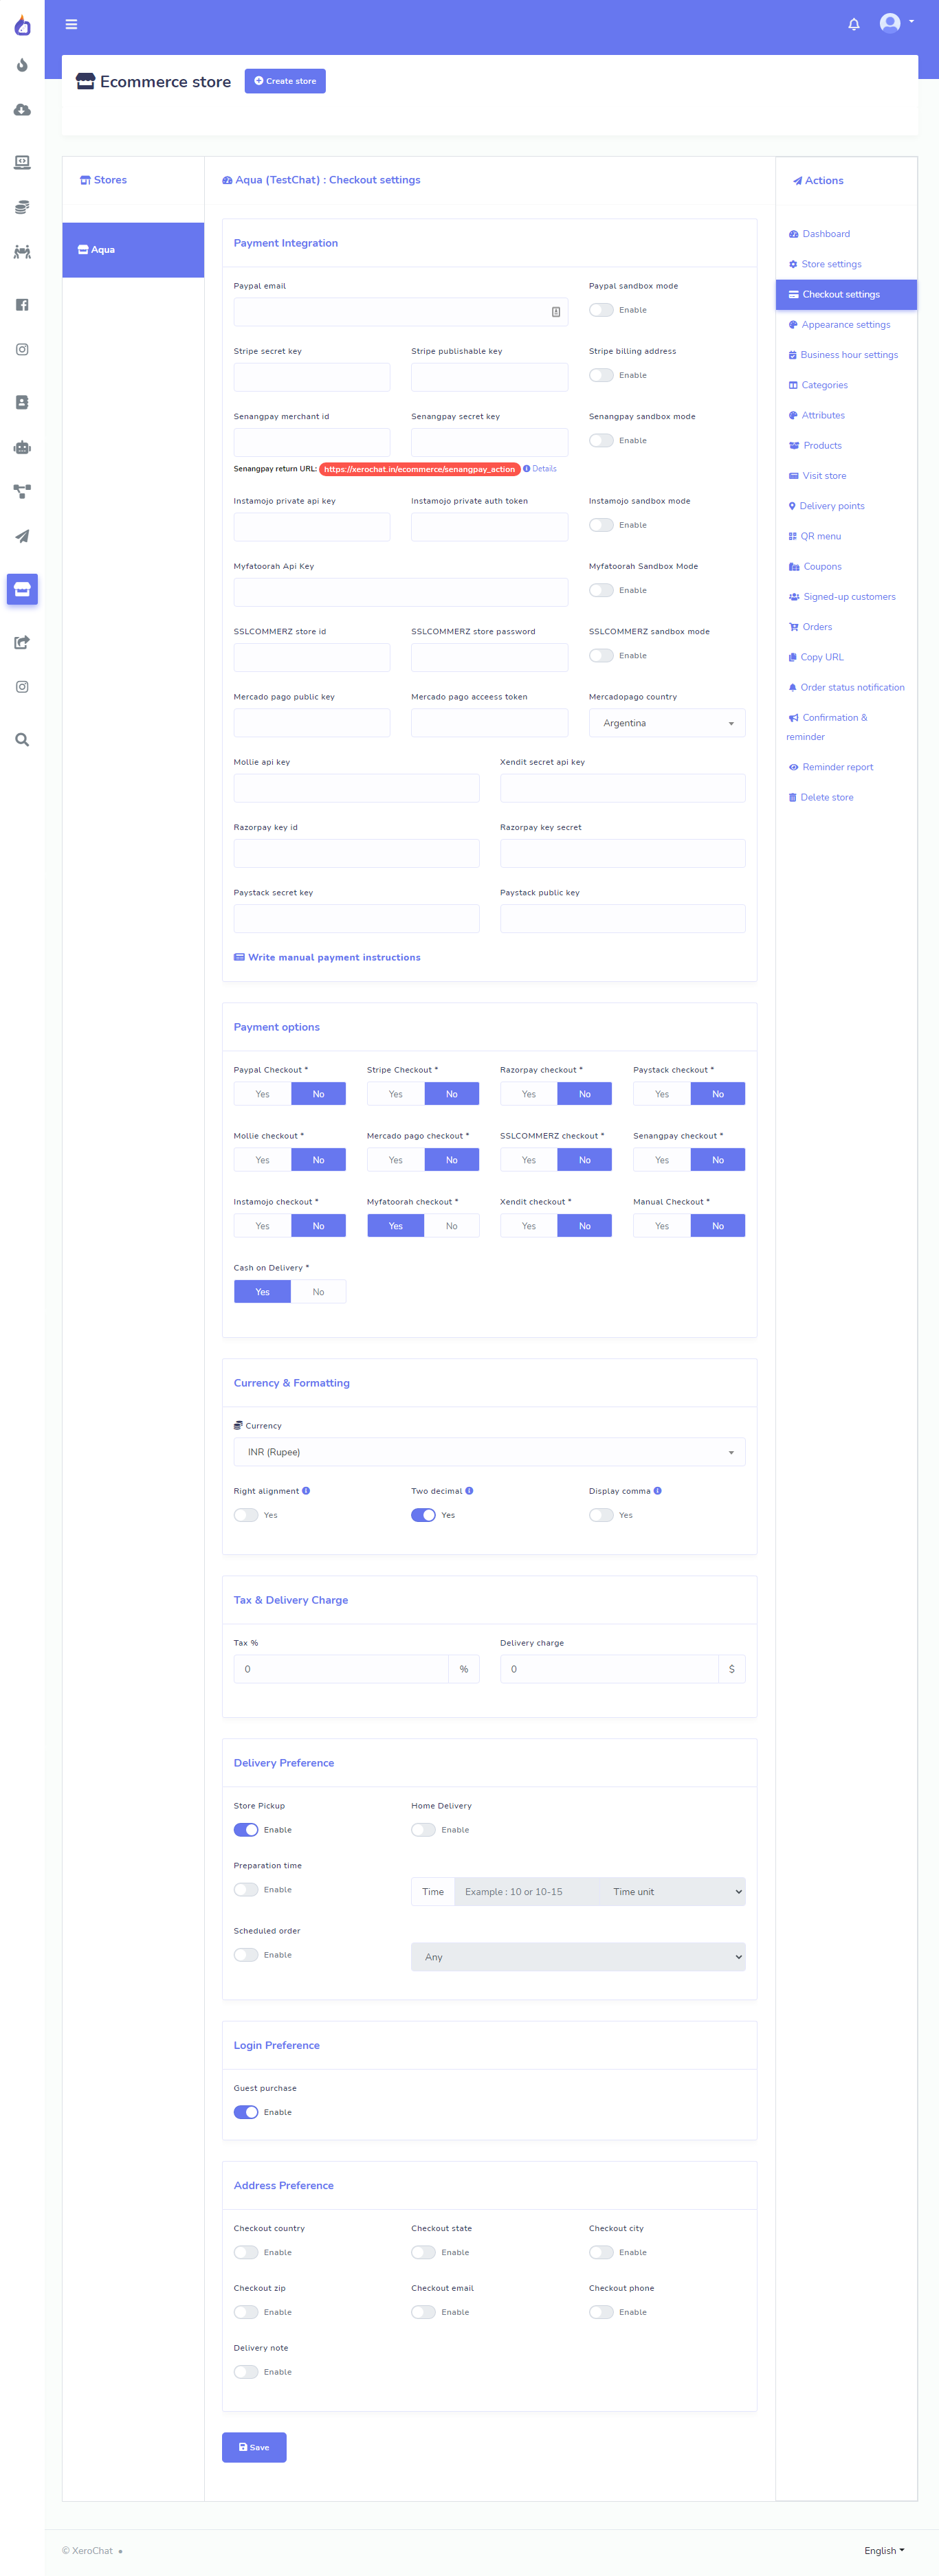
>>> Payment Integration
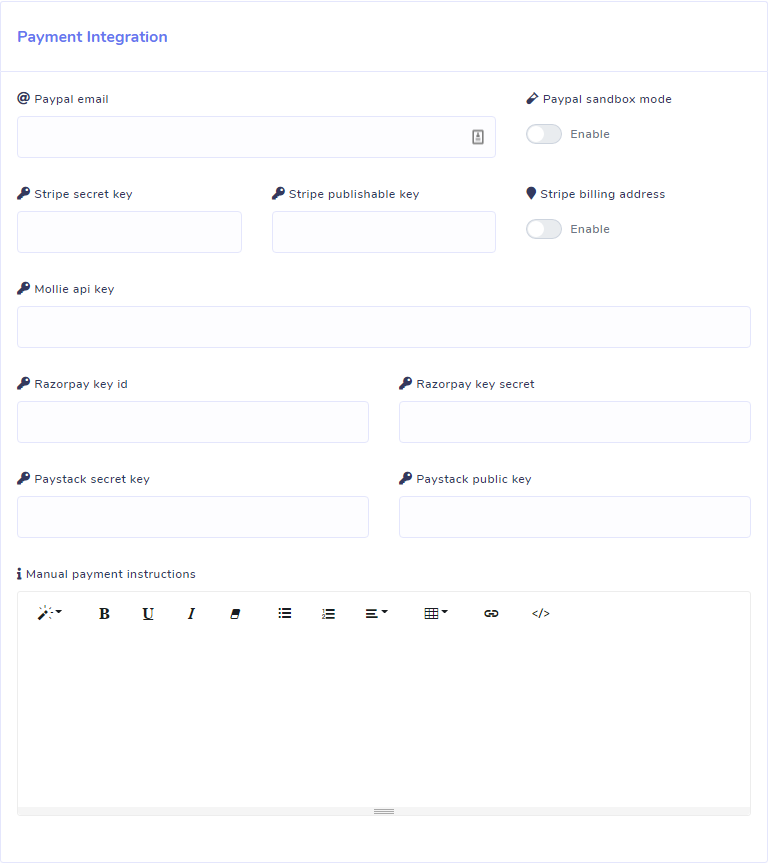
You can set up six types of payment systems: Paypal, Stripe, Razorpay, Paystack, Mollie and manual Payment System.
PayPal Email: Provide your PayPal business account email.
PayPal Sandbox Mode: If you want to test the paypal payment then you have to enable sandbox mode.
Stripe secret Key & Stripe published key: If you want to integrate your Stripe account then you’ve put your stripe secret key and stripe published key of your stripe account.
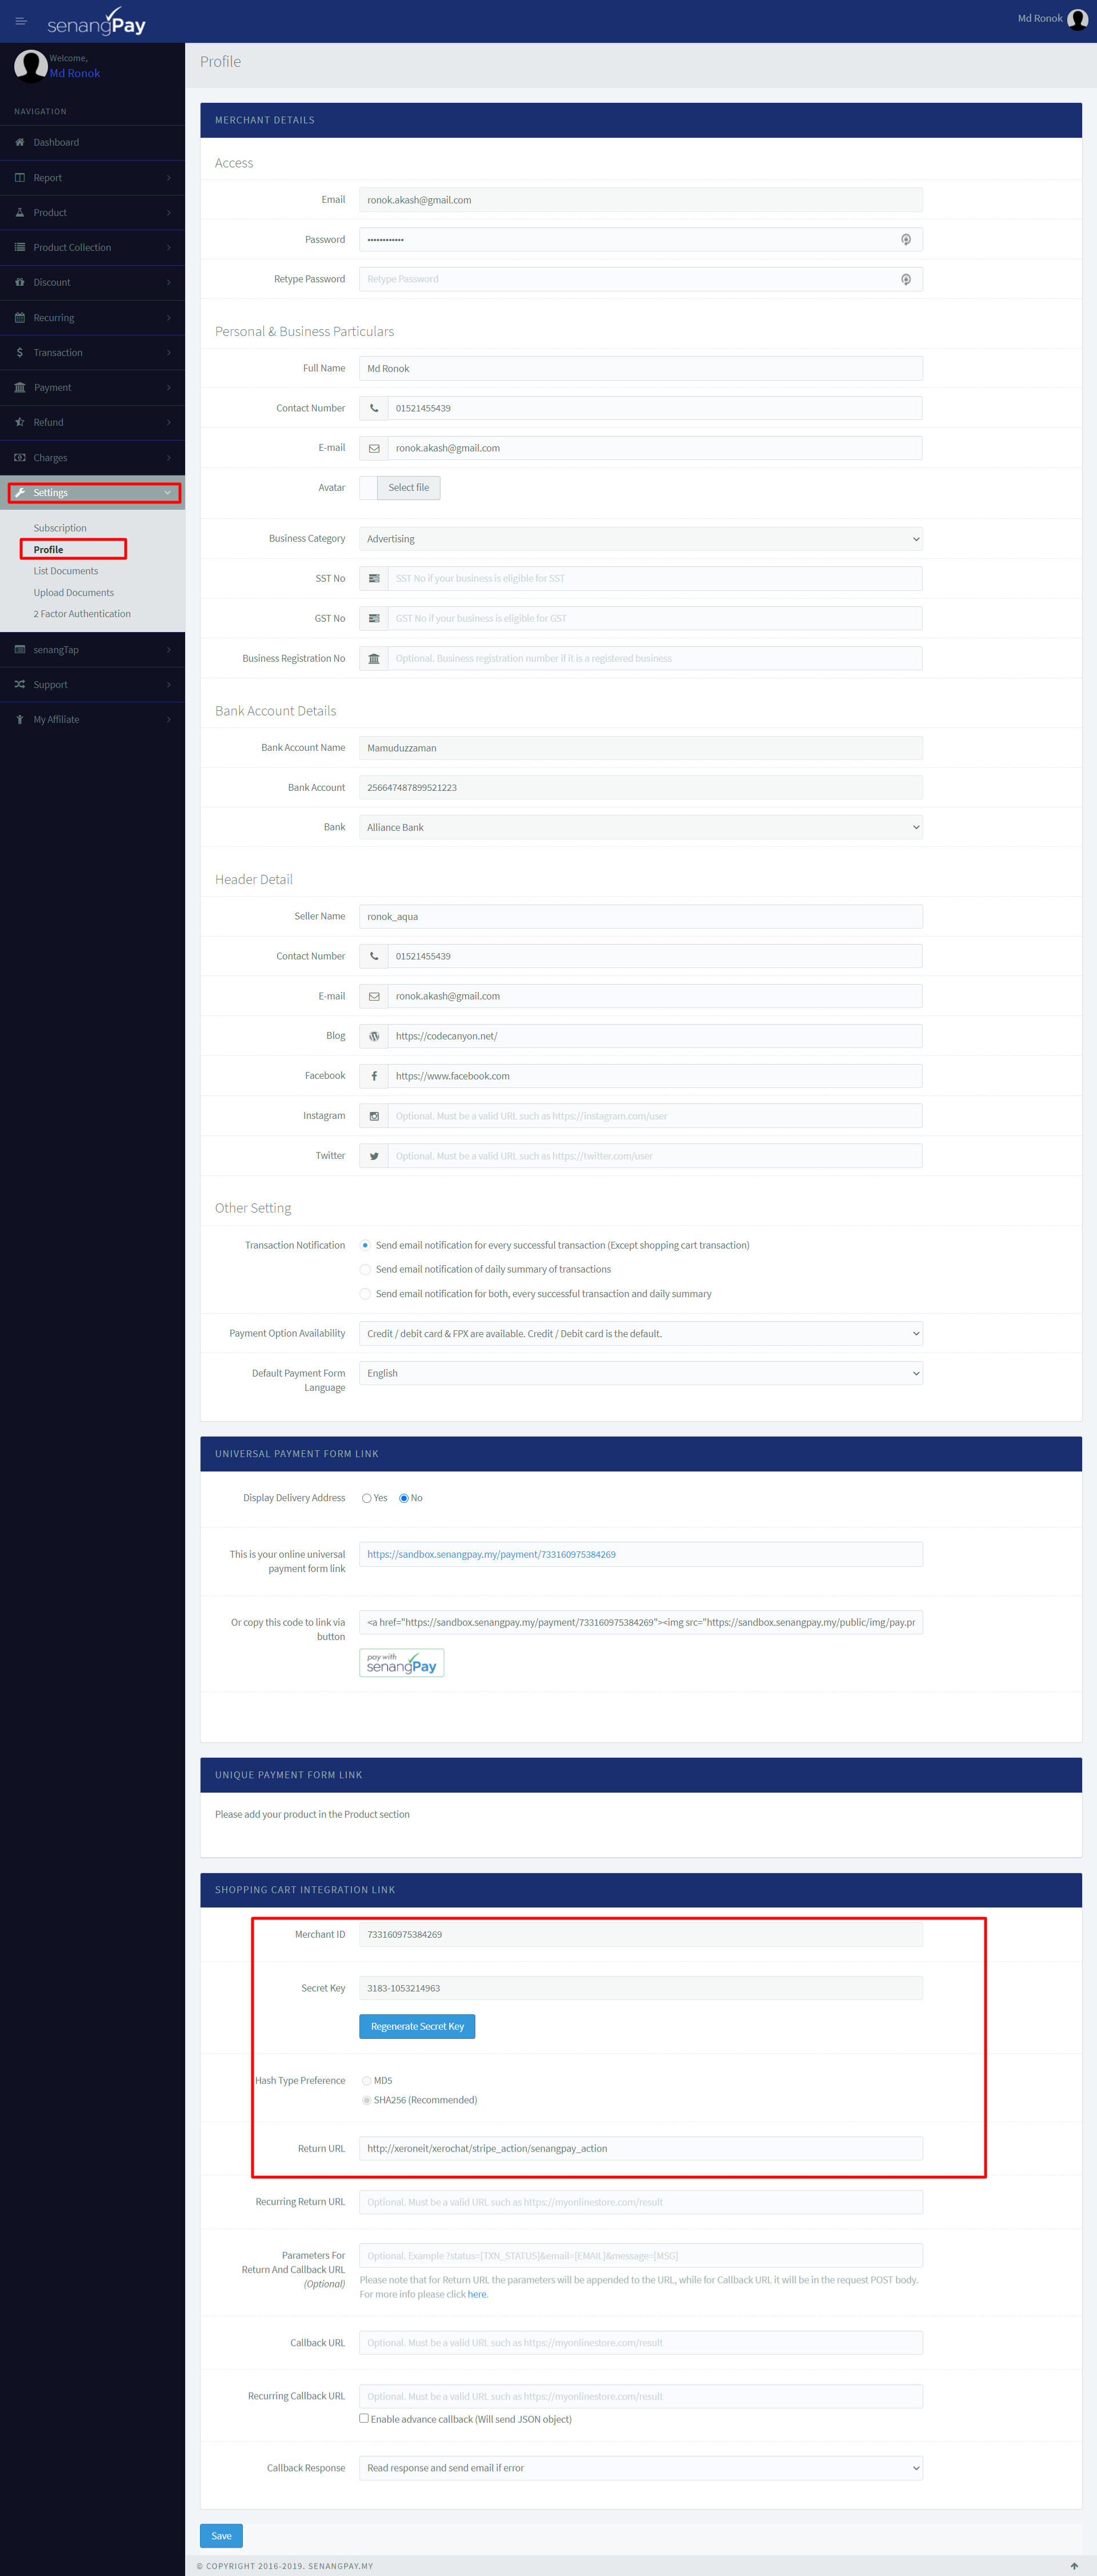
Senangpay merchant id & secret key: If you want to integrate Senangpay payment method then you’ve to put your Senangpay merchant id and secret key. Visit Senangpay and go to Settings > Profile and Scroll down to Shopping cart integration link. From there copy your merchant id and secret key and paste into the corresponding field. Also please copy the Senangpay Return url from Ecommerce store checkout Settings and paste it into Return url of Senangpay panel.
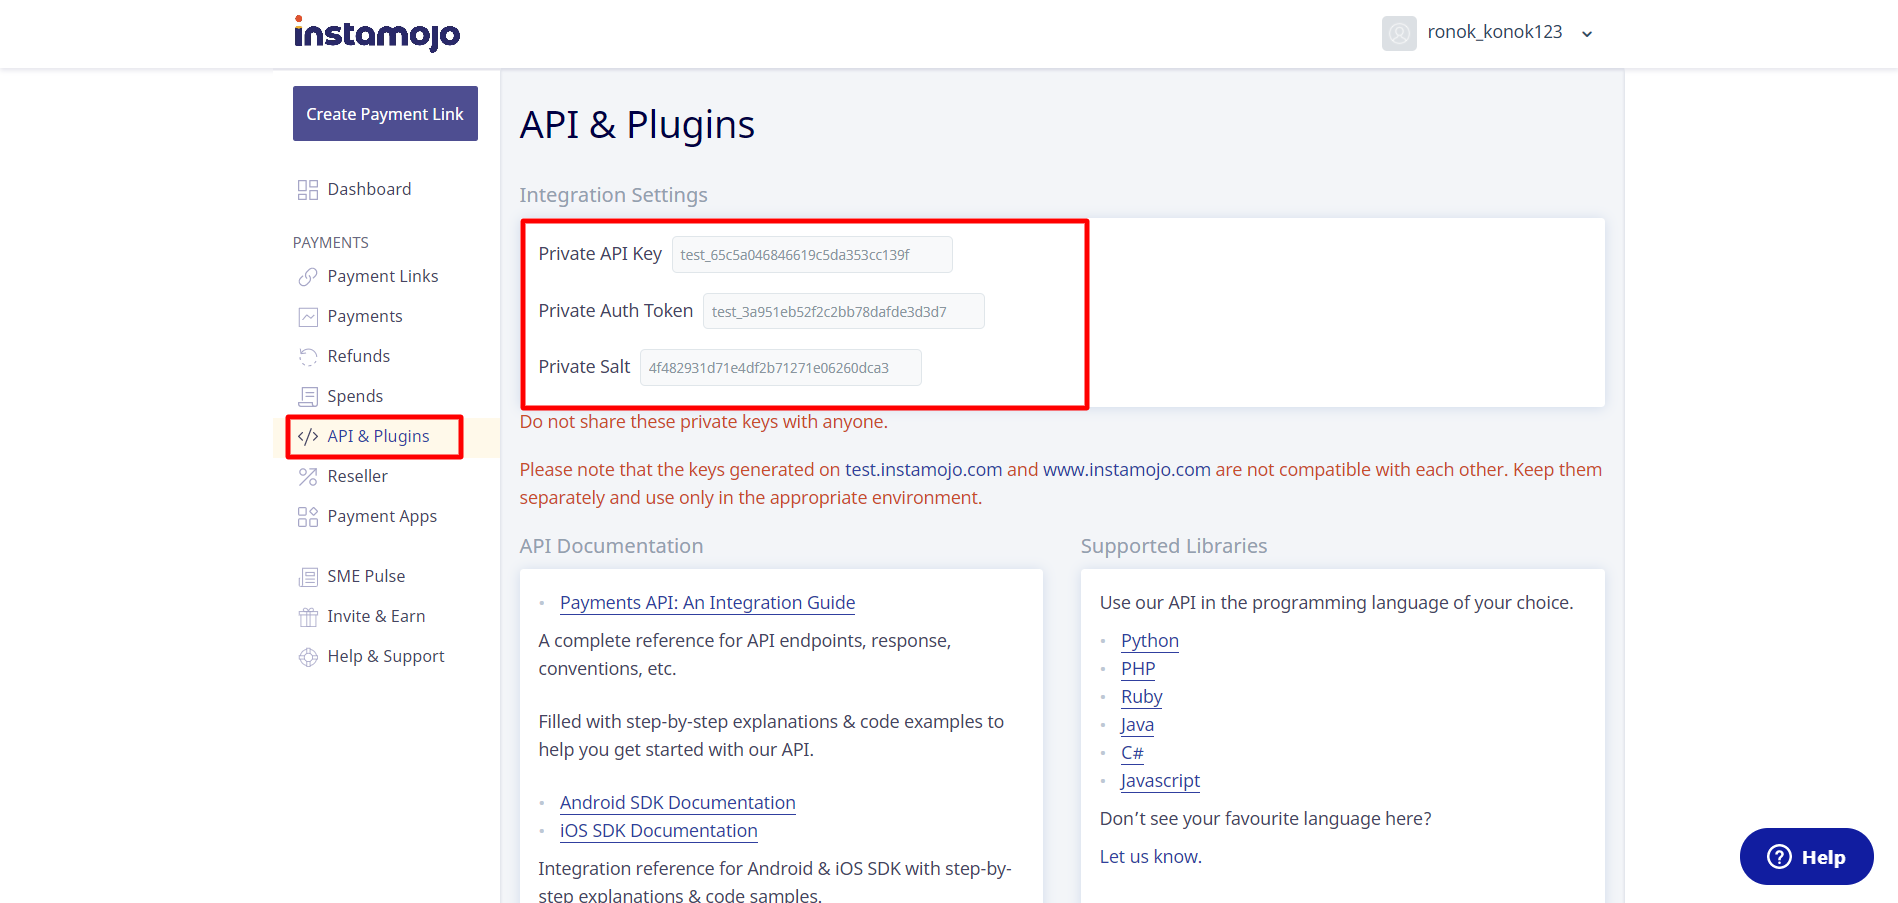
Instamojo private api key & private auth token: If you want to integrate Instamojo payment method then you’ve to put your Instamojo private api key & private auth token. Visit Instamojo and go to API & Plugins and copy your private api key & private auth token and paste into the corresponding field.
Myfatoorah Api Key: If you want to integrate Myfatoorah payment method then you’ve to put your Myfatoorah api key. Visit Myfatoorah and go to Live Token and follow the instruction and put the API key into the corresponding field.
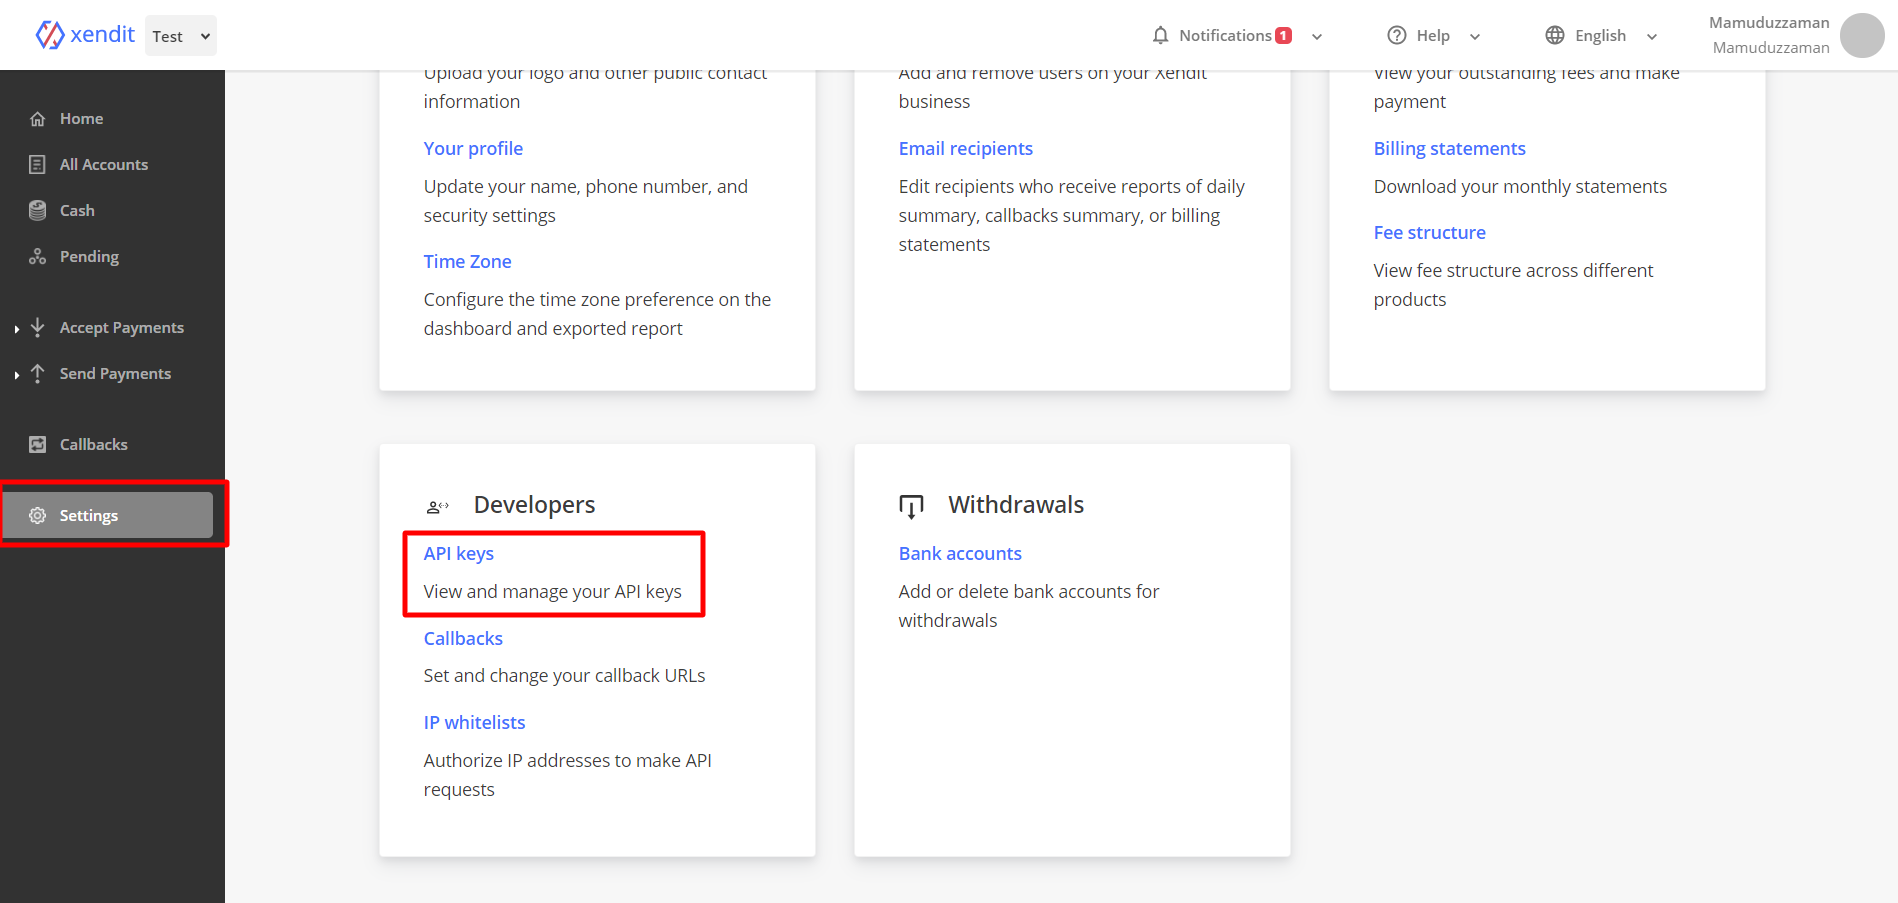
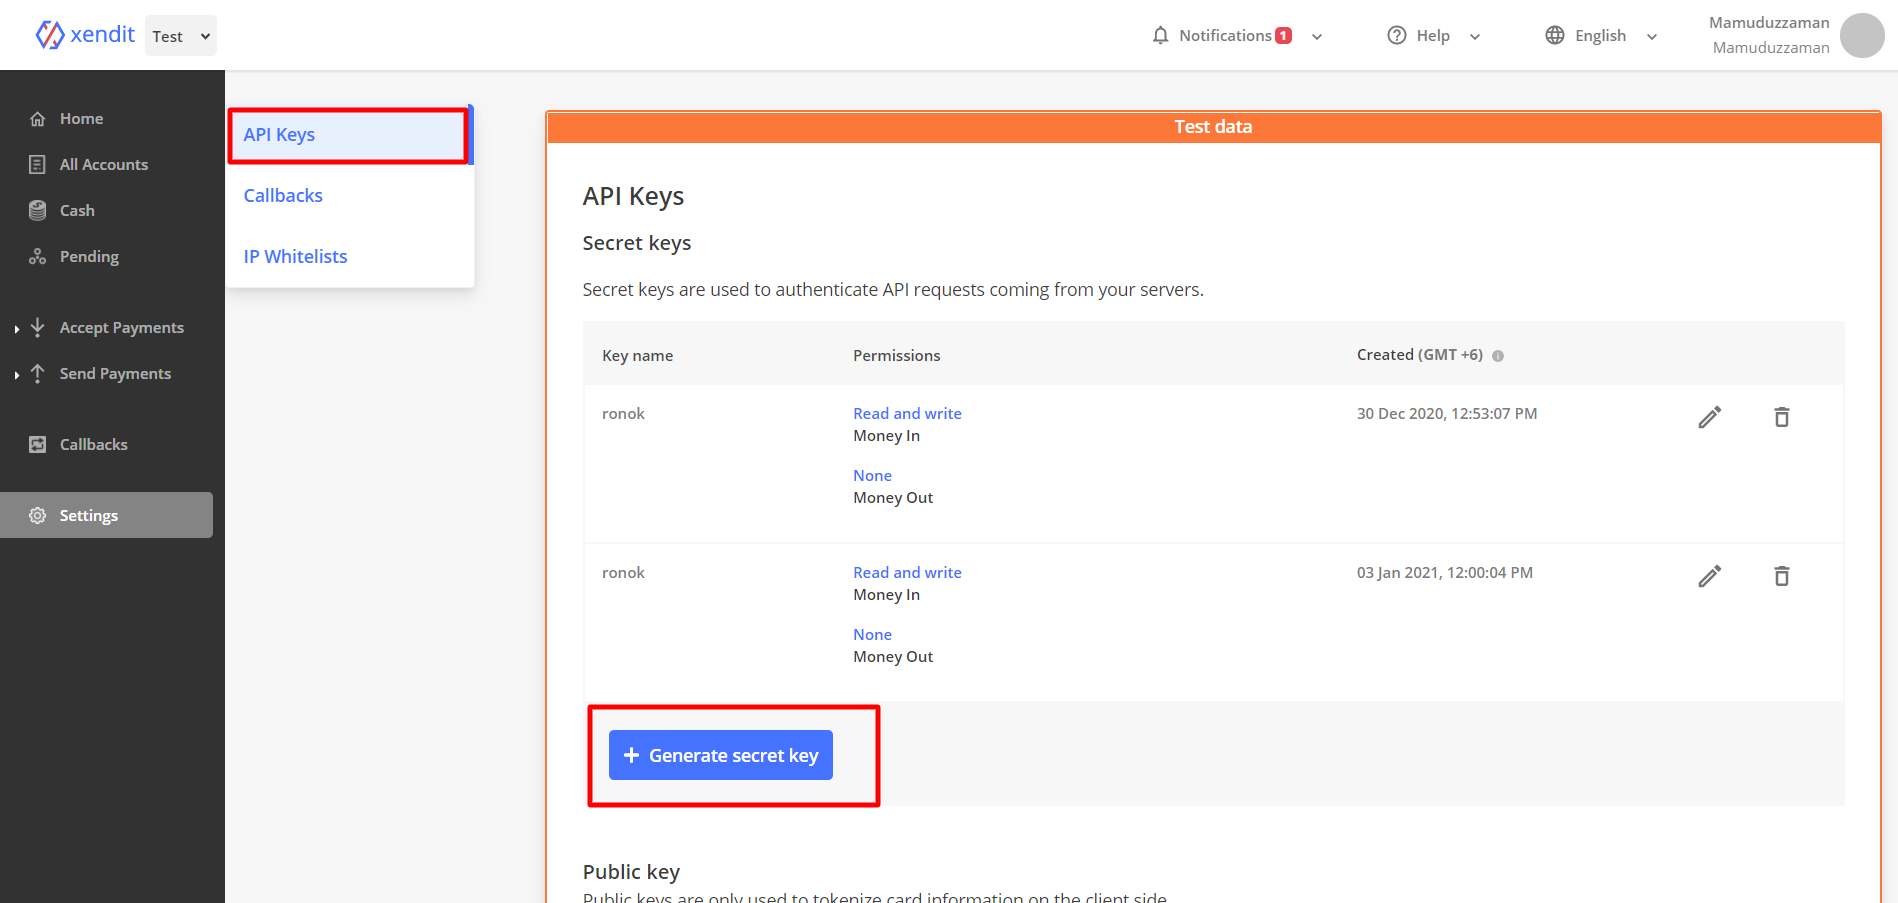
Xendit secret api key: If you want to integrate Xendit payment method then you’ve to put your Xendit secret api key. Visit Xendit and go to Settings -> Developer (API Key) and then click on Generate secret key and then copy Publick follow the instruction and put the API key into the corresponding field.
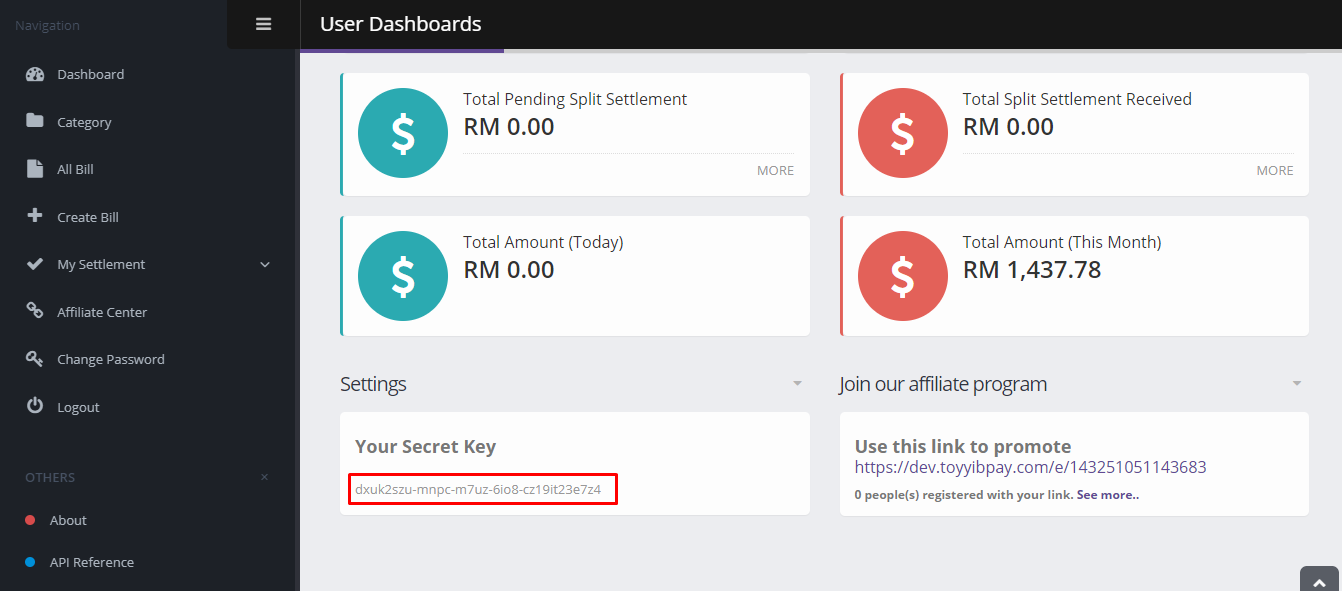
Toyyibpay Secret Key & Toyyibpay Category code: If you want to integrate Toyyibpay payment method then you’ve to put your Toyyibpay Secret Key & Toyyibpay Category code. Visit Toyyibpay and go to Dashboard and copy secret key and put it into corresponding field. Then go to Category menu, add category and copy the category code and paste it into corresponding field.
Mercado pago public key & acceess token: If you want to integrate Mercado pago payment method then you’ve to put your Mercado pago public key & acceess token. Visit Mercado pago copy Mercado pago public key & acceess token and put them into the corresponding fields.
SSLCOMMERZ store id & store password: If you want to integrate SSLCOMMERZ payment method then you’ve to put your SSLCOMMERZ store id & store password.
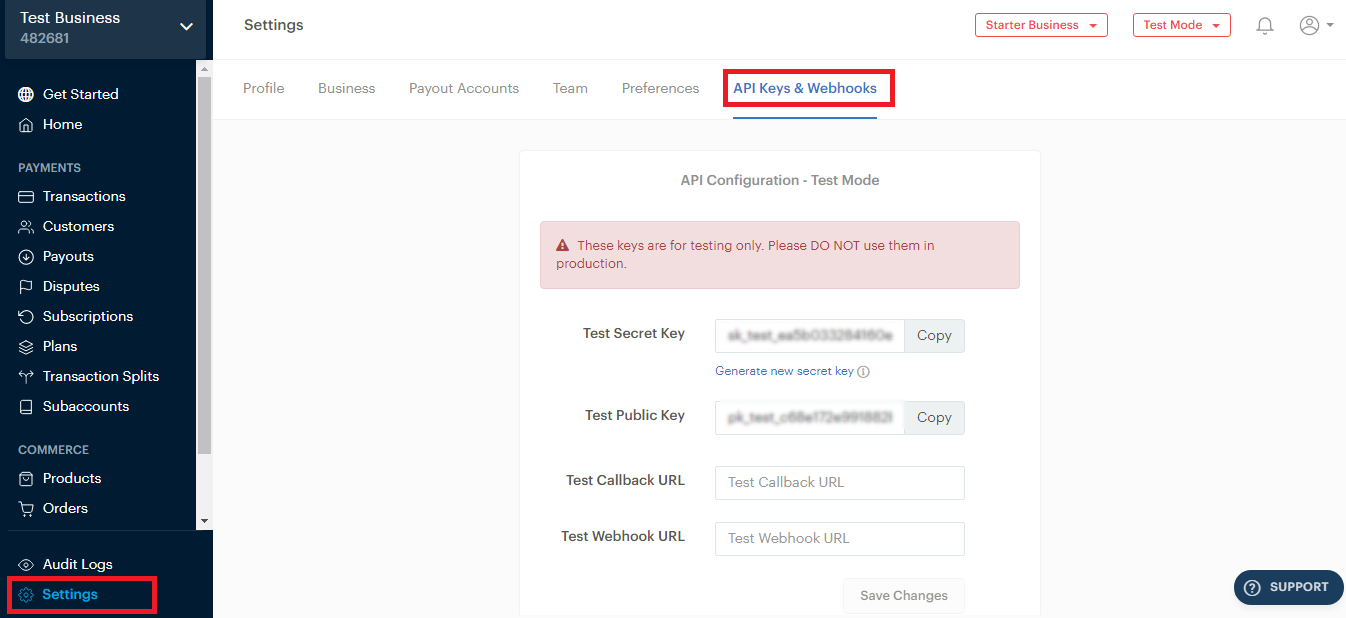
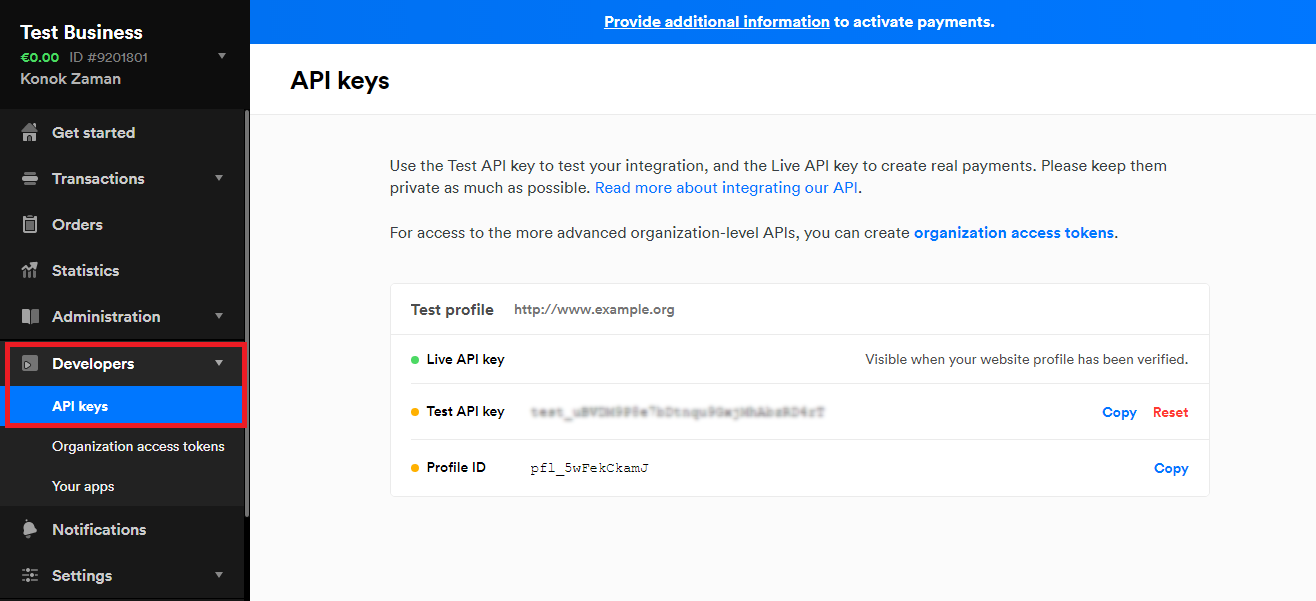
Razorpay Key ID & key secret: If you want to integrate Razorpay payment method then you’ve to put your razorpay key id and secret key. Visit Razorpay and go to Settings > API Keys and copy your key id and key secret and paste into the corresponding field.
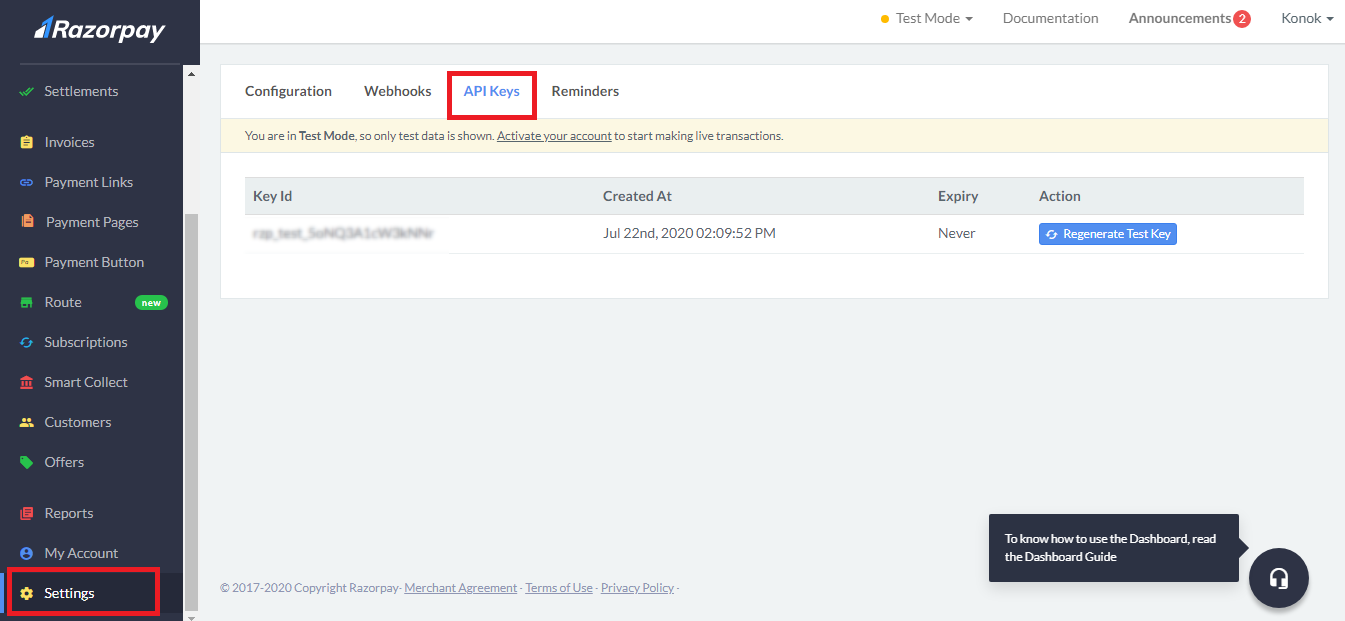
Paystack Secret Key & public key: If you want to integrate paystack payment method then you’ve to put your paystack secret key and public key. Visit Paystack and go to Settings > API Keys & Webhooks and copy your key id and key secret and paste into the corresponding field.
Mollie API Key: If you want to integrate the Mollie payment method then you’ve to put your Mollie API key. Visit Mollie and go to Settings > API Keys & Webhooks and copy your key id and key secret and paste into the corresponding field.
Manual Payment: Manual payment is for take payment manually from user manually and uploads payment documents in the system.
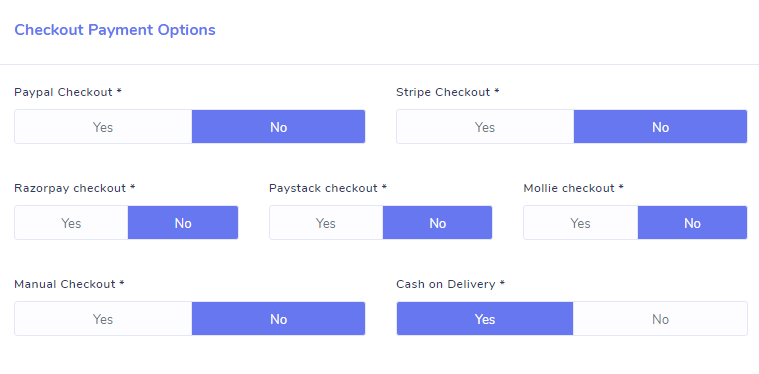
>>> Checkout Payment Options
This section is for which payment method you want show at user end. You set up all method but you want to take payment with PayPal or stripe only, so you can set yes from here.
>>> Currency & Label
Currency: Select your country payment currency.
Currency alignment: This setting is for make your currency alignment right or left. If you enable it then the currency will be shown on the right side of the amount. Suppose your payment amount is 50 and your currency is $, so the amount will be shown as 50$. If you disable it then the amount will be shown as $50.
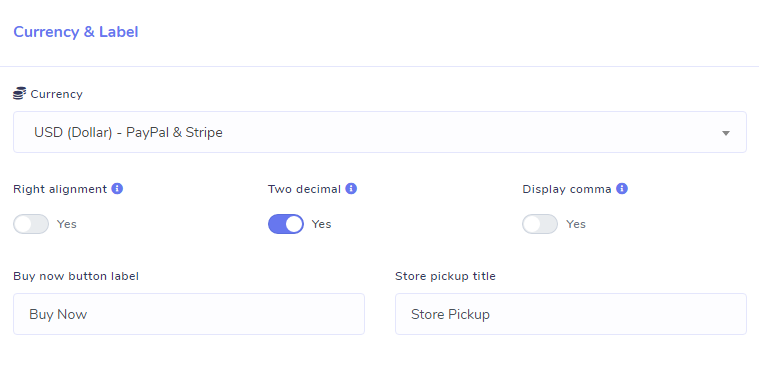
Two decimal Places: If you enable it then amount will be shown with two decimal points. Suppose your amount is 39.44 and you enabled it, so it will show the amount as 39.44
Comma Separated: If you enable it, then amount will be shown as comma separated, suppose your amount is 29000, so the amount will be shown as 29,000
>>> Tax & Delivery Charge
Tax %: If you want to sell product including tax then you can set tax percentage here.
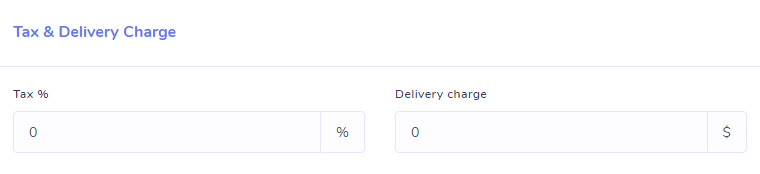
Delivery charge: If you want to take delivery charge from user then set the charge here or keep that empty if you don't want.
Enjoy all the awesome features of ChatPion.
Related Topics :
How to create E-commerce Store both inside and outside of Messenger with ChatPion
How to Recover Lost Sale With ChatPion Abandoned Cart Reminder
How to make QR Code Menu for Restaurant food order with ChatPion


4 Comments Login to comment
-

Please add UPI payment and can be a add-on with extra cost.
-

Please add SSlcommerz payment gateway adding option if possible.
Thanks -

Please consider to let us add local payment gateway solution if possible.

4
8564
Social Media Management