How to Integrate Mailgun SMTP with ChatPion:
As you already know that you can integrate server SMTP and any type of SMTP with ChatPion. But sometimes we need help to integrate some SMTP, so as previous blog we’ve discussed how you can integrate sendgrid SMTP with ChatPion. Now, in this blog, we’ll instruct you on how you can integrate Mailgun SMTP with ChatPion.
Follow the below steps:
Add Domain & Verify:
>>> Before you can verify a domain, it needs to be added to Mailgun.
>>> Go to Mailgun Control Panel of your account to get the settings.
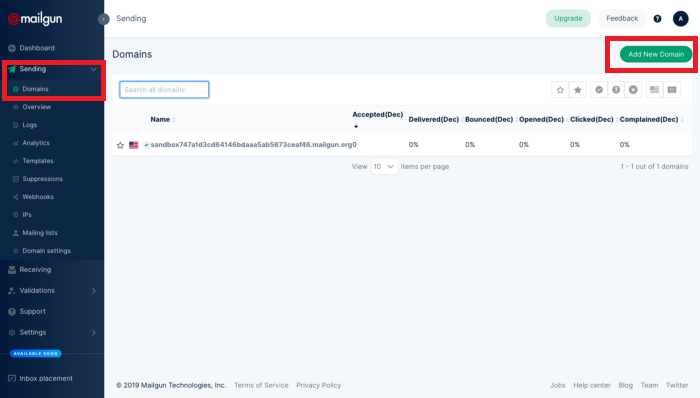
>>> As you already know that you need to verify domain to get started of sending emails with Mailgun API. So Click on Sending on the left-hand side of your Mailgun dashboard.
>>> Click the green Add New Domain button, then proceed with the information. You may visit Add Domain for more help on how you can add a domain. Besides, using a verified domain, Mailgun has kept an option Called sandbox. You can use the sandbox domain but you can only send emails to your authorized email.
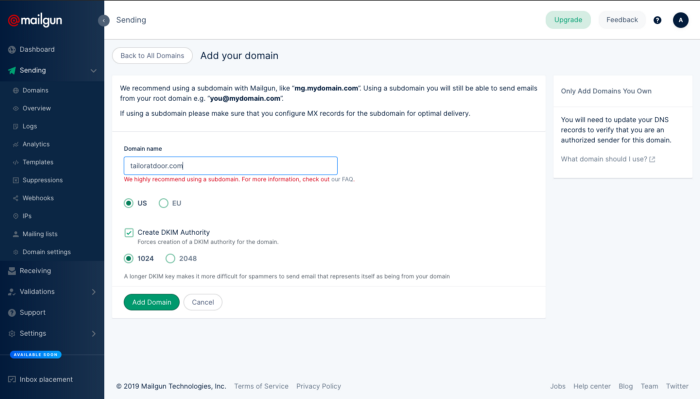
>>> Now verify your added domain with Mailgun. You may get help by visiting How to verify domain with Mailgun.
SMTP credentials:
Your SMTP credentials are different for each domain you add. You can find your default credentials, and add more, by clicking through to your domain settings.
Inside the Mailgun Control Panel (options displayed down the left-hand side on a dark column), the SMTP Credentials are not visible and can only be reset. To get SMTP credentials or update follow the below steps:
>>> Click on Sending on the left-hand side of your the Mailgun dashboard and select Domains.
>>> Select your desired domain. Click on Sending -> Domain Settings from left-sidebar, then click on the SMTP credentials tab. Please see the below image to get idea.
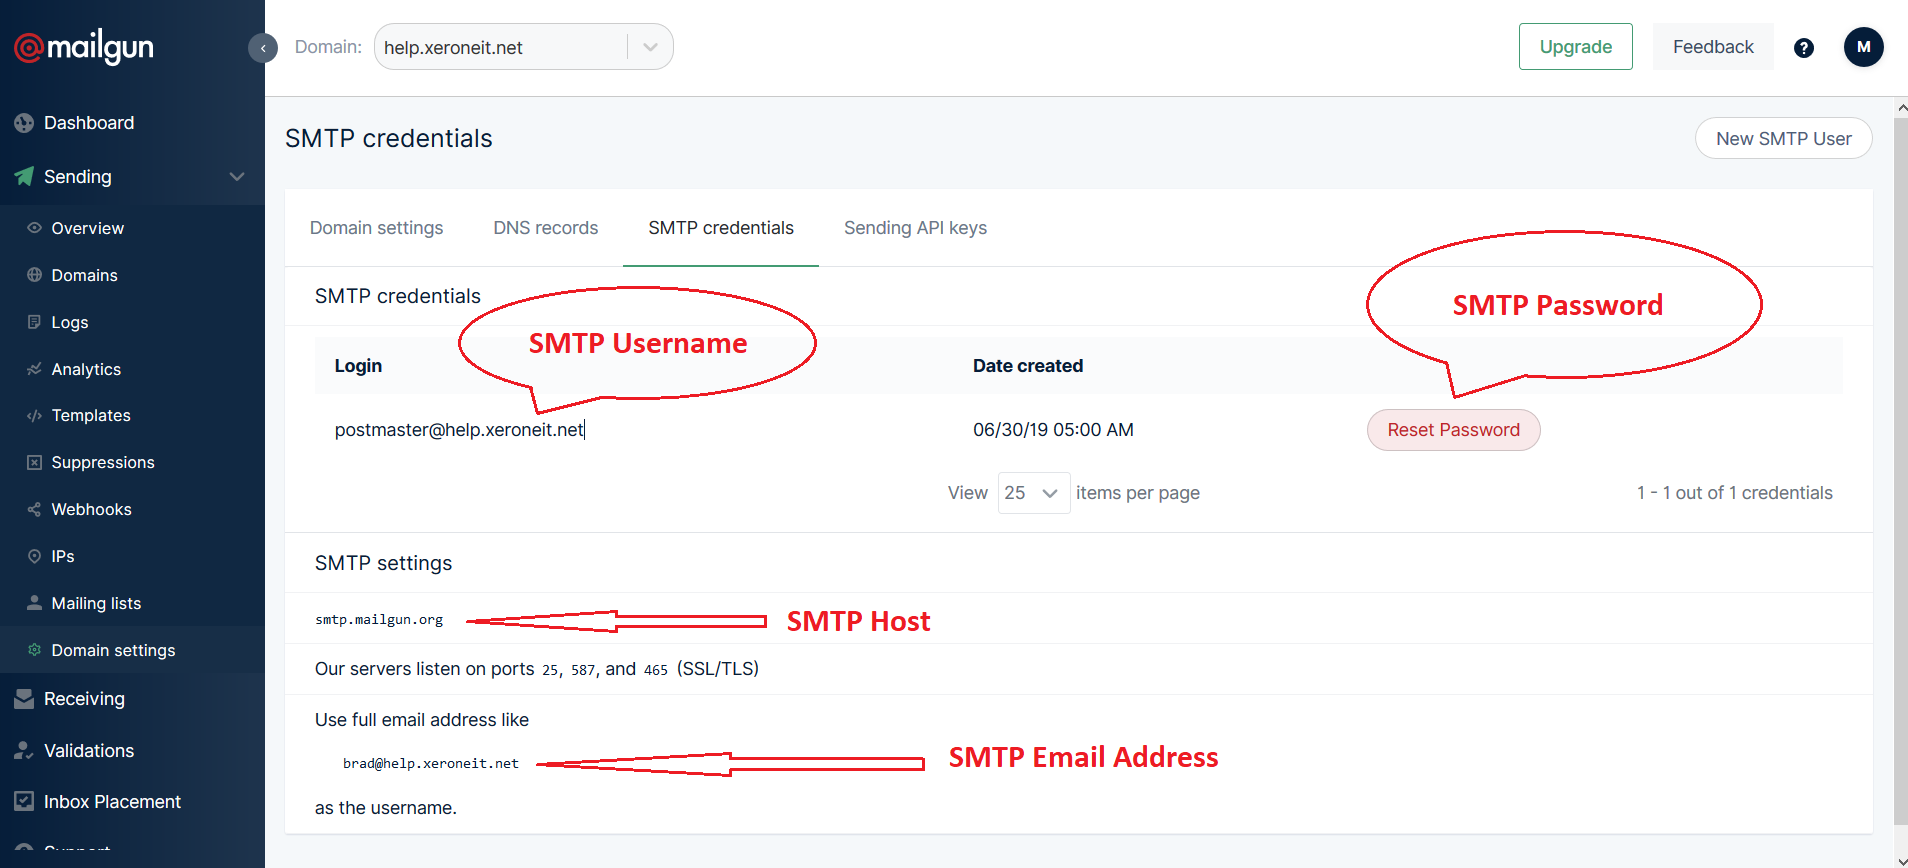
>>> If you forgot your password, then you can reset the password by click on Reset Password button. Confirm your password reset by clicking Reset Password in the pop-up. Your SMTP credential's new password will be displayed on the top-right corner within a green pop-up. Save this password by clicking on the copy button and pasting it into a safe location, as it will not be revealed again.
Integrate Mailgun SMTP with ChatPion:
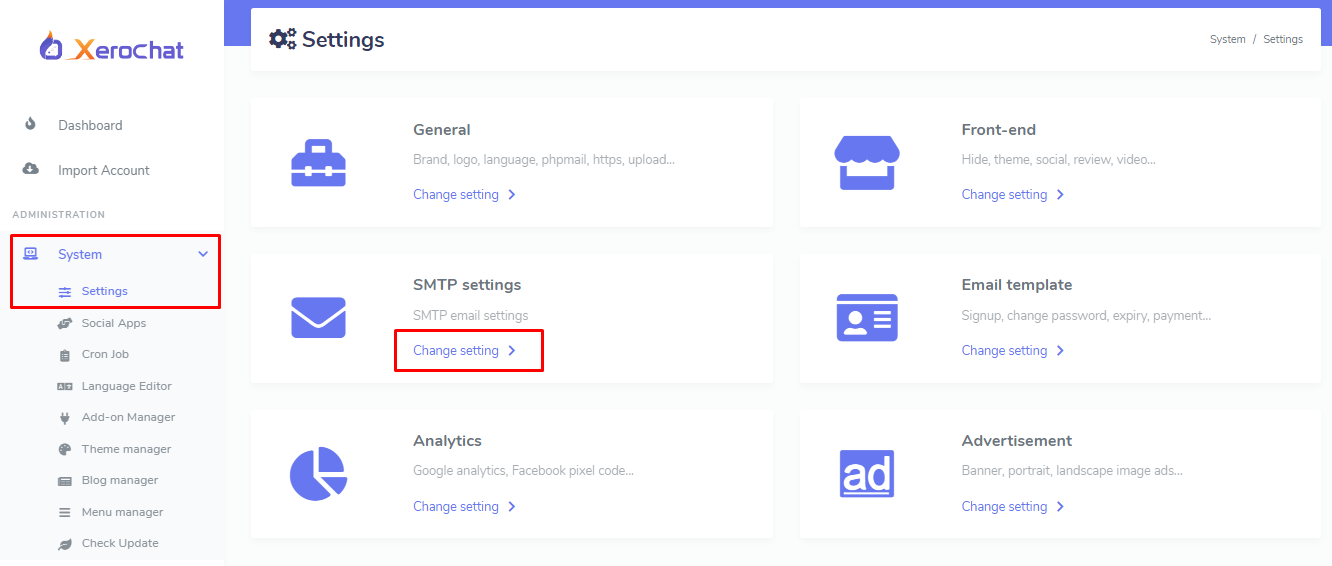
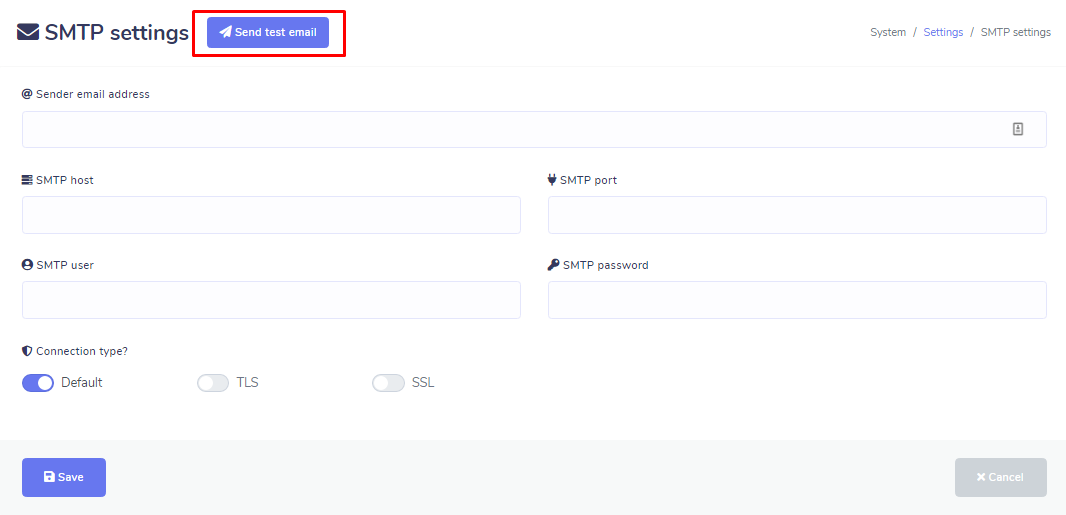
After completing Domain Verification and retrieve SMTP credentials of Mailgun SMTP, go to System -> Settings -> SMTP Settings. Copy Mailgun SMTP credentials and paste them into the corresponding fields of ChatPion SMTP settings form. After Completed SMTP set up, you can send a test email by click on Send Test Email to be sure that your SMTP is working.
- Email address: brad@yourdomain.com
- SMTP host: smtp.mailgun.org
- SMTP username: postmaster@yourdomain.com
- Password: Mailgun SMTP Password
- SMTP type/port: SSL/465 (If you want to set port 587 then you've to select smtp type as Default)
Enjoy all the awesome features of ChatPion.
Related Topics :
How To Set Up Gmail SMTP With Xerochat
Setup Sendgrid SMTP & Integrate With ChatPion For Email Marketing
How To Integrate Amazon SES SMTP With ChatPion
How To Integrate Acelle With ChatPion
How To Integrate Mautic With ChatPion
How To Integrate ActiveCampaign With ChatPion
How To Integrate Sendinblue With ChatPion
Email Marketing With ChatPion & Email API Integration
How to collect Email address / Leads inside Facebook Messenger with ChatPion
How to setup system SMTP settings for ChatPion


0
4406
Social Media Management